
|
water entering into blower motor assy |
Post Reply 
|
| Author | |
andyjman83 
Member 
Joined: 15-September-2014 Location: so cal Status: Offline Points: 66 |
 Post Options Post Options
") Thanks(0) Thanks(0)
 Quote Reply Quote Reply
 Topic: water entering into blower motor assy Topic: water entering into blower motor assyPosted: 09-October-2014 at 2:09PM |
|
Hey guys
My blower motor on my ranchy is trash. I removed the blower box, cleaned theheck out if it, ordered a new motor which will be in tomorrow and I'm going to sand the assembly, paint it and reseal it. The whole blower assembly has surface rust covering pretty much all of the metal surfaces, and the inside of the box where the fan is looks like its had water entering into it for years. I know that it brings in outside air through the cowl when the door is in the right position, but how could the water be getting in? Is there a raised ring inside the cowl where it allows air into the hole but water flows around it, or how is it set up? I want to stop it before it ruins the new motor. Thanks, Andy |
|
 |
|
|
Rockatansky
Senior Member 
Joined: 30-July-2010 Location: On The Road Status: Offline Points: 6072 |
Post Options
Thanks(0)
Quote Reply
Posted: 09-October-2014 at 2:15PM |
|
gallery here http://www.supermotors.net/registry/10950/74222-2 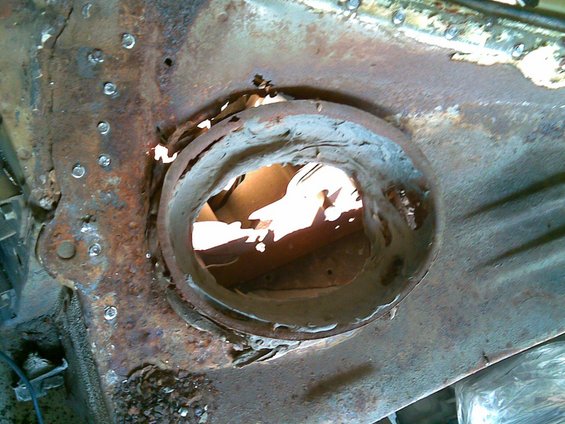
Edited by Rockatansky - 09-October-2014 at 2:15PM |
|
|
72 GT Ute
|
|
|
|
|
californiajohnny
Moderator Group 

Joined: 05-October-2013 Location: winlock, wa Status: Offline Points: 14609 |
Post Options
Thanks(0)
Quote Reply
Posted: 09-October-2014 at 2:23PM |
|
check that raised ring thing for rust!! they seem to be notorious for rusting, that's where water got inside my car and rusted the floor pans (before i got the car) mine was so bad the motor was froze solid, i took it out and messed with it for several minutes to free it sprayed a little penetrating fluid onto the bushings of the motor till it turned a little more free, then hooked it to the battery charger set to 200amp start spun the hell out of it! i was just messing around with it because i was just going to buy a new motor, but the stupid thing works perfect
 so i'll run it till it quits then buy a new one! so i'll run it till it quits then buy a new one!
|
|
|
JOHN
74 GRAN TORINO S&H CLONE 74 VETTE CUSTOM 90 S10 BLAZER 4X4 LIFTED 77 CELICA CUSTOM 75 V8 MONZA SUPERCHARGED 79 COURIER VERT. SLAMMED 75 VEGA V6 5 SPD 70 CHEV C10 P/U 68 MUSTANG FB CONVERSION |
|
|
|
|
andyjman83
Member
Joined: 15-September-2014 Location: so cal Status: Offline Points: 66 |
Post Options
Thanks(0)
Quote Reply
Posted: 09-October-2014 at 2:48PM |
|
I checked the lil stove pipe and its actually painted. I was reading another thread that said a lot of the times they weren't painted. I'm probably going to remove my fenders and check the drains. I'm gonna pull em anyway when I do my motor swap.
The only thing that looks like it might be an issue is the silicone like sealer around the stove pipe, is there a way to get in there so I can reseal it? Lol the rear storage compartment is a whole other matter lol the top or it it nice and orange with rust. I know they tend to leak, but I'm not going to fix any of the bed seams because I'm going to have a spray on bed liner done pretty soon, that should seal it up nice. |
|
|
|
|
Ranchero Fan
Senior Member

Joined: 03-March-2011 Location: Chicago area Status: Offline Points: 1022 |
Post Options
Thanks(0)
Quote Reply
Posted: 09-October-2014 at 4:13PM |
|
x2 what John said, definitely check the drains especially the center cowl drain, (rubber nipple, center area of the firewall top of the trans tunnel). If you have a/c check the condensate drain also, but I tend to think your cowl drains are blocked common problem, especially when these cars sit outside many years.
|
|
|
Brian 1973 Ford Ranchero Big Block. ''THE OTHER WOMAN''
|
|
|
|
|
andyjman83
Member
Joined: 15-September-2014 Location: so cal Status: Offline Points: 66 |
Post Options
Thanks(0)
Quote Reply
Posted: 09-October-2014 at 5:08PM |
|
It did sit outside for a while. The center drain is that little box lookin guy sticking out of the firewall by the wiper motor?
I was going to try and fix my blower motor, but it doesn't even try to spin on its own, I an freely spin the shaft by hand though so I'm thinking a brush broke or something. Hey, while the box is out maybe ill replace my heater core. Does anyone know where I can find a write up for that? I have seen a few on here but they were all for ones without a/c. Thanks |
|
|
|
|
Rockatansky
Senior Member
Joined: 30-July-2010 Location: On The Road Status: Offline Points: 6072 |
Post Options
Thanks(0)
Quote Reply
Posted: 09-October-2014 at 5:23PM |
I tried that once, you can find new motors for around $30  Edited by Rockatansky - 09-October-2014 at 5:24PM |
|
|
72 GT Ute
|
|
|
|
|
andyjman83
Member
Joined: 15-September-2014 Location: so cal Status: Offline Points: 66 |
Post Options
Thanks(0)
Quote Reply
Posted: 10-October-2014 at 10:39AM |
|
What has to come out in order to change the heater core on a 72 ranchero with a/c? I'm wondering if itdd be easier to replace it while the blower assy is out.
|
|
|
|
|
Rockatansky
Senior Member
Joined: 30-July-2010 Location: On The Road Status: Offline Points: 6072 |
Post Options
Thanks(0)
Quote Reply
Posted: 11-October-2014 at 2:54AM |
|
the interior plenum behind the glove box contains the heater core & the blower motor
|
|
|
72 GT Ute
|
|
|
|
|
andyjman83
Member
Joined: 15-September-2014 Location: so cal Status: Offline Points: 66 |
Post Options
Thanks(0)
Quote Reply
Posted: 11-October-2014 at 10:50AM |
|
How do I remove it?
|
|
|
|
|
californiajohnny
Moderator Group
Joined: 05-October-2013 Location: winlock, wa Status: Offline Points: 14609 |
Post Options
Thanks(0)
Quote Reply
Posted: 11-October-2014 at 1:02PM |
|
there are nuts on the engine side of the firewall (my non a/c has 4) and remove any cables or vacuum hoses from the box inside, and the plastic air vent thing attached to it by the blower motor and the whole box should drop out. once you have it out there should be a metal plate with screws, remove it , and the core should just lift out
|
|
|
JOHN
74 GRAN TORINO S&H CLONE 74 VETTE CUSTOM 90 S10 BLAZER 4X4 LIFTED 77 CELICA CUSTOM 75 V8 MONZA SUPERCHARGED 79 COURIER VERT. SLAMMED 75 VEGA V6 5 SPD 70 CHEV C10 P/U 68 MUSTANG FB CONVERSION |
|
|
|
|
Rockatansky
Senior Member
Joined: 30-July-2010 Location: On The Road Status: Offline Points: 6072 |
Post Options
Thanks(0)
Quote Reply
Posted: 11-October-2014 at 2:01PM |
|
I haven't pulled apart an A/C plenum house in so long I can't remember, but there may be shared bolts/screws that pass through the firewall from either side. it's pretty much just a matter of searching, loosening & being careful not to break anything
there's probably a sticky in the HowTo section but I didn't see it I also did not see it at the circus Fordmuscle to the rescue FYI there may be slight changes from 1972 until 1975 when the diagram is from but it's not rocket science
Edited by Rockatansky - 11-October-2014 at 2:03PM |
|
|
72 GT Ute
|
|
|
|
|
Rockatansky
Senior Member
Joined: 30-July-2010 Location: On The Road Status: Offline Points: 6072 |
Post Options
Thanks(0)
Quote Reply
Posted: 11-October-2014 at 2:06PM |
|
thread with a link in it http://forum.grantorinosport.org/heatercore-replacement-problem_topic8753.htmlhttp://www.2carpros.com/questions/1973-ford-torino-heater-core-replacement
|
|
|
72 GT Ute
|
|
|
|
|
andyjman83
Member
Joined: 15-September-2014 Location: so cal Status: Offline Points: 66 |
Post Options
Thanks(0)
Quote Reply
Posted: 11-October-2014 at 3:06PM |
|
Heck yea!! Thanks guys. Well I got my blower motor in today. I took the entire assy apart, ground all the rust and old weather stripping off of the box and air doors, used rustoleum rust converting primer, painted everything, applied new weather stripping to the sealing surfaces of the box and put it in. The fun part was getting the old blower wheel off. The allen screw was completely rusted on there so I had to drill a hold in the center of the old motor shaft and keep increasing diameters on the drill bits until it came off. Then I had to drill out the allen screw, and tap the hole with a 5/16 tap and put a new allen screw in. Everything was reassembled with stainless steel screws, and used stainless screws when I installed it. I got the vac pod hooked back up and much to my amazement, when I move the selector lever for defrost, vent, floor, etc it actually movesand works. When I wired up the blower motor, I soldered the new motors wires to the wires or the old one so I could keep the bullet connector on the positive and the loop for the negative. For some reason, the area where the negative loop terminal was attached to the body was painted, so it had a crappy ground, so I ground it down to bare metal, attached it with a stainless screw and washer, and painted over the screw and terminal to keep corrosion away.
I also cleaned the center cowl drain and the 2 side ones by hosing it out after vacuuming it, but on the pass side a lil water came in and it didn't look like it was from the stovepipe assembly. It was driping on the vacuum pod, and when I looked, it looks like the seam in the corner has lost its sealer, so when I have the fenders off, I'm going to scrape and grind all the old stuff off. The blower works great, but only on high so I'm thinking that the resistor is toast. Anyway thanks again guys I really appreciate the info. Next project, heater core :-) Andy |
|
|
|
|
californiajohnny
Moderator Group
Joined: 05-October-2013 Location: winlock, wa Status: Offline Points: 14609 |
Post Options
Thanks(0)
Quote Reply
Posted: 11-October-2014 at 3:38PM |

|
|
|
JOHN
74 GRAN TORINO S&H CLONE 74 VETTE CUSTOM 90 S10 BLAZER 4X4 LIFTED 77 CELICA CUSTOM 75 V8 MONZA SUPERCHARGED 79 COURIER VERT. SLAMMED 75 VEGA V6 5 SPD 70 CHEV C10 P/U 68 MUSTANG FB CONVERSION |
|
|
|
|
Danno
Member
Joined: 05-March-2015 Location: Chesapeake Status: Offline Points: 129 |
Post Options
Thanks(0)
Quote Reply
Posted: 10-March-2015 at 7:31AM |
|
My heater core was severely leaking so I ended up pulling the entire box assy out of the car. This was only easy because I had the whole dash assembly out anyways. I can't imagine doing it any other way. Once the assembly was off the dash panel, it was easy taking it apart and replacing the core. It's also easier to do a top notch resealing of the box assembly when it's sitting on a workbench.
|
|
|
Danno
|
|
|
|
|
GranTorinoSport
Admin Group 

Admin of "The Org" Joined: 20-May-2003 Location: Seattle Status: Offline Points: 2287 |
Post Options
Thanks(0)
Quote Reply
Posted: 10-March-2015 at 7:51AM |
|
I did a complete restoration on my AC/heater box, but you do not need to pull the whole box to get the heater core and fan replaced. The fan needs to come out and the front half of the box needs to come off only. It will be helpful/necessary to have the dash pad and glove box out. access isn't too bad with 1/4 drive tools.
I took the whole box out to restore everything and install a new evaporator. If you take the whole box out on the inside, you'll be removing the evap case as well in the engine compartment, so think about what you want to do before you tear into it. (most of the screws that hold the evap case in screw through the heater box and the fan box, by not removing it, you may risk damage for the remaining hardware and the cheap plastic case with the heavy evap in it) Edited by GranTorinoSport - 10-March-2015 at 7:53AM |
|
|
Scott Eklund
Webmaster |
|
|
|
|
zjosh
Member
Joined: 23-August-2013 Location: Blackstone Status: Offline Points: 91 |
Post Options
Thanks(0)
Quote Reply
Posted: 08-November-2016 at 2:04PM |
|
Any idea where i can get the seals for the heater box motor. also what the best way to seal the heater sides of the boxes together?
thanks tom |
|
|
|
|
Post Reply
|
|
| Tweet |
| Forum Jump | Forum Permissions You cannot post new topics in this forum You cannot reply to topics in this forum You cannot delete your posts in this forum You cannot edit your posts in this forum You cannot create polls in this forum You cannot vote in polls in this forum |


 Topic Options
 andyjman83 wrote: