
|
Project TV 2M8O |
Post Reply 
|
Page <1 2223242526 42> |
| Author | |
Paul100ca 
Senior Member 

Joined: 21-November-2014 Location: Ontario, Canada Status: Offline Points: 315 |
 Post Options Post Options
") Thanks(0) Thanks(0)
 Quote Reply Quote Reply
 Posted: 11-August-2017 at 4:07AM Posted: 11-August-2017 at 4:07AM |
|
beauty

|
|
|
Nothing stops this train.
|
|
 |
|
|
TV 2M8O
Senior Member
Joined: 20-September-2006 Location: Southern Ohio Status: Offline Points: 2053 |
Post Options
Thanks(0)
Quote Reply
Posted: 16-August-2017 at 12:43PM |
|
**CLICK ON PICS TO ENLARGE AND CLICK AGAIN TO SUPERSIZE** PART ONE...... Been several weeks since I've updated so I thought I would bring everyone up to speed. Nothing major but a lot of incidental items addressed.... My life saver arrived and it made a world of difference handling the high temps upstairs at the dealership!  I got the drivers seat temporarily installed, 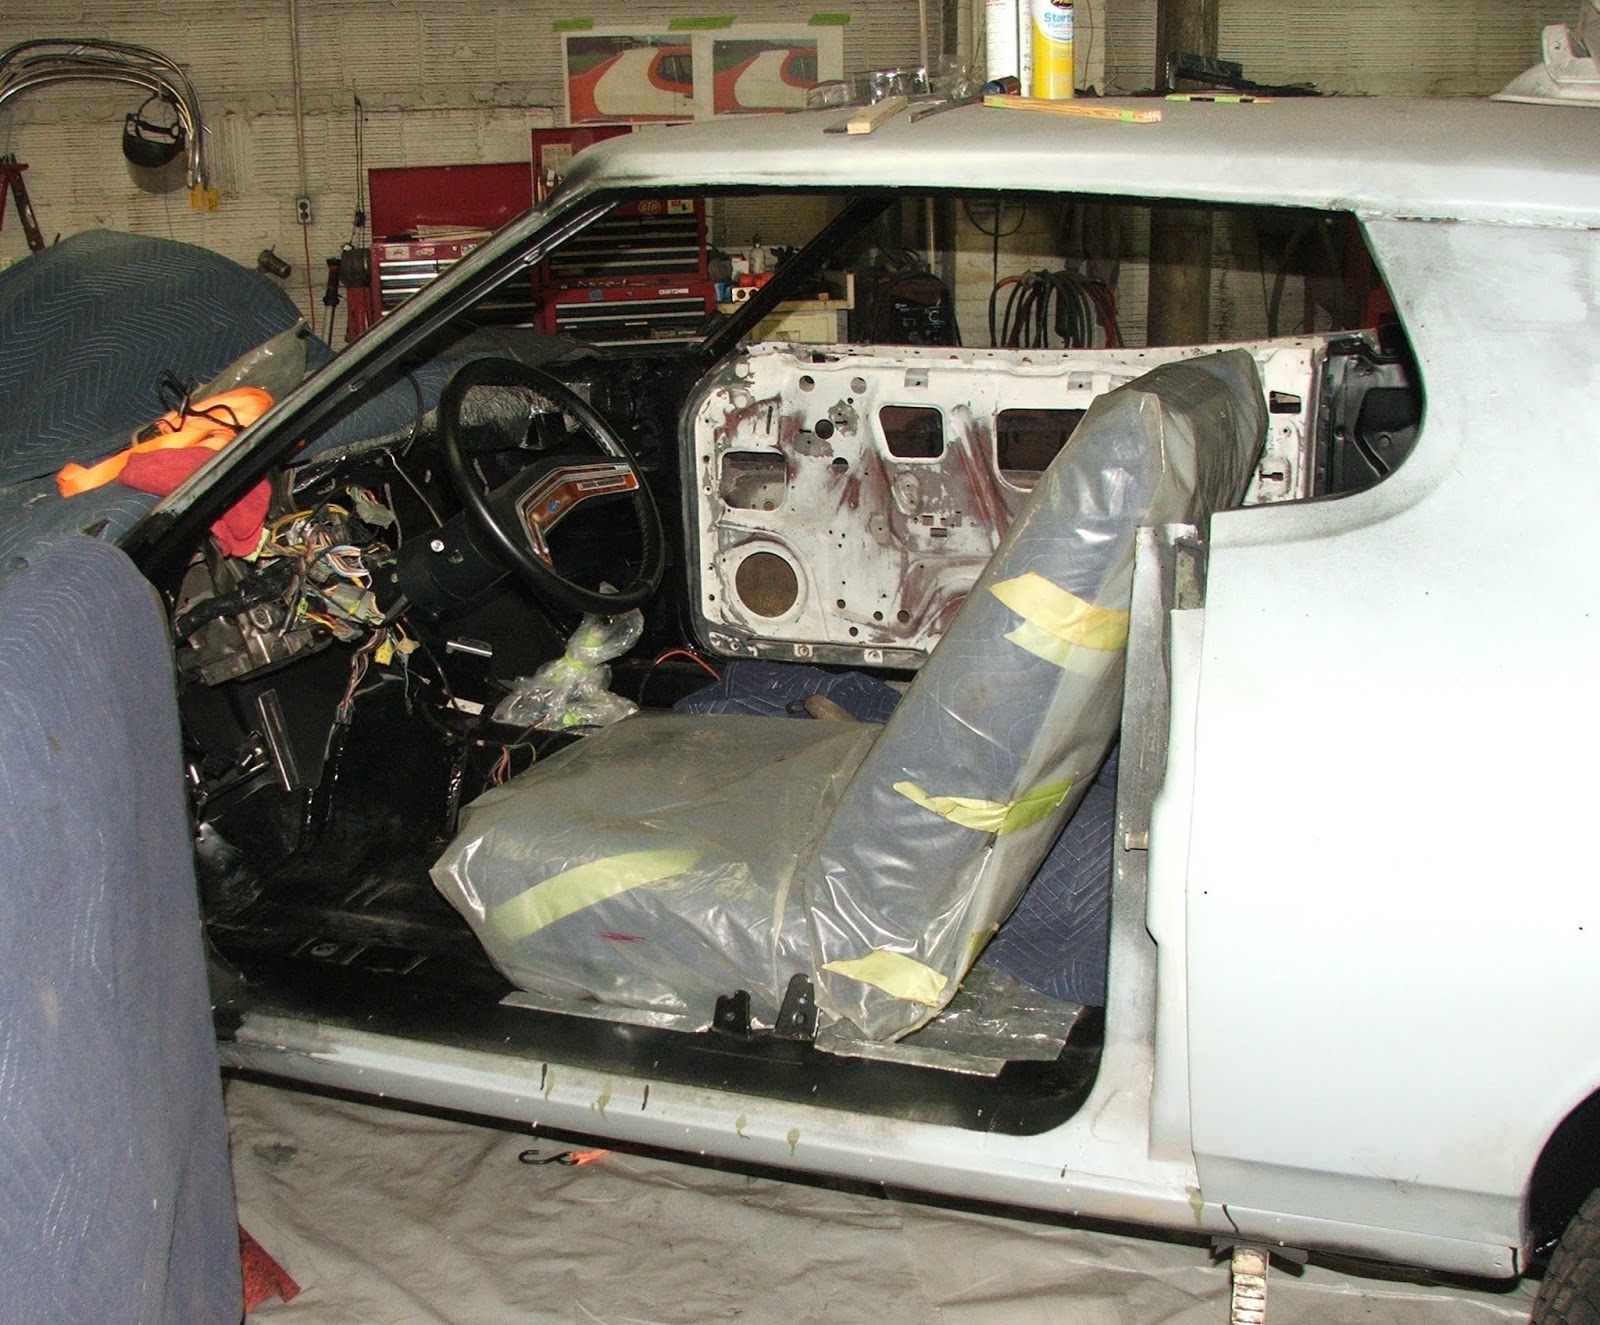 the driver side wheelhouse reinstalled... 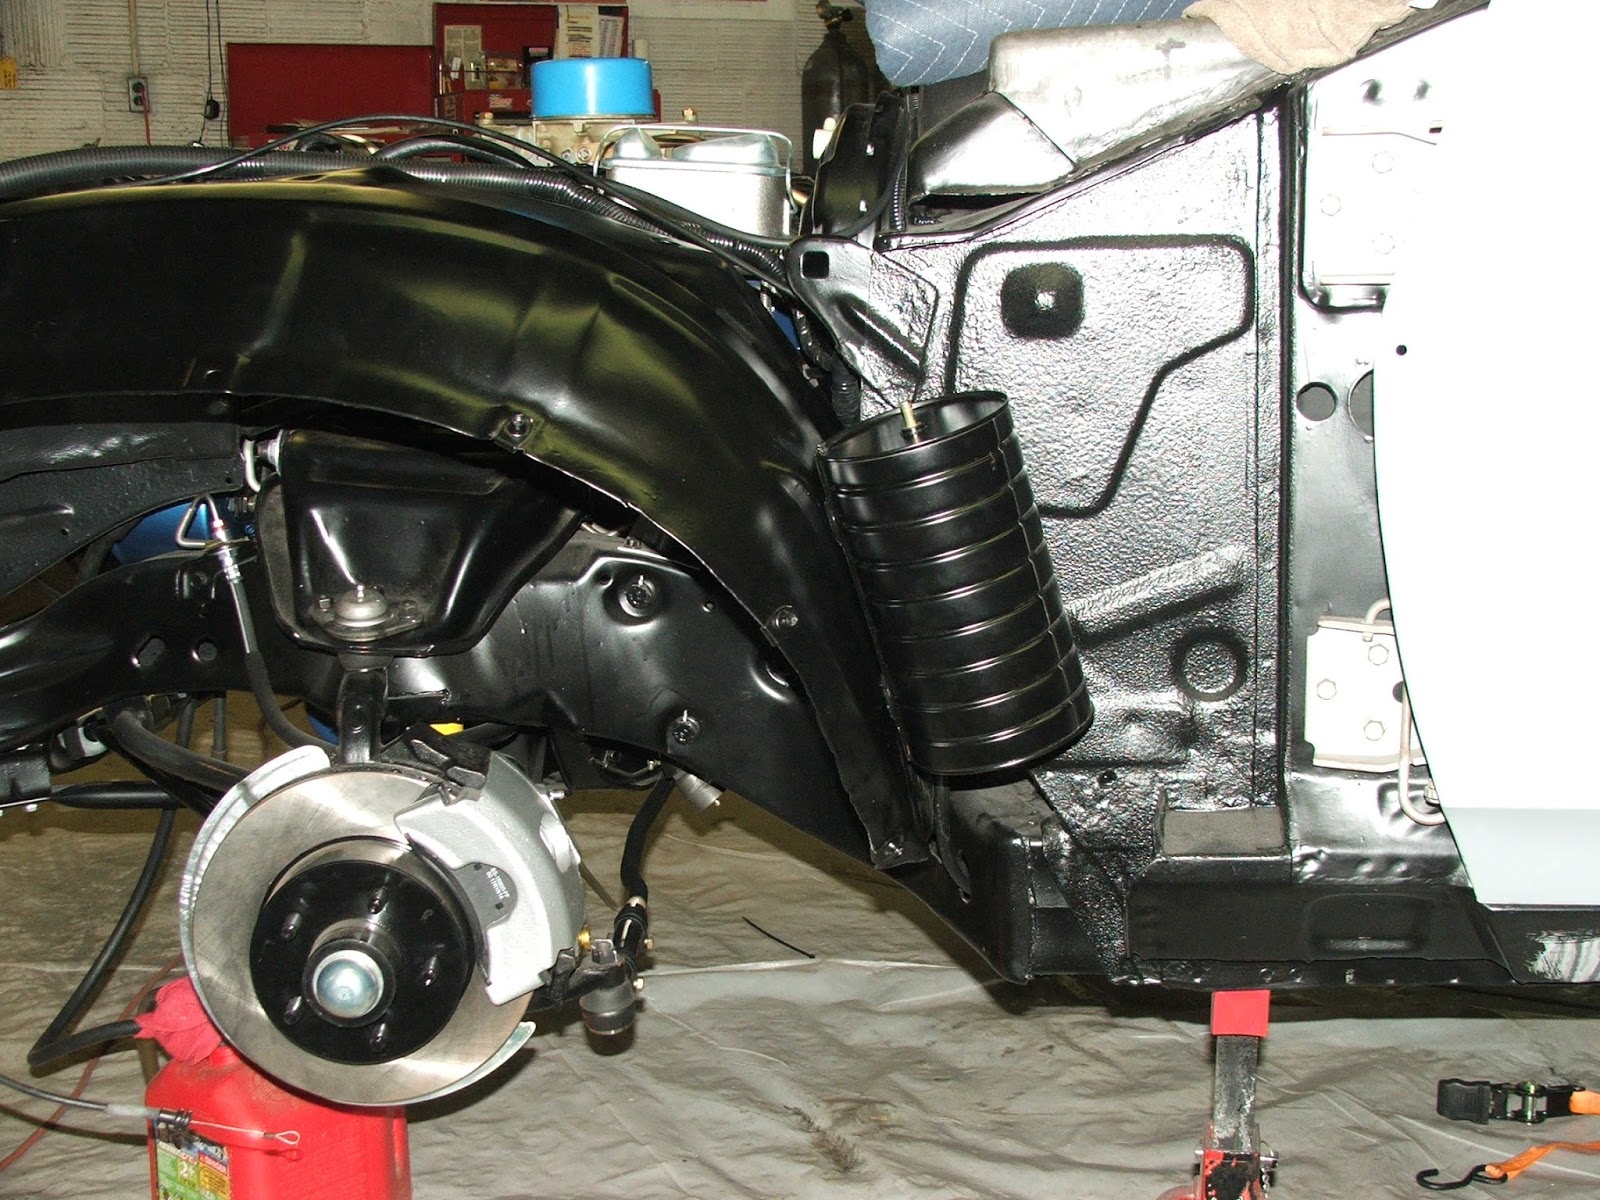 and started pulling out the power systems harness (seat, windows, locks, rw defroster) to determine which firewall opening need to be plugged and how the harness runs thru the vehicle. 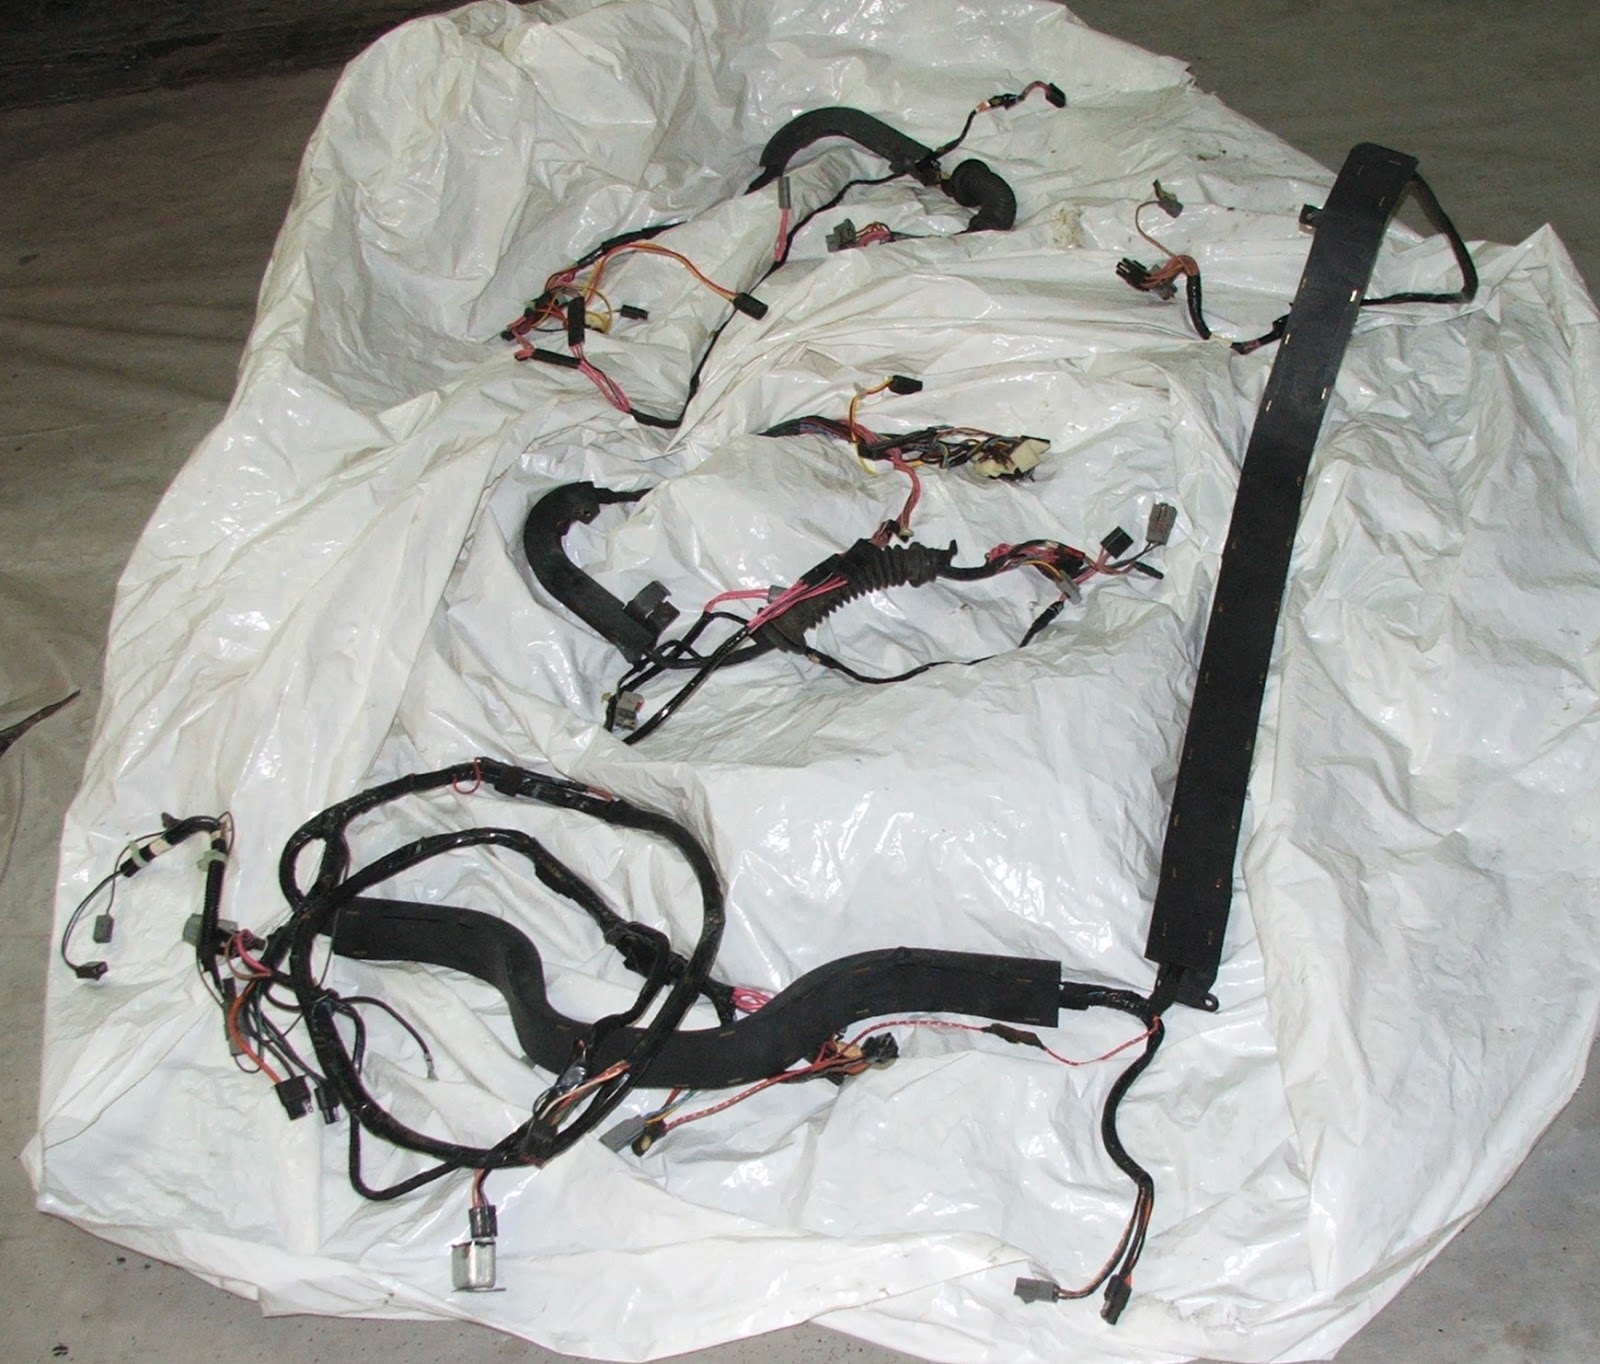  After looking at what was there, I put the harnesses back into the protective plastic and then broke down the power antenna setup and wrapped the wiring in convoluted conduit... 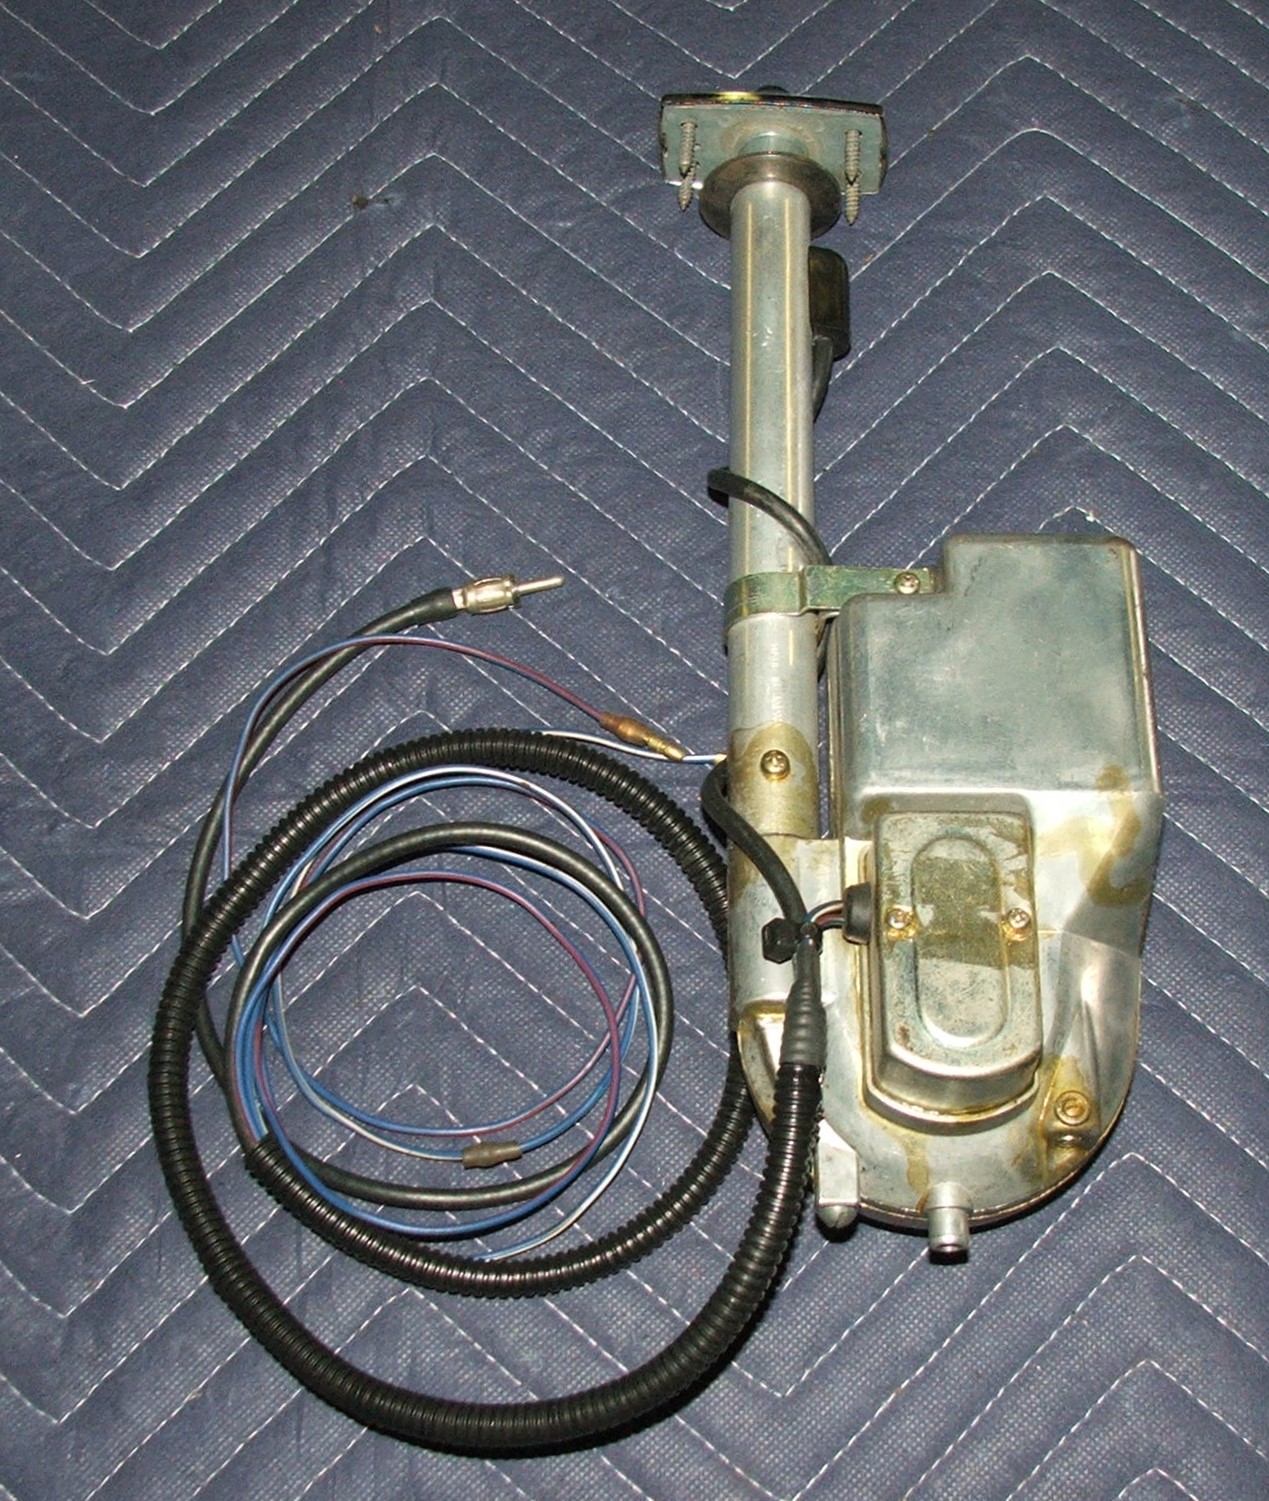  painted the mounting bracket... 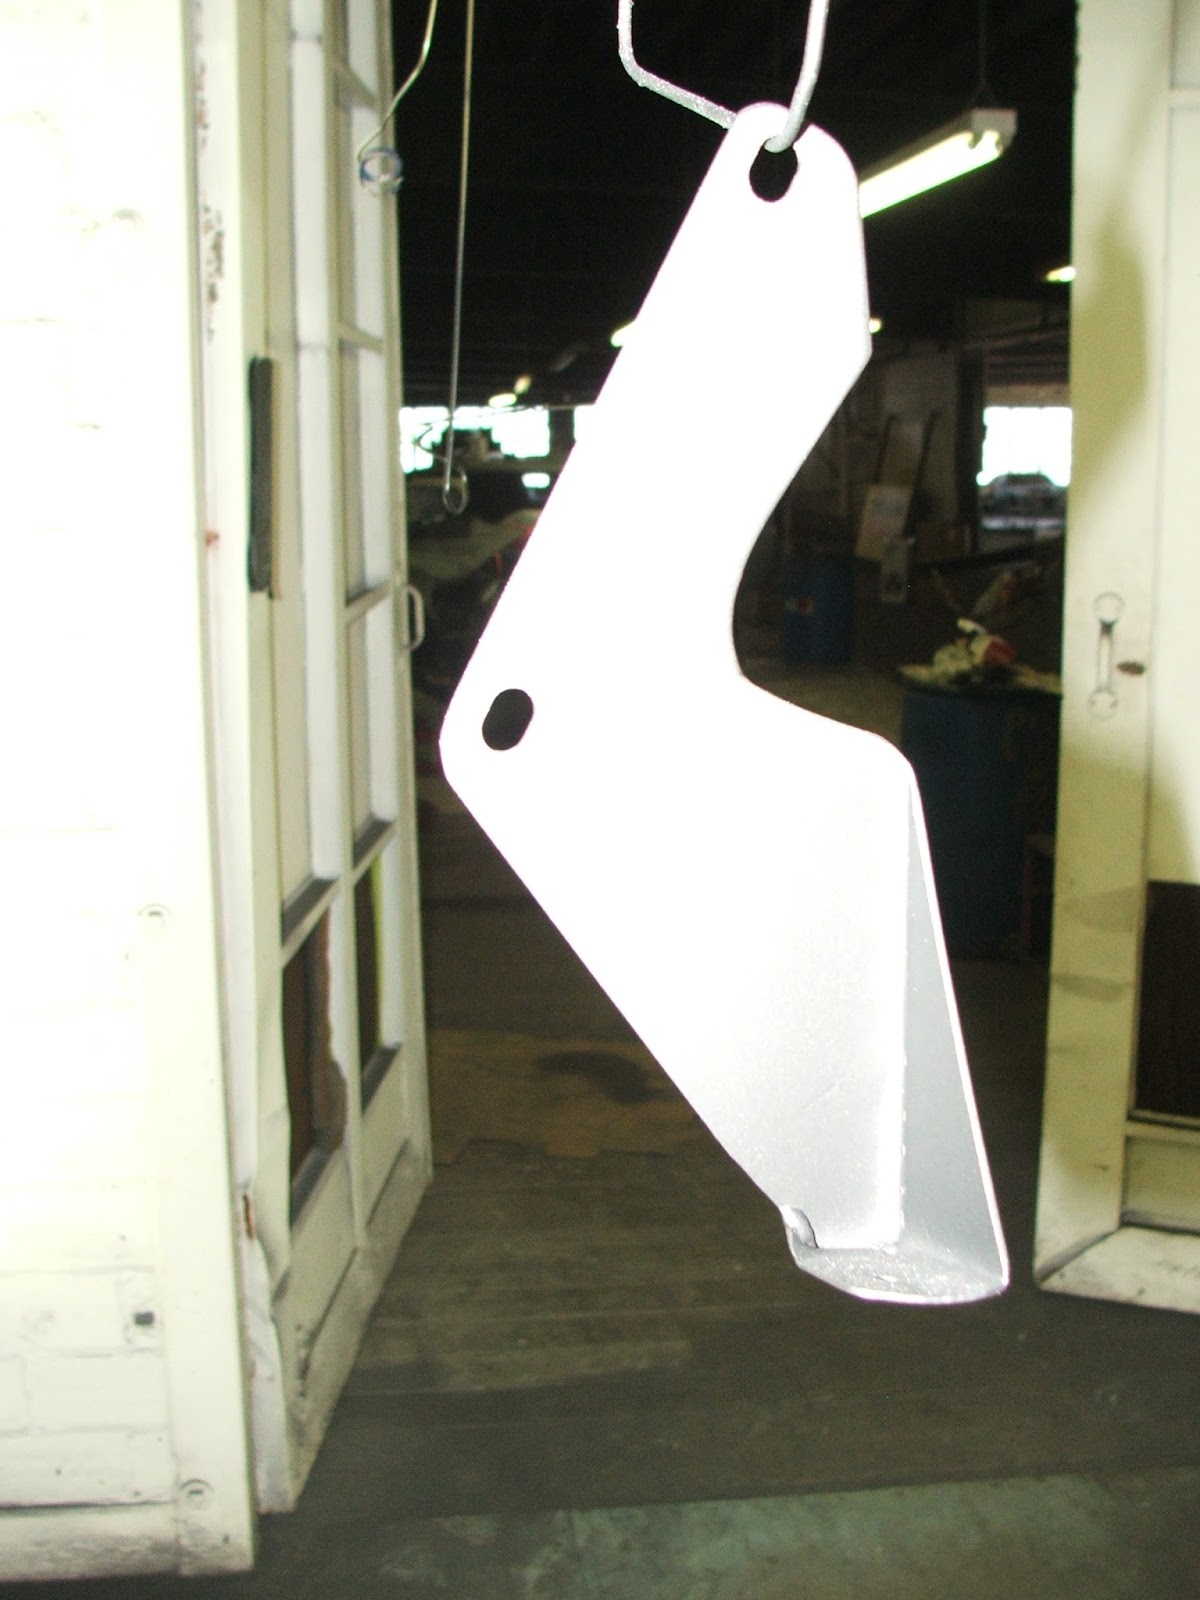 repaired the stop light switch harness and wrapped it in convoluted conduit and modified the Fiero vacuum canister mounting foot for use on the driver side wheelhouse... 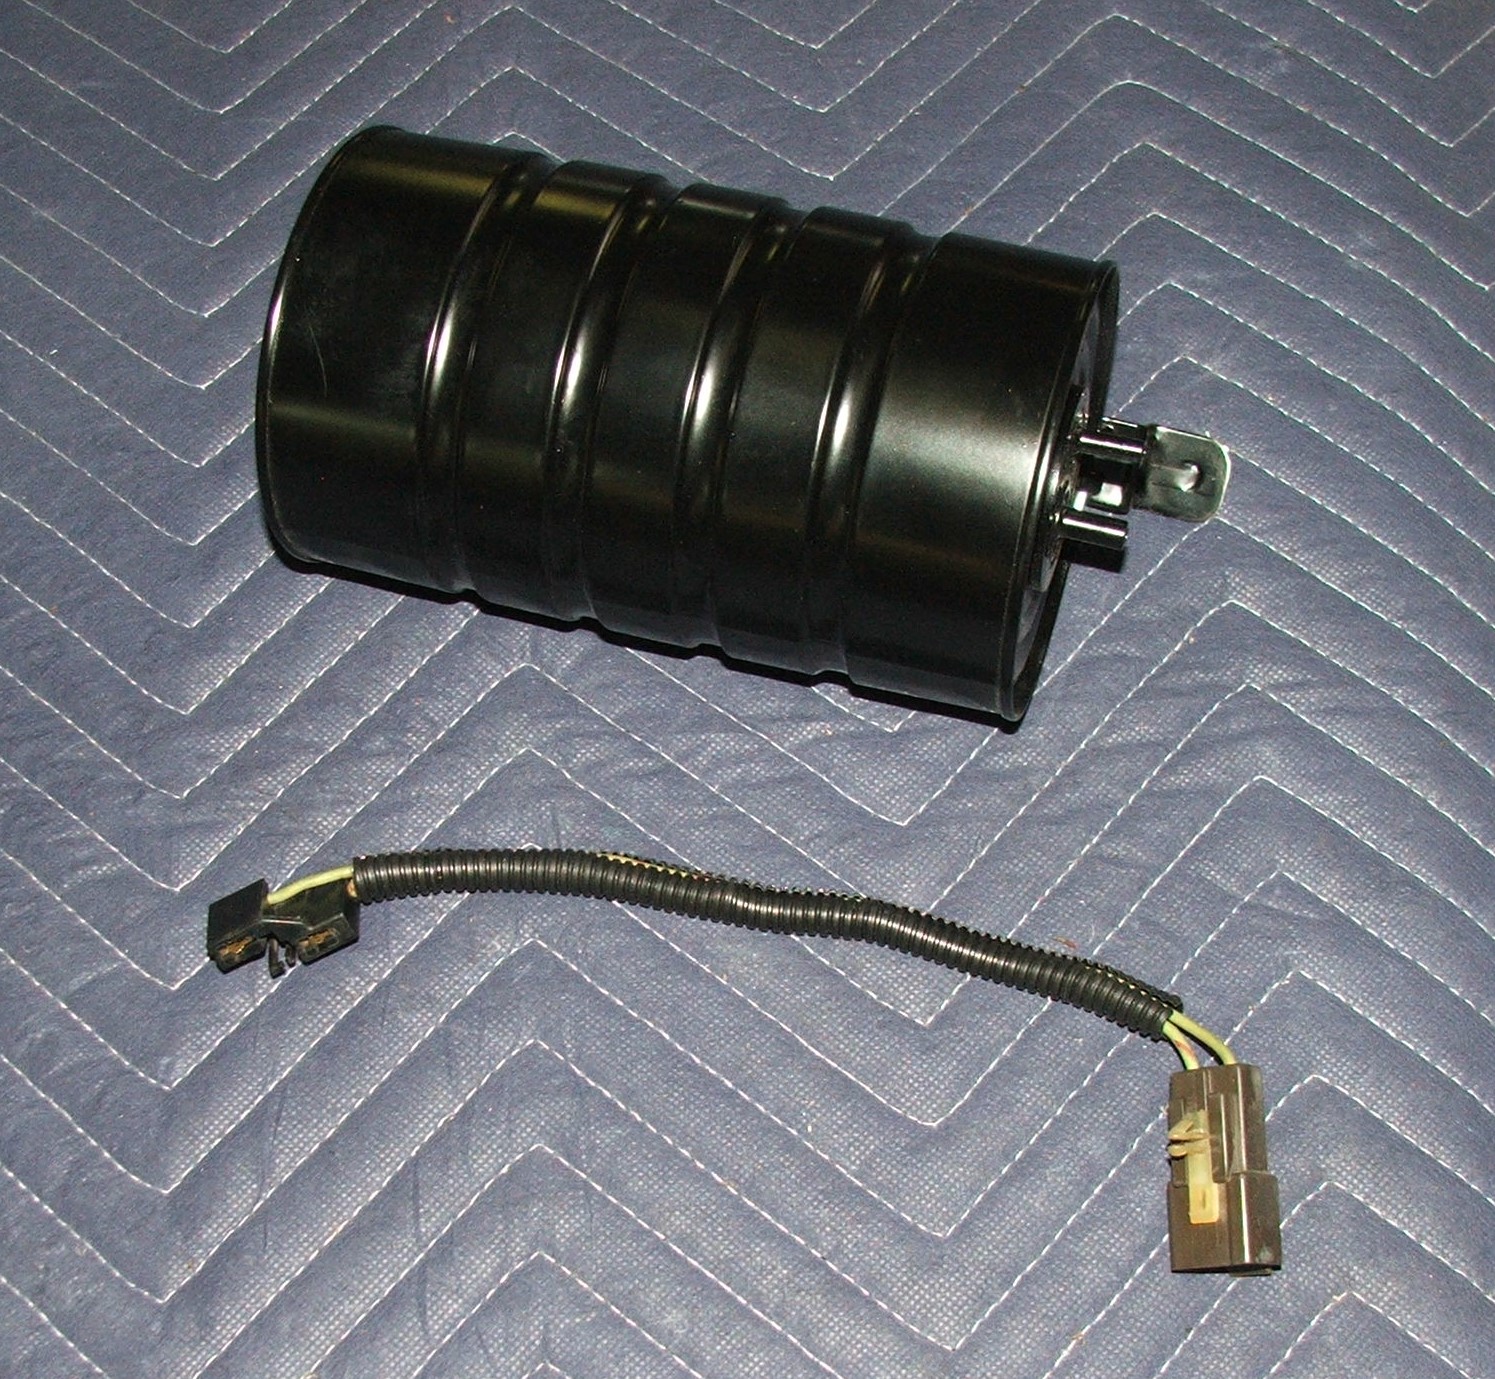 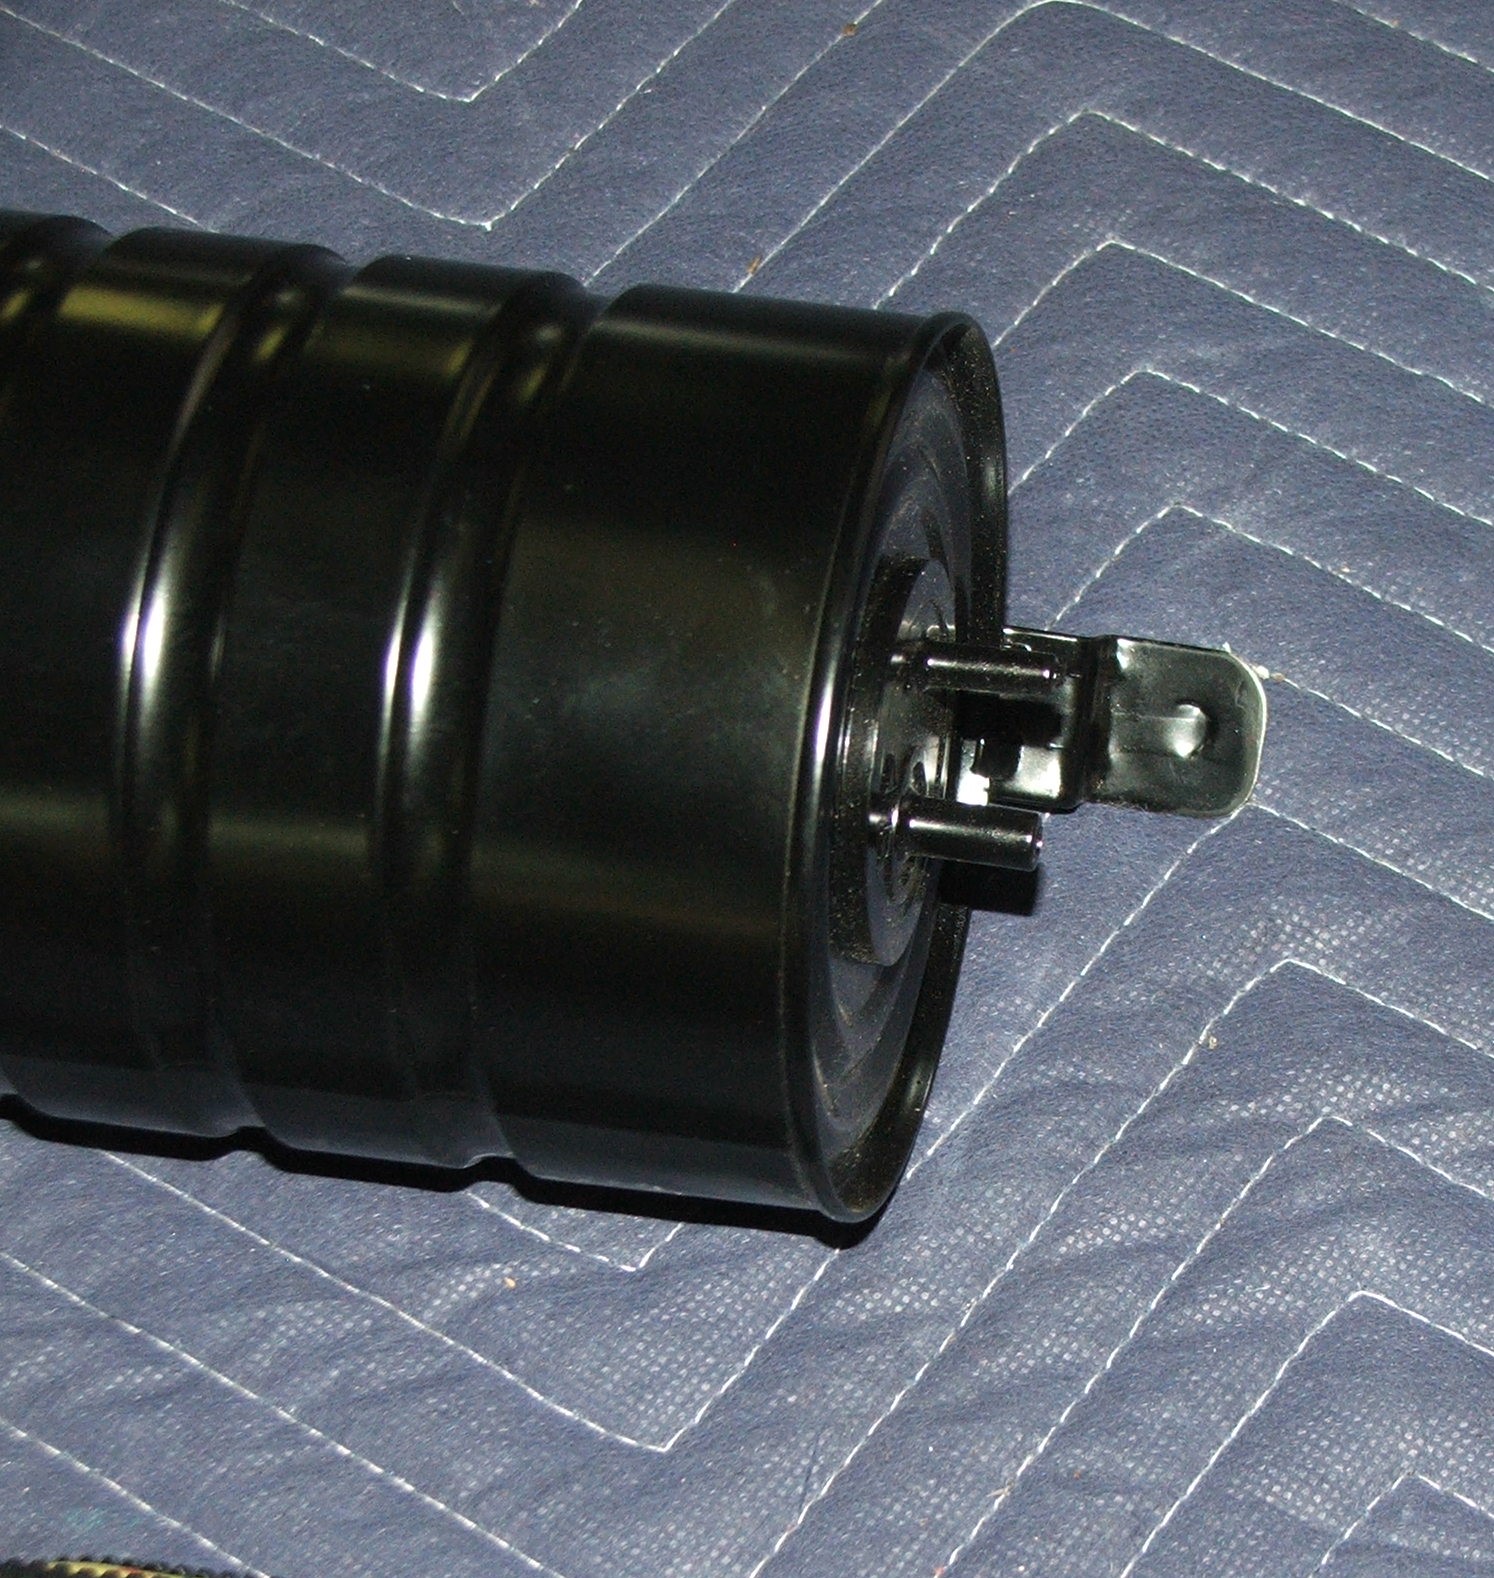 assembled and painted the headlight bucket mounting plates and the overflow bottle mounting bracket... 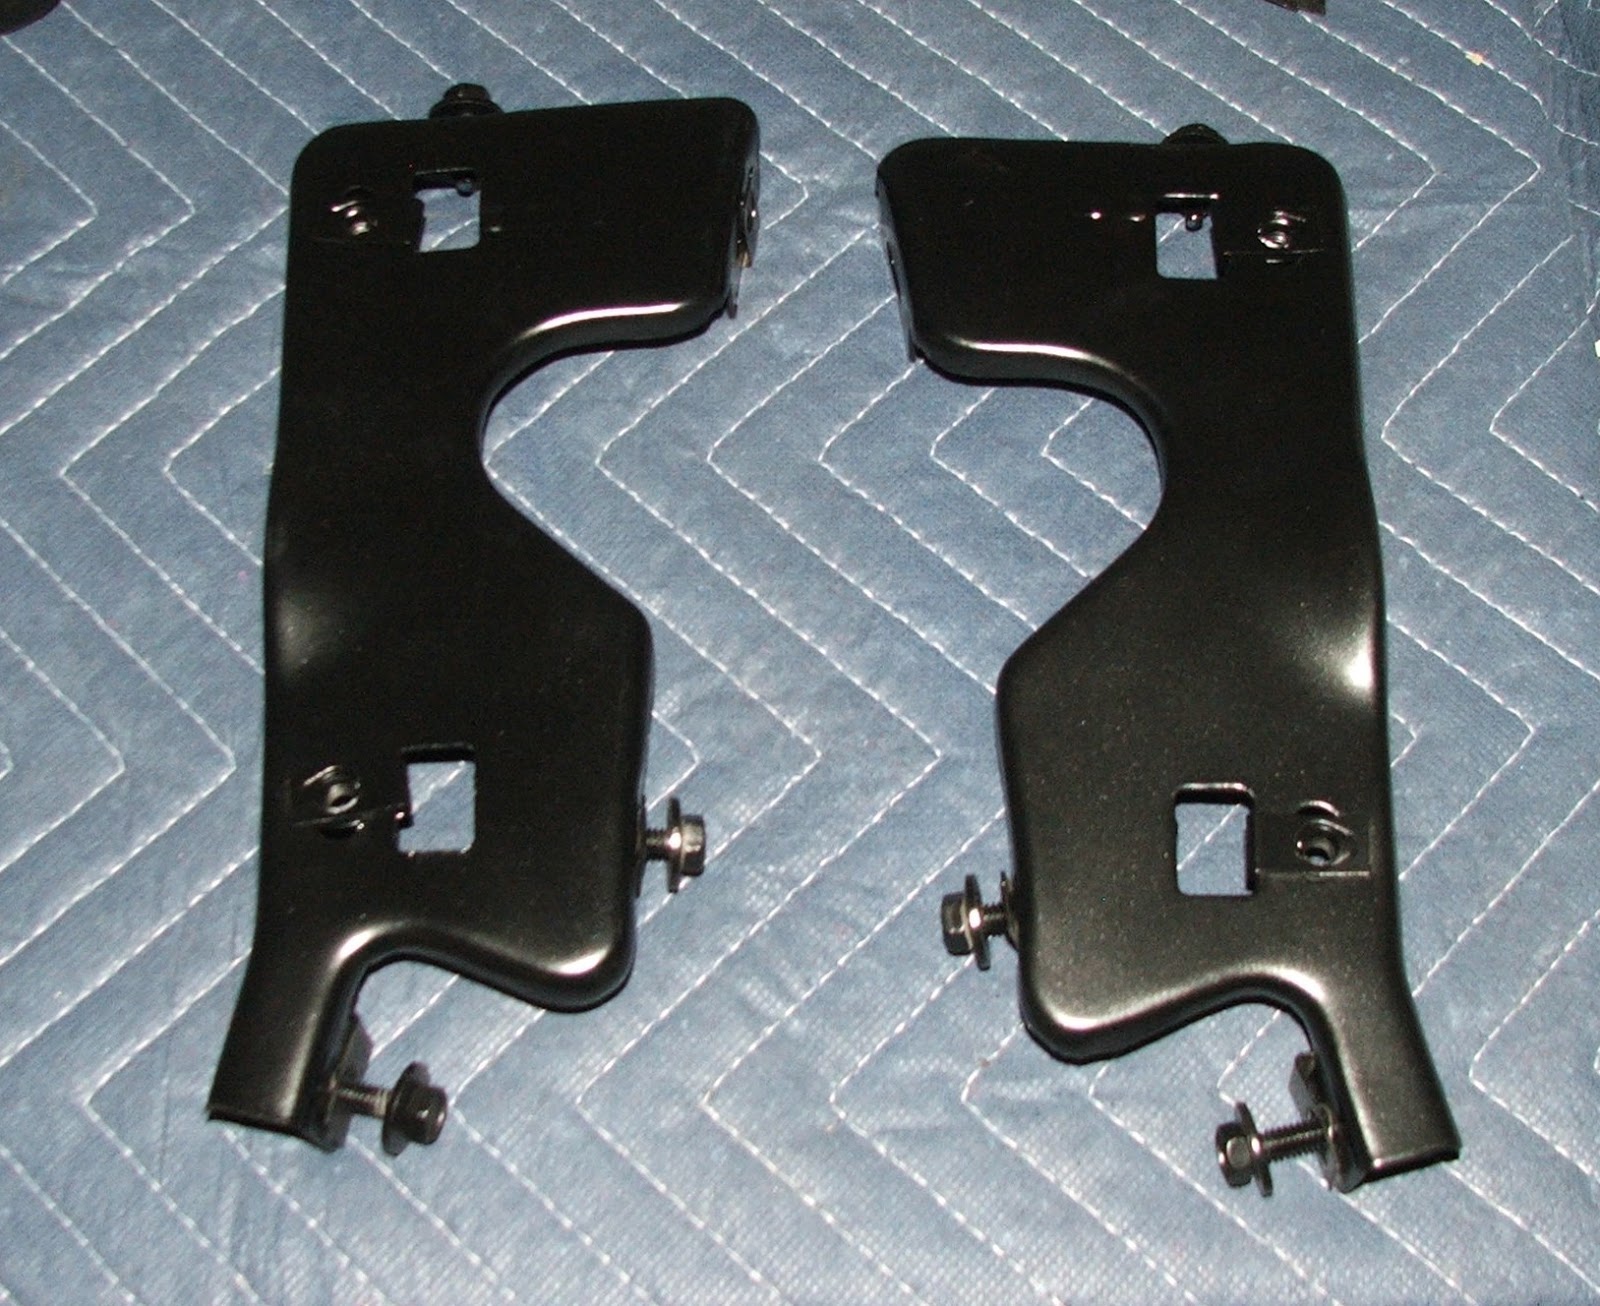 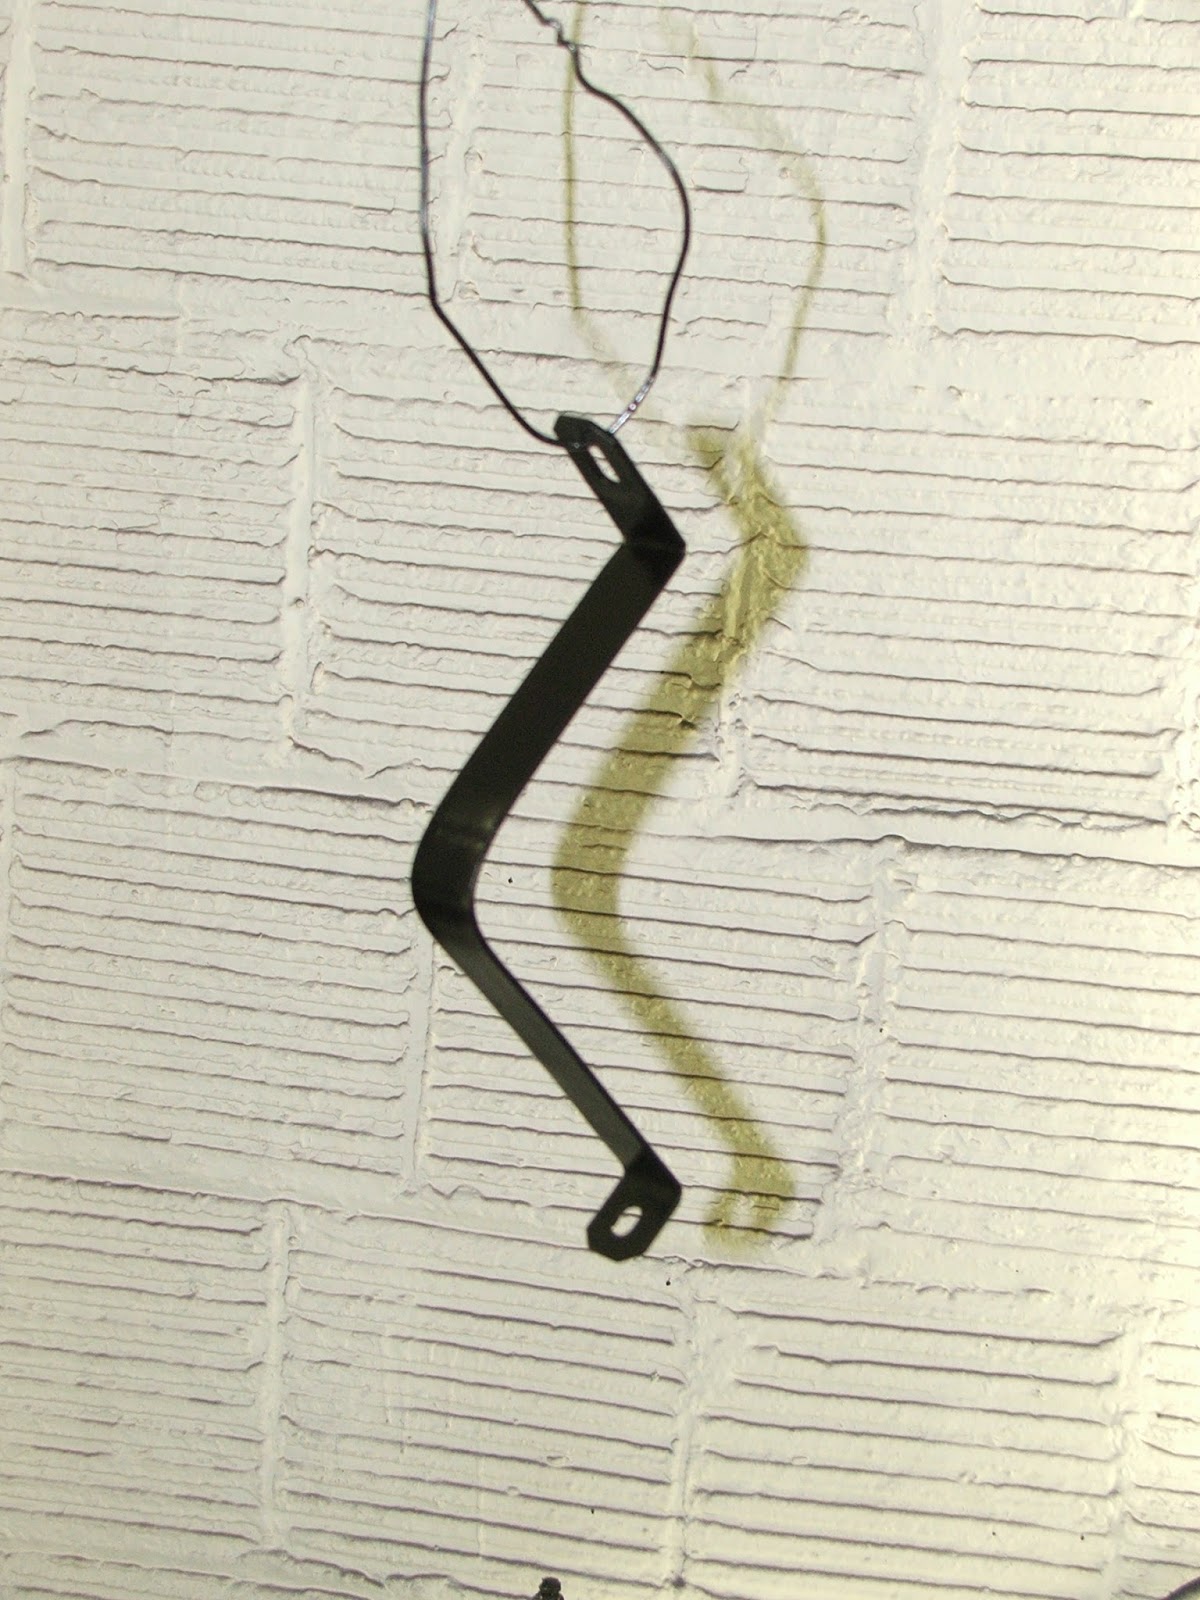 blasted and detailed the inner fender vertical liners... 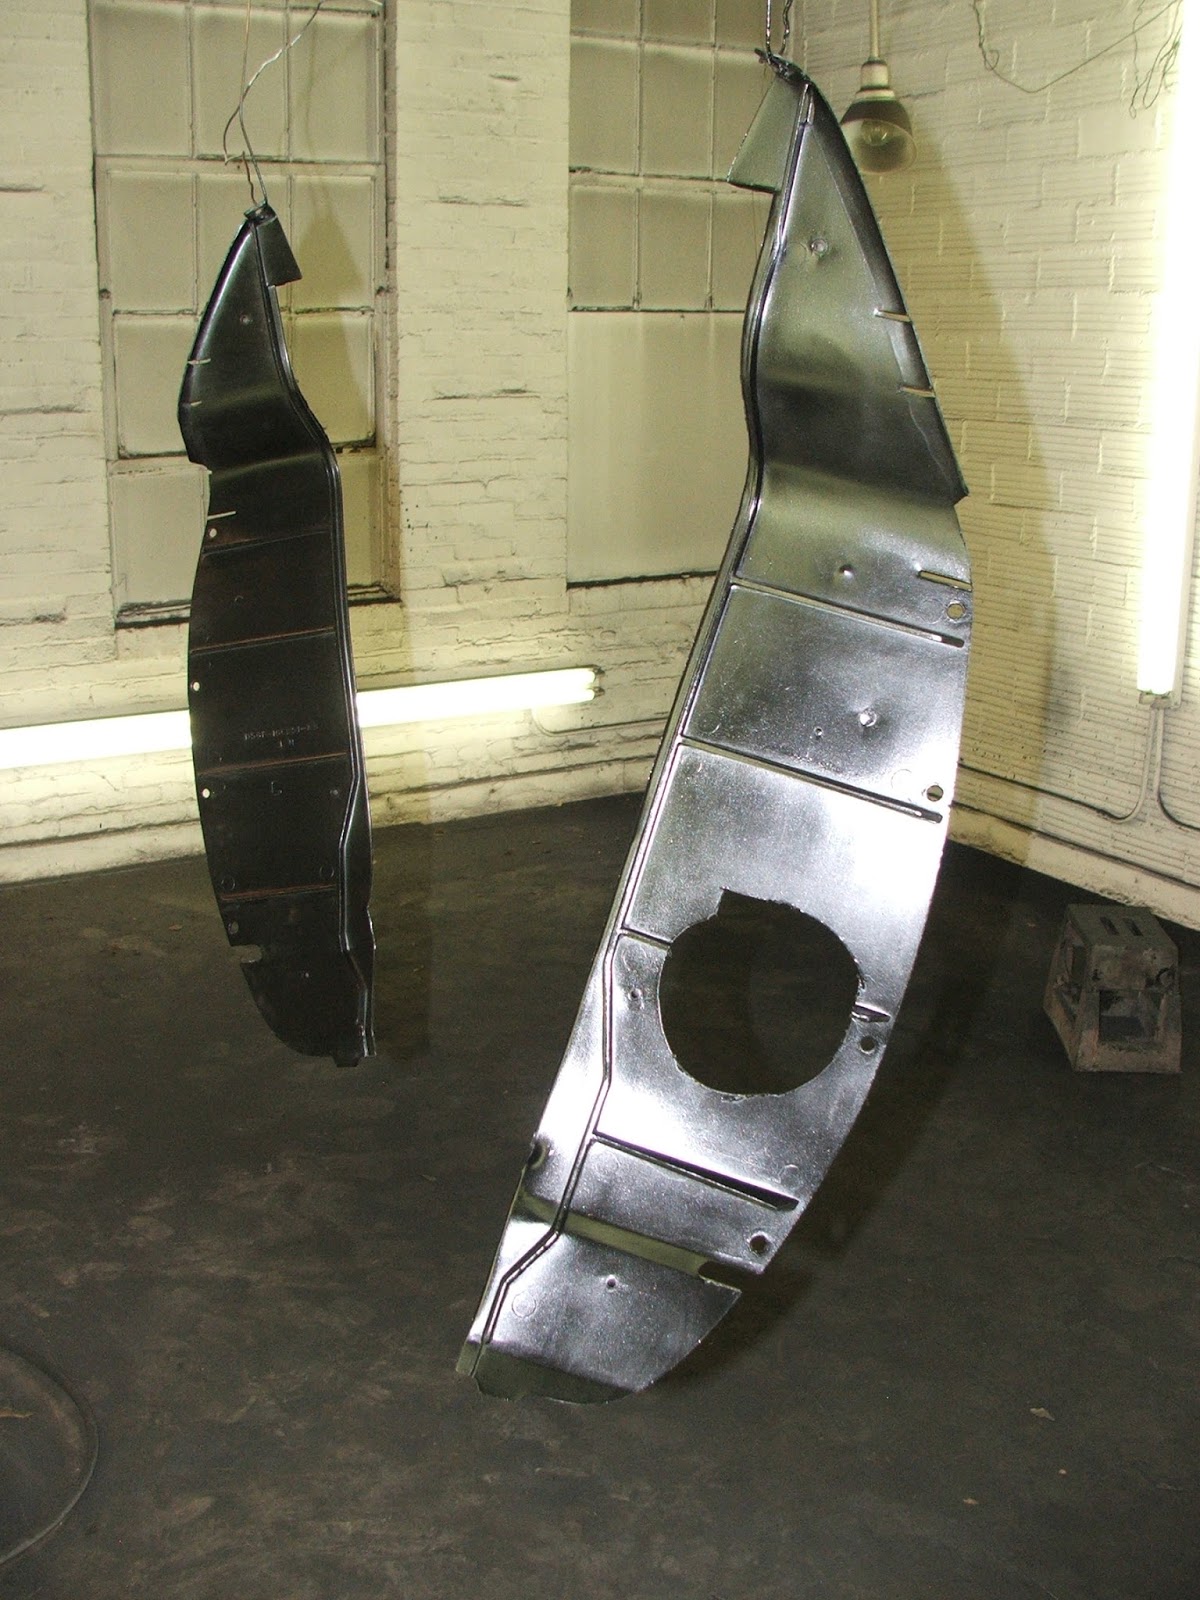  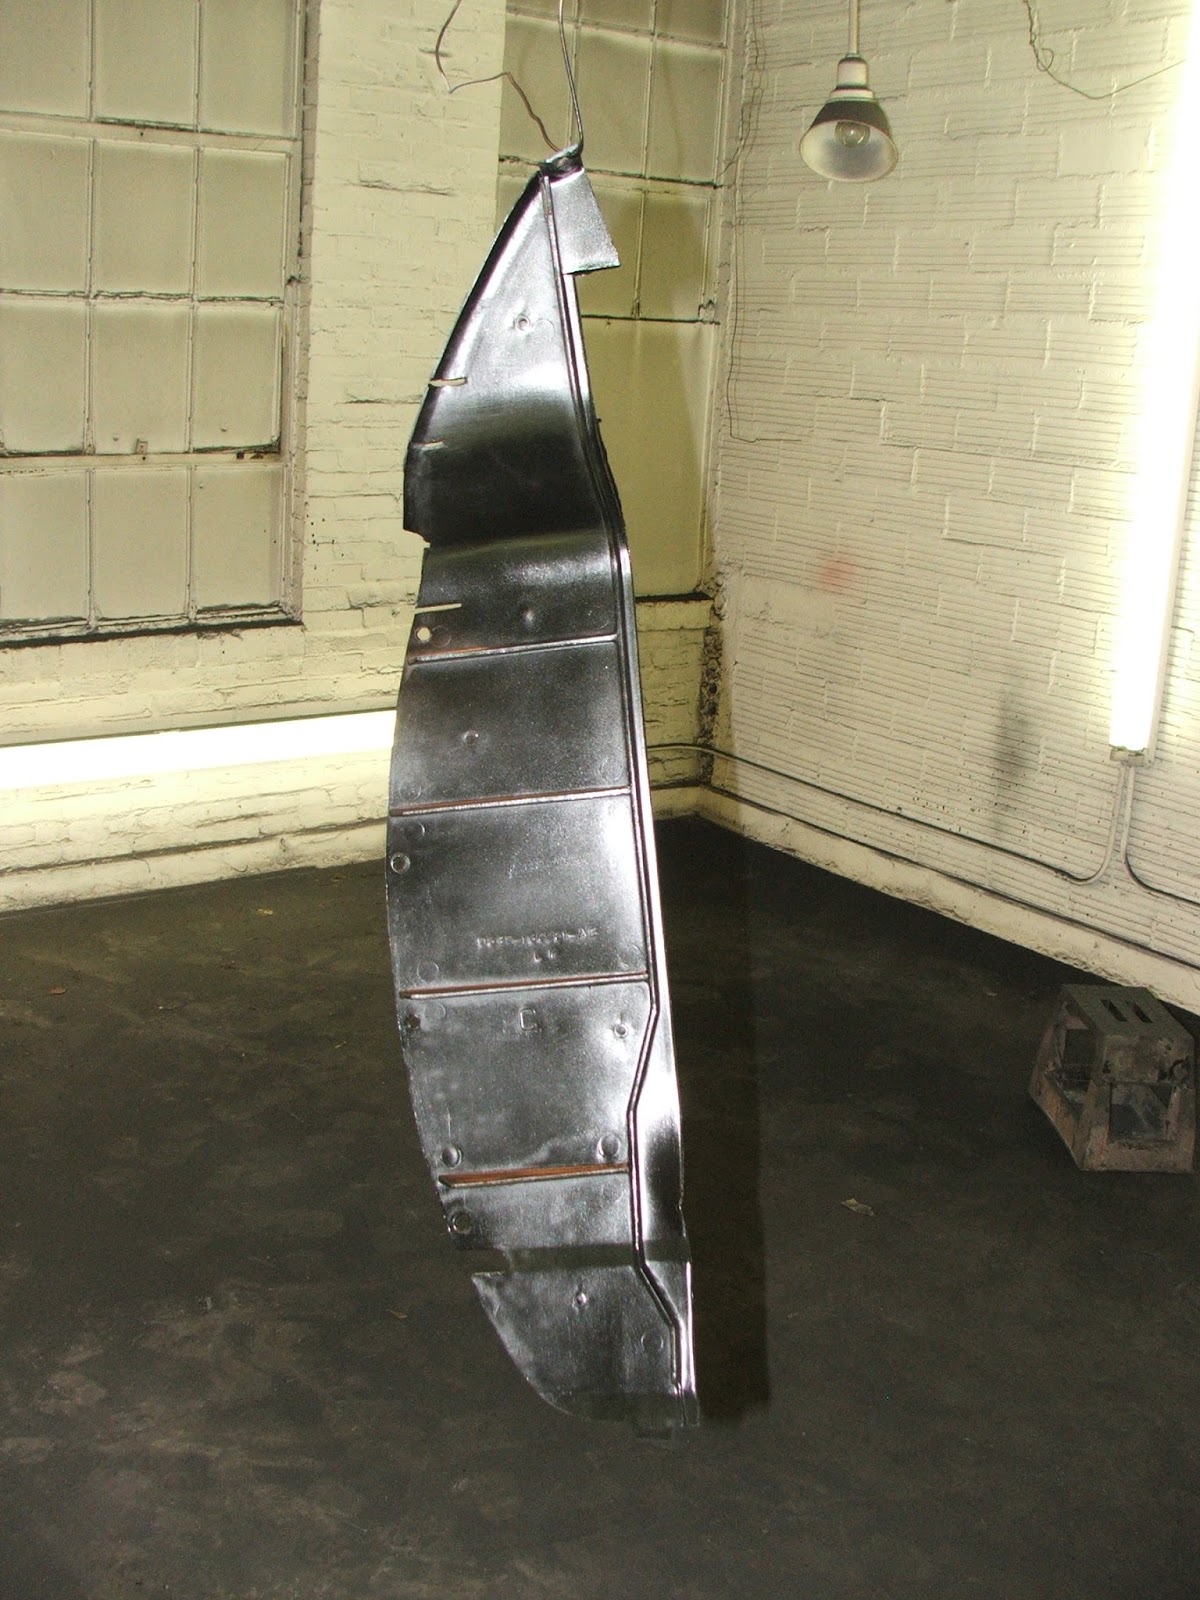 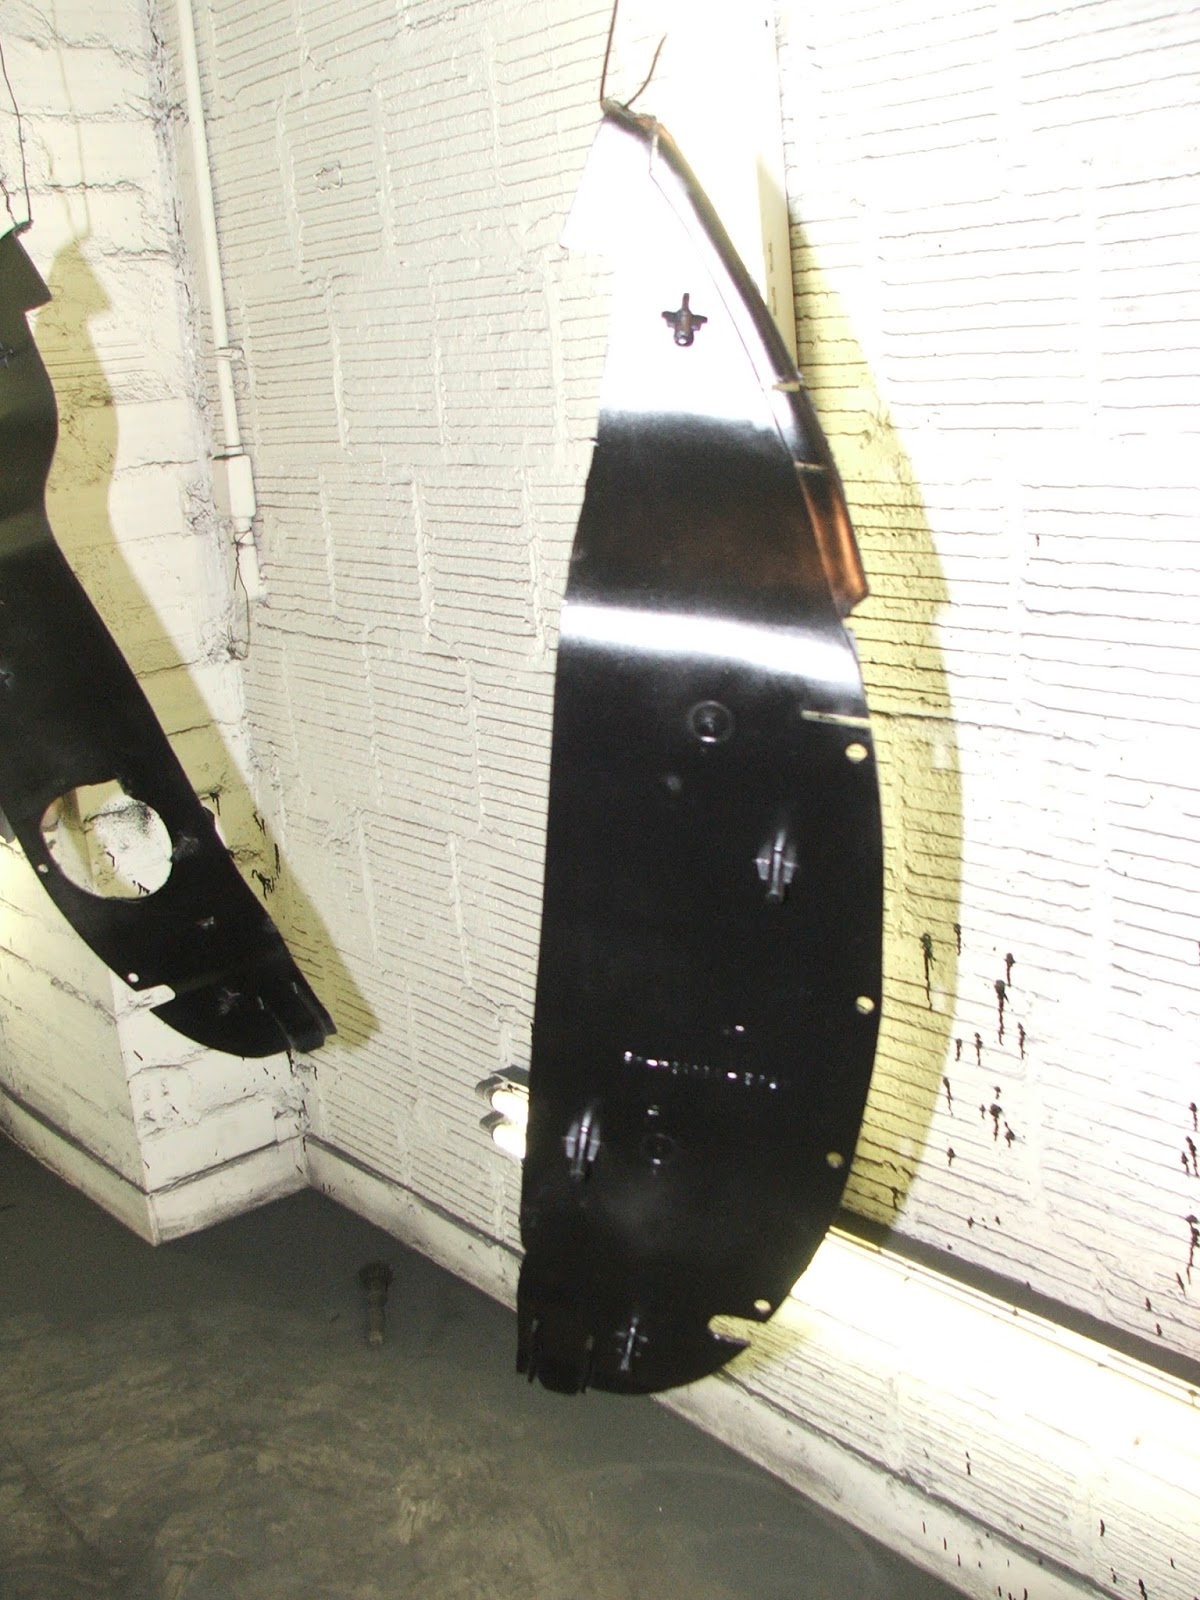 and applied the first coat of seam sealer to the passenger door....  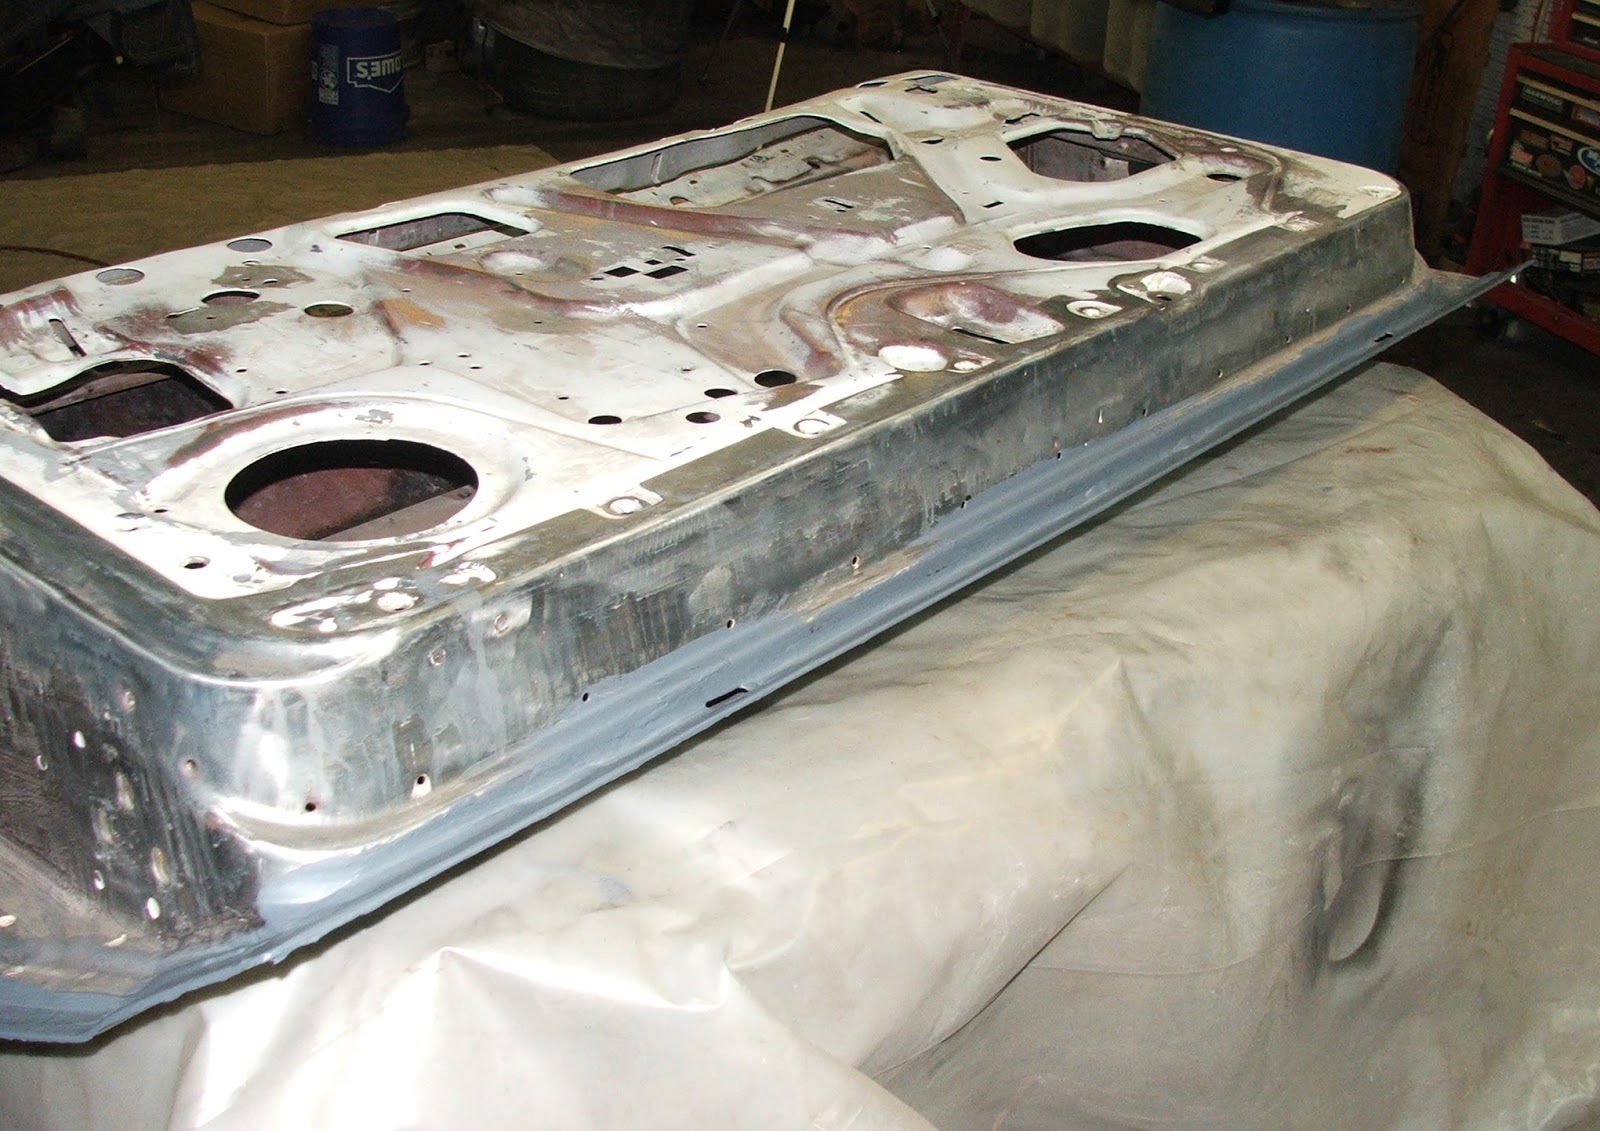 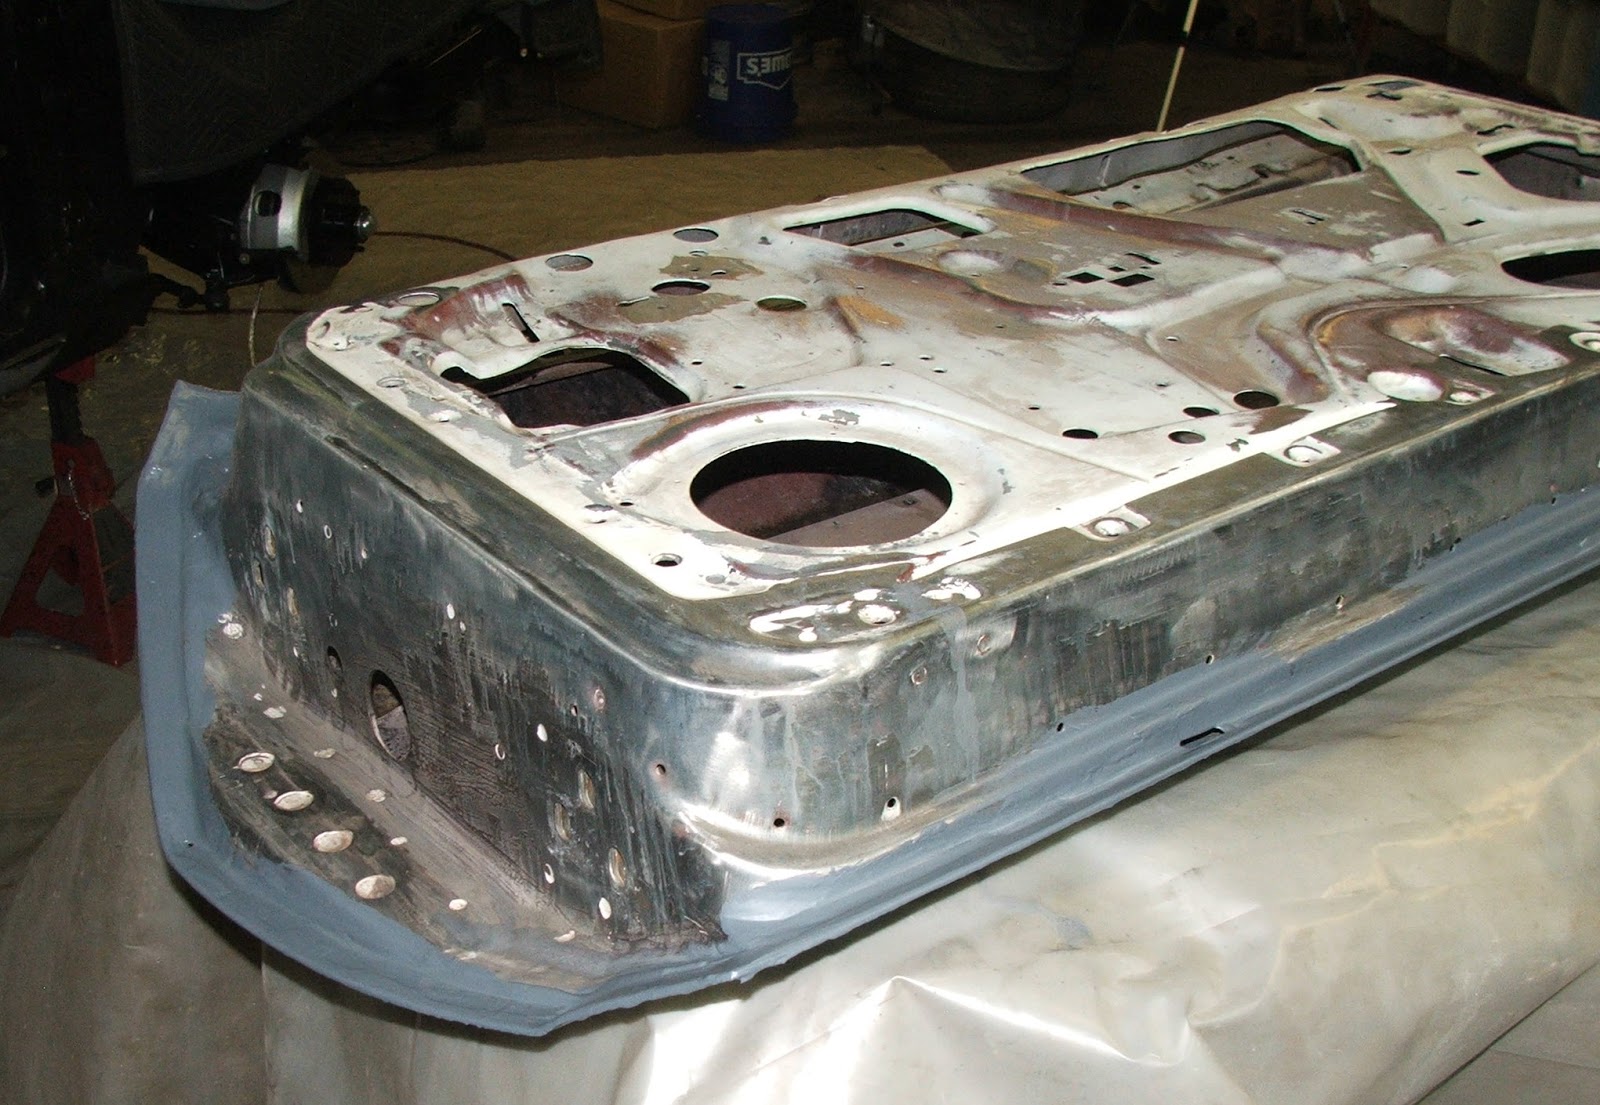 continued on PART 2..... Edited by TV 2M8O - 16-August-2017 at 12:47PM |
|
 TV 2M8O OUT JOE 1976 Gran Torino S&H season 2-4 Clone Project Blog: http://tv2m8o.blogspot.com/ |
|
|
|
|
TV 2M8O
Senior Member
Joined: 20-September-2006 Location: Southern Ohio Status: Offline Points: 2053 |
Post Options
Thanks(0)
Quote Reply
Posted: 16-August-2017 at 12:48PM |
|
**CLICK ON PICS TO ENLARGE AND CLICK AGAIN TO SUPERSIZE**
PART TWO...... My Ford hardware catalog also arrived and boy does it make a world of difference looking up the correct hardware to use reassembling your favorite FOMOCO!! A must have for doing it right... 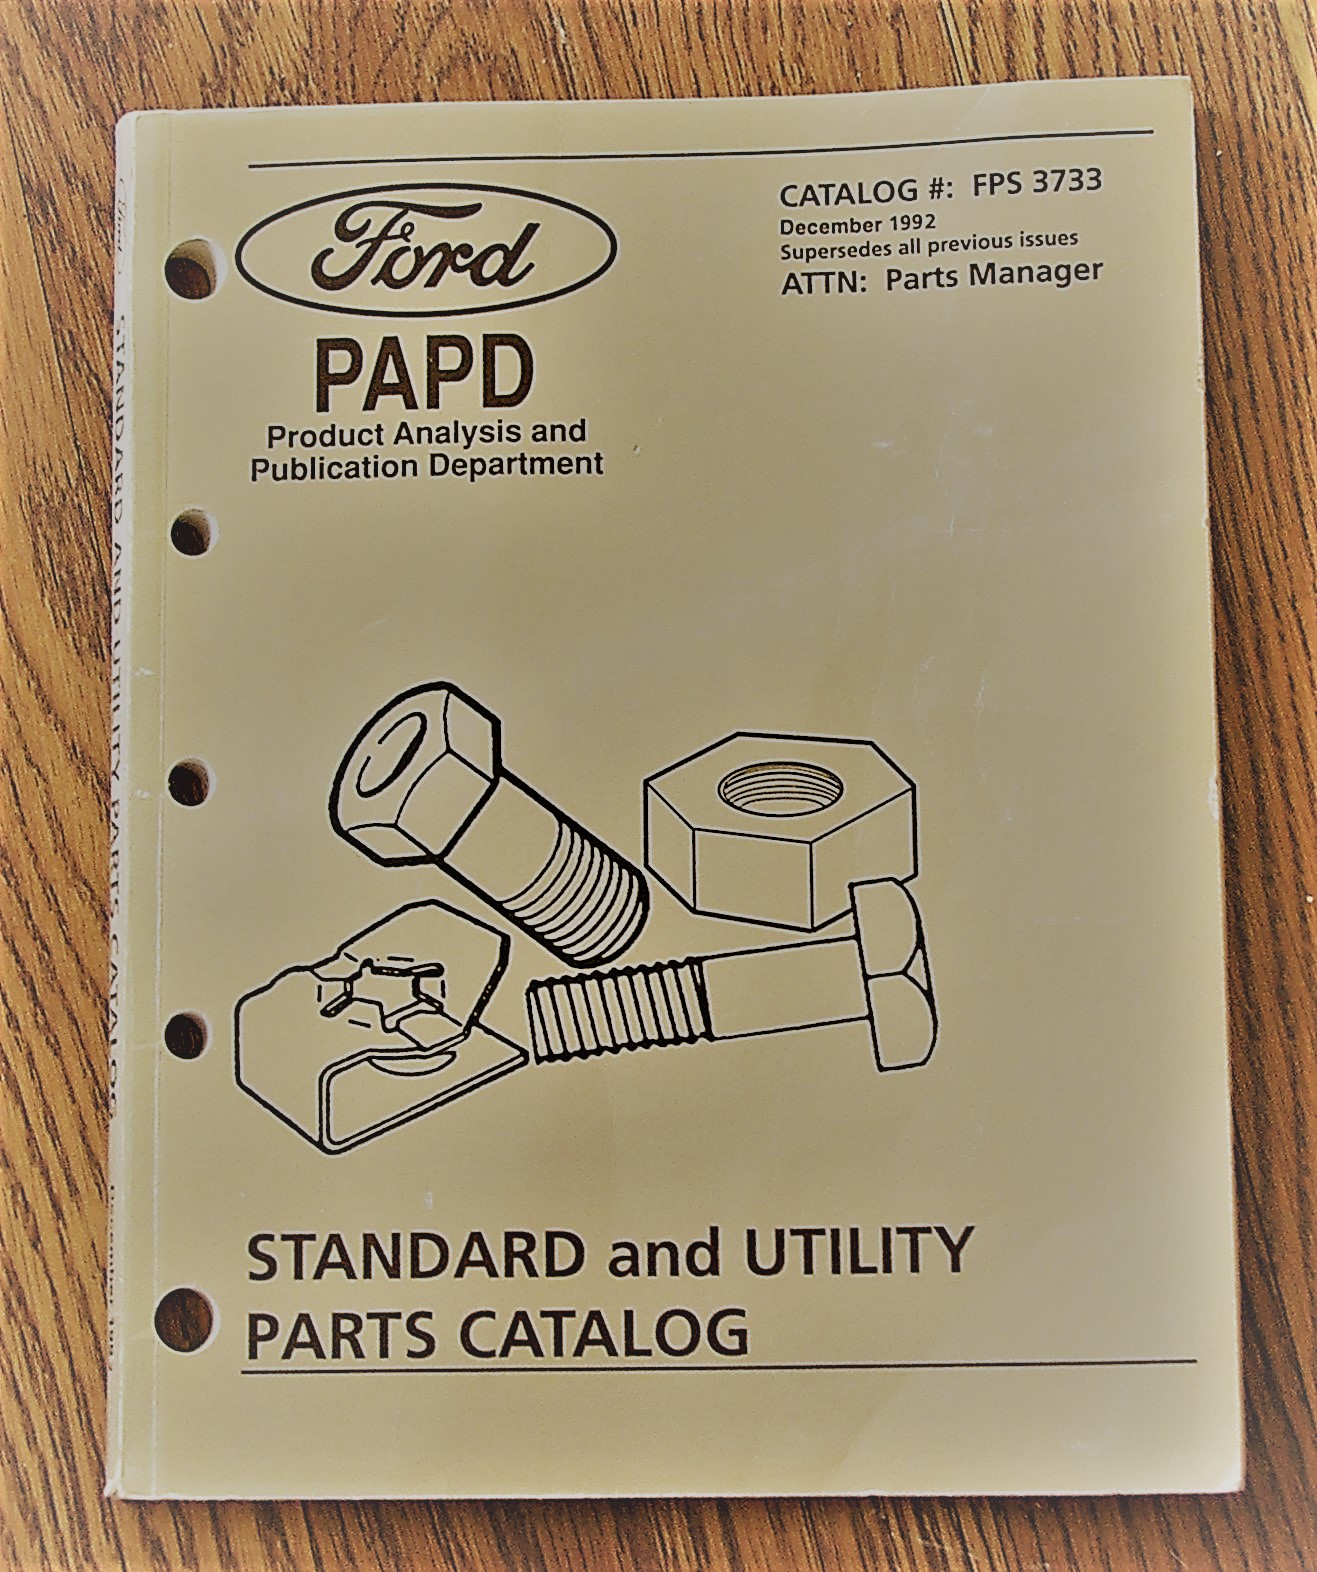 The following weekend, I pulled both front wheelhouses and the core support back off so I could easily access the 3G alternator and determine what modifications I needed to make to get it positioned correctly on the 460. Got the stock spacers shimmed or trimmed as necessary and need to have one more small spacer made to utilize all the factory brackets and lower swing arm without modifications.  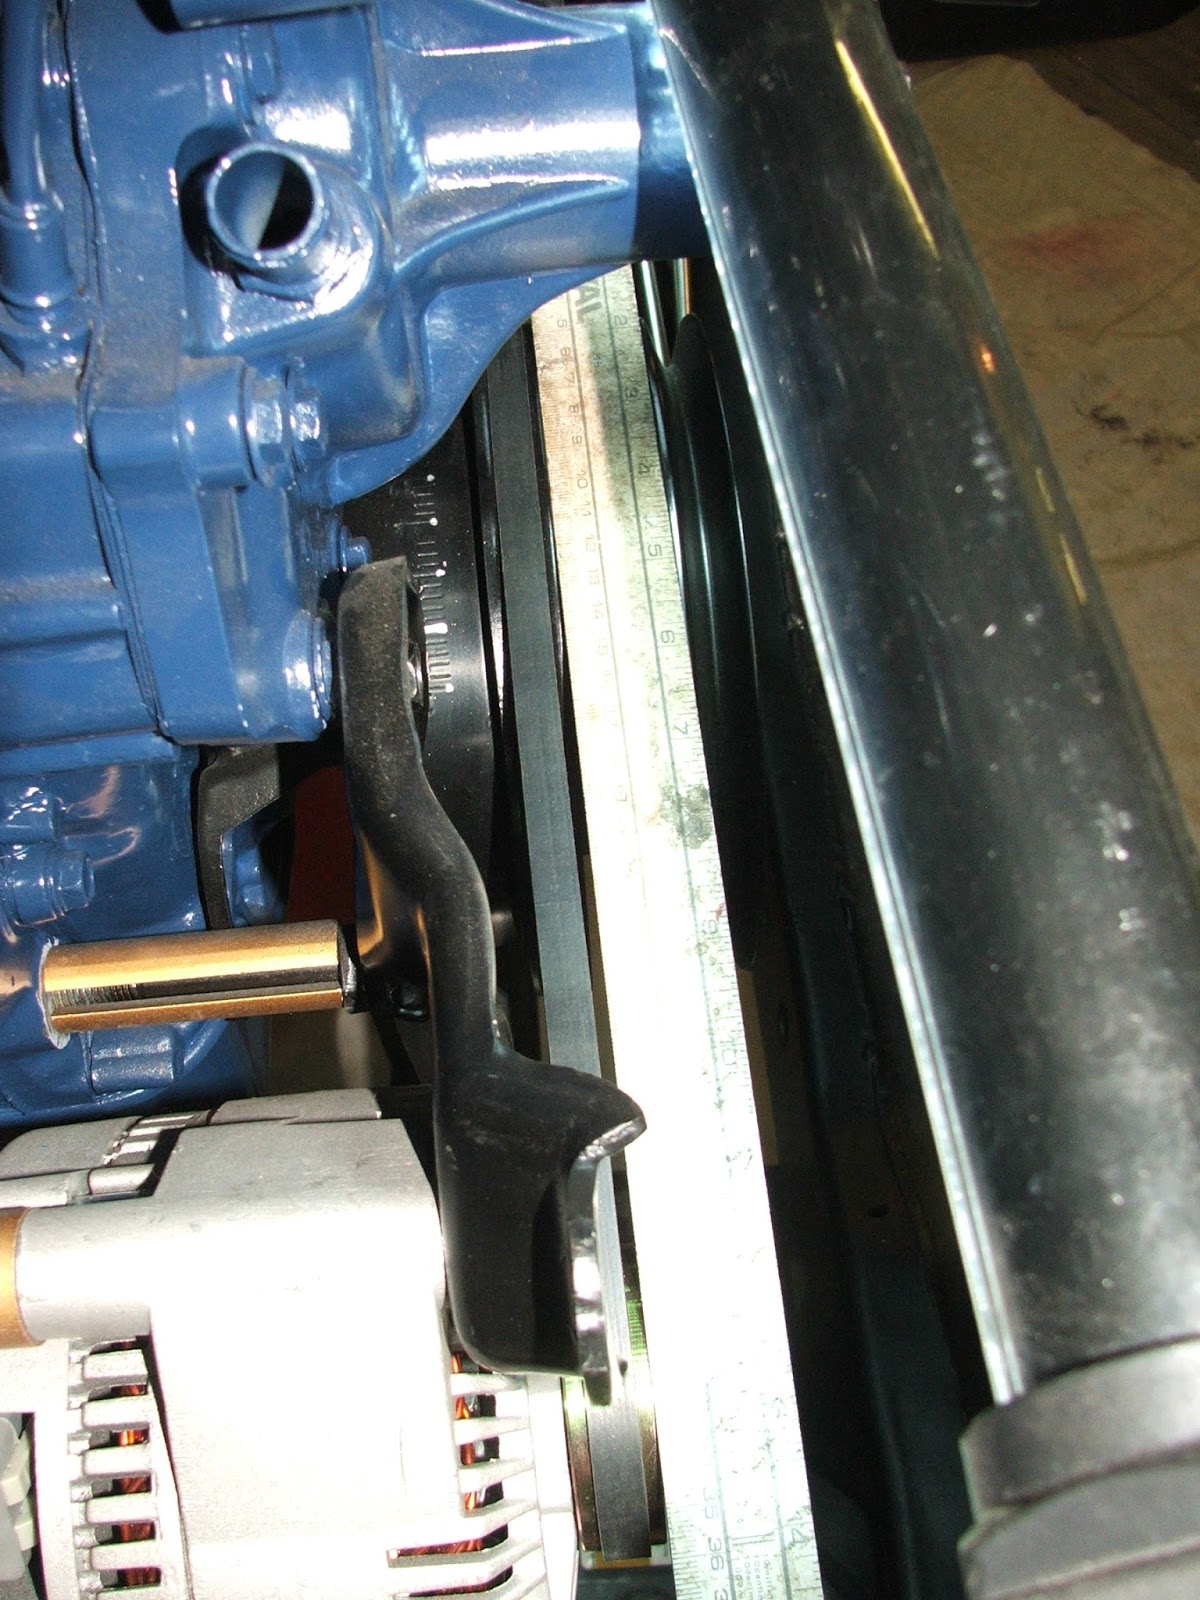 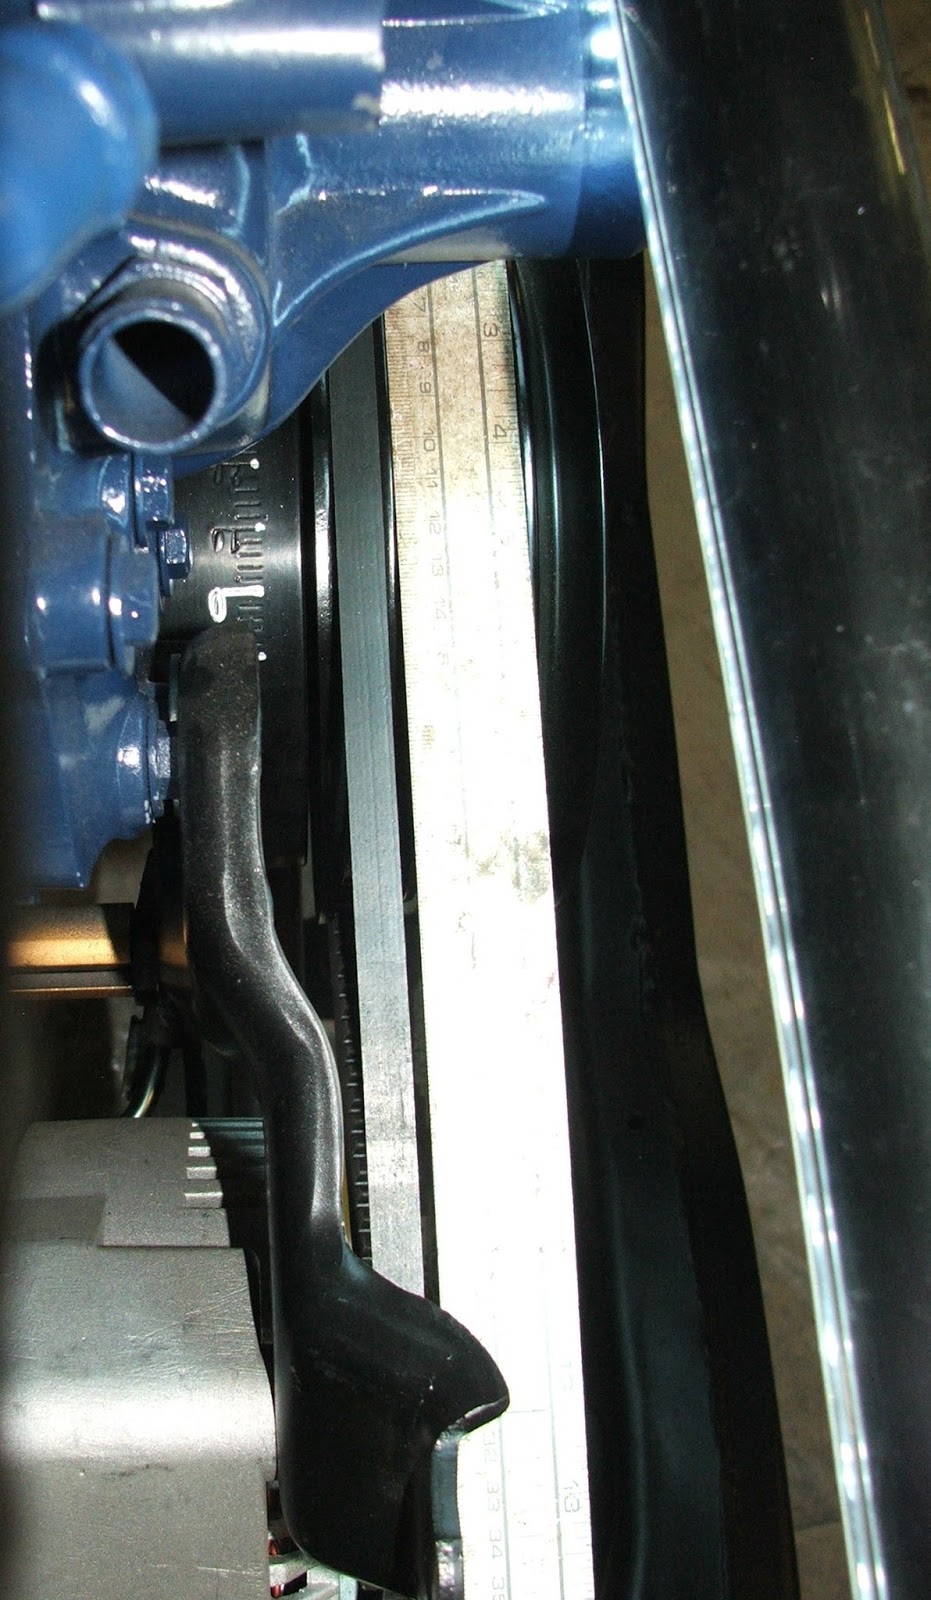 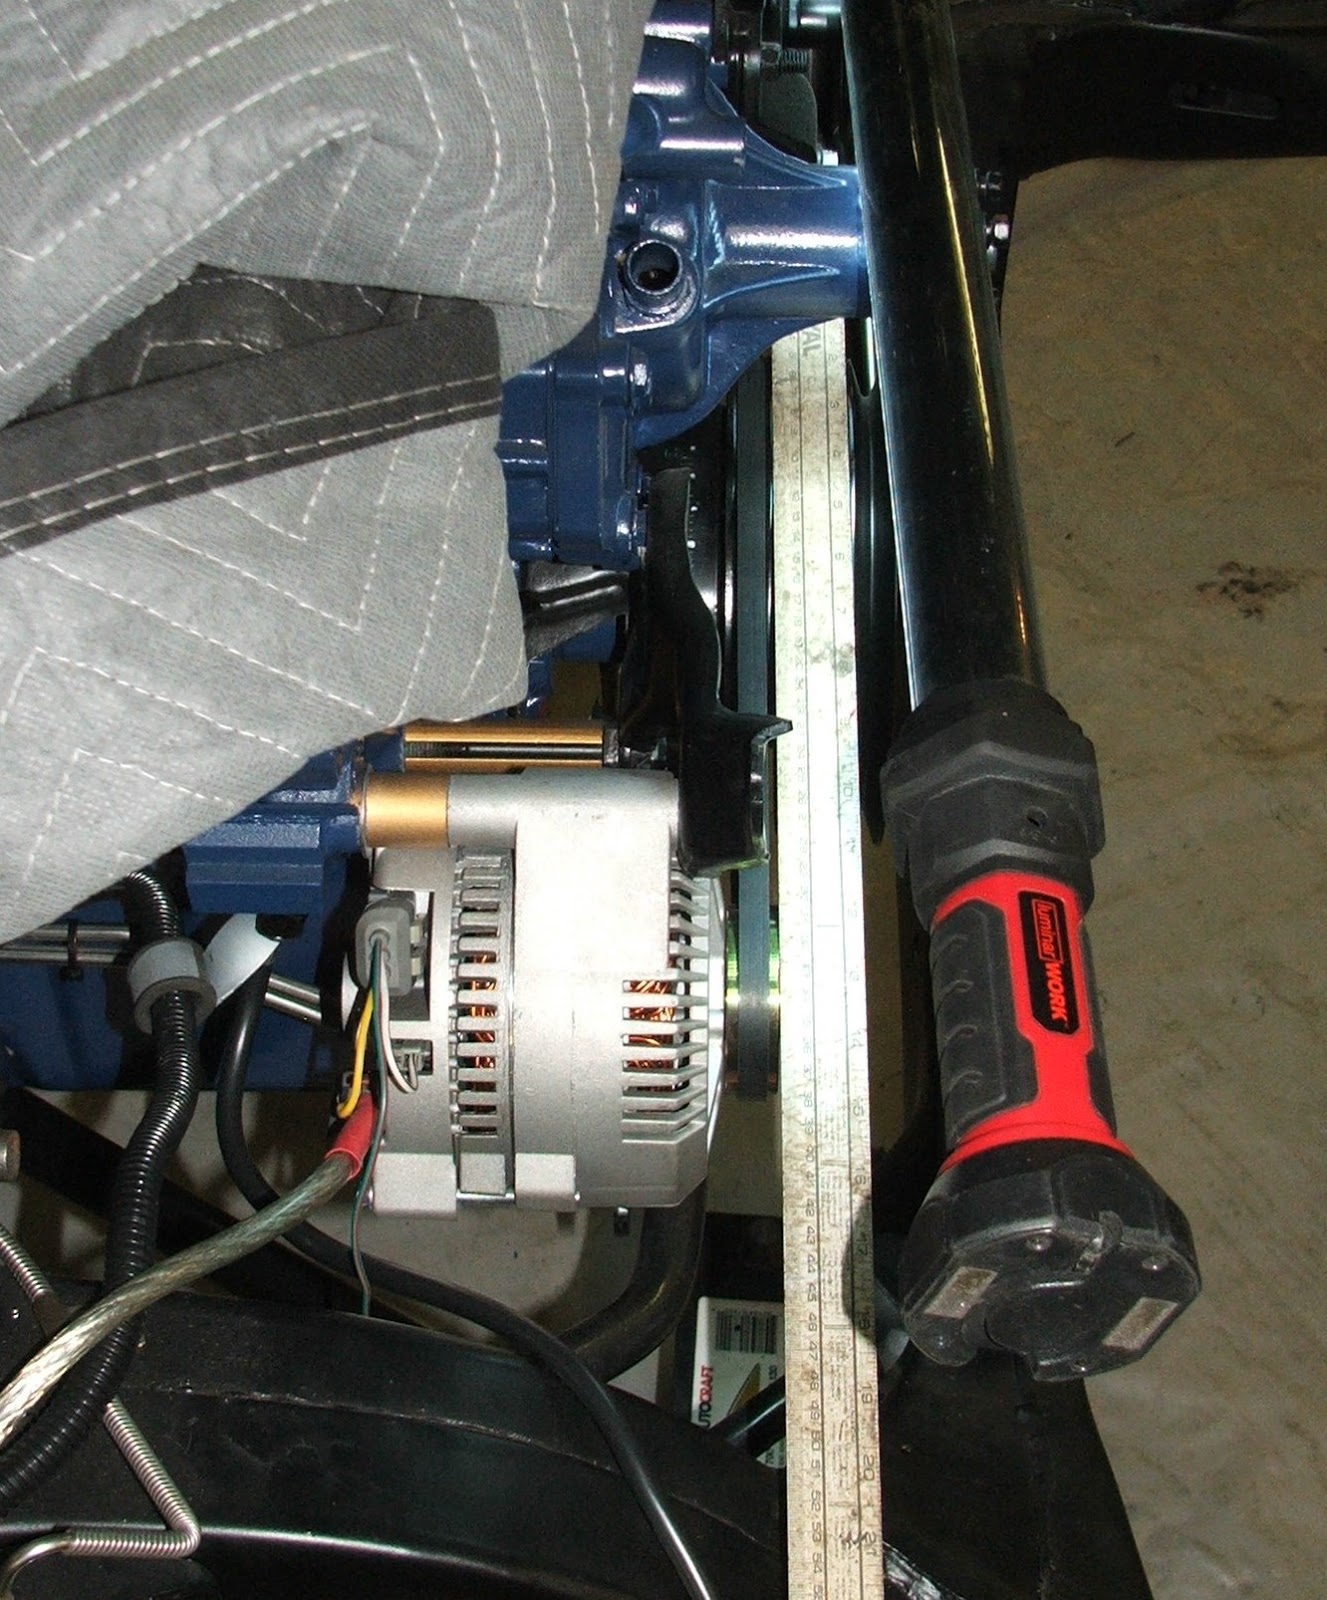  Also got a couple areas at the corners of the package tray ready to seam seal. Last weekend I bled the master cylinder...  finished fabricating the necessary spacers for the 3G alternator conversion and got it mocked up... 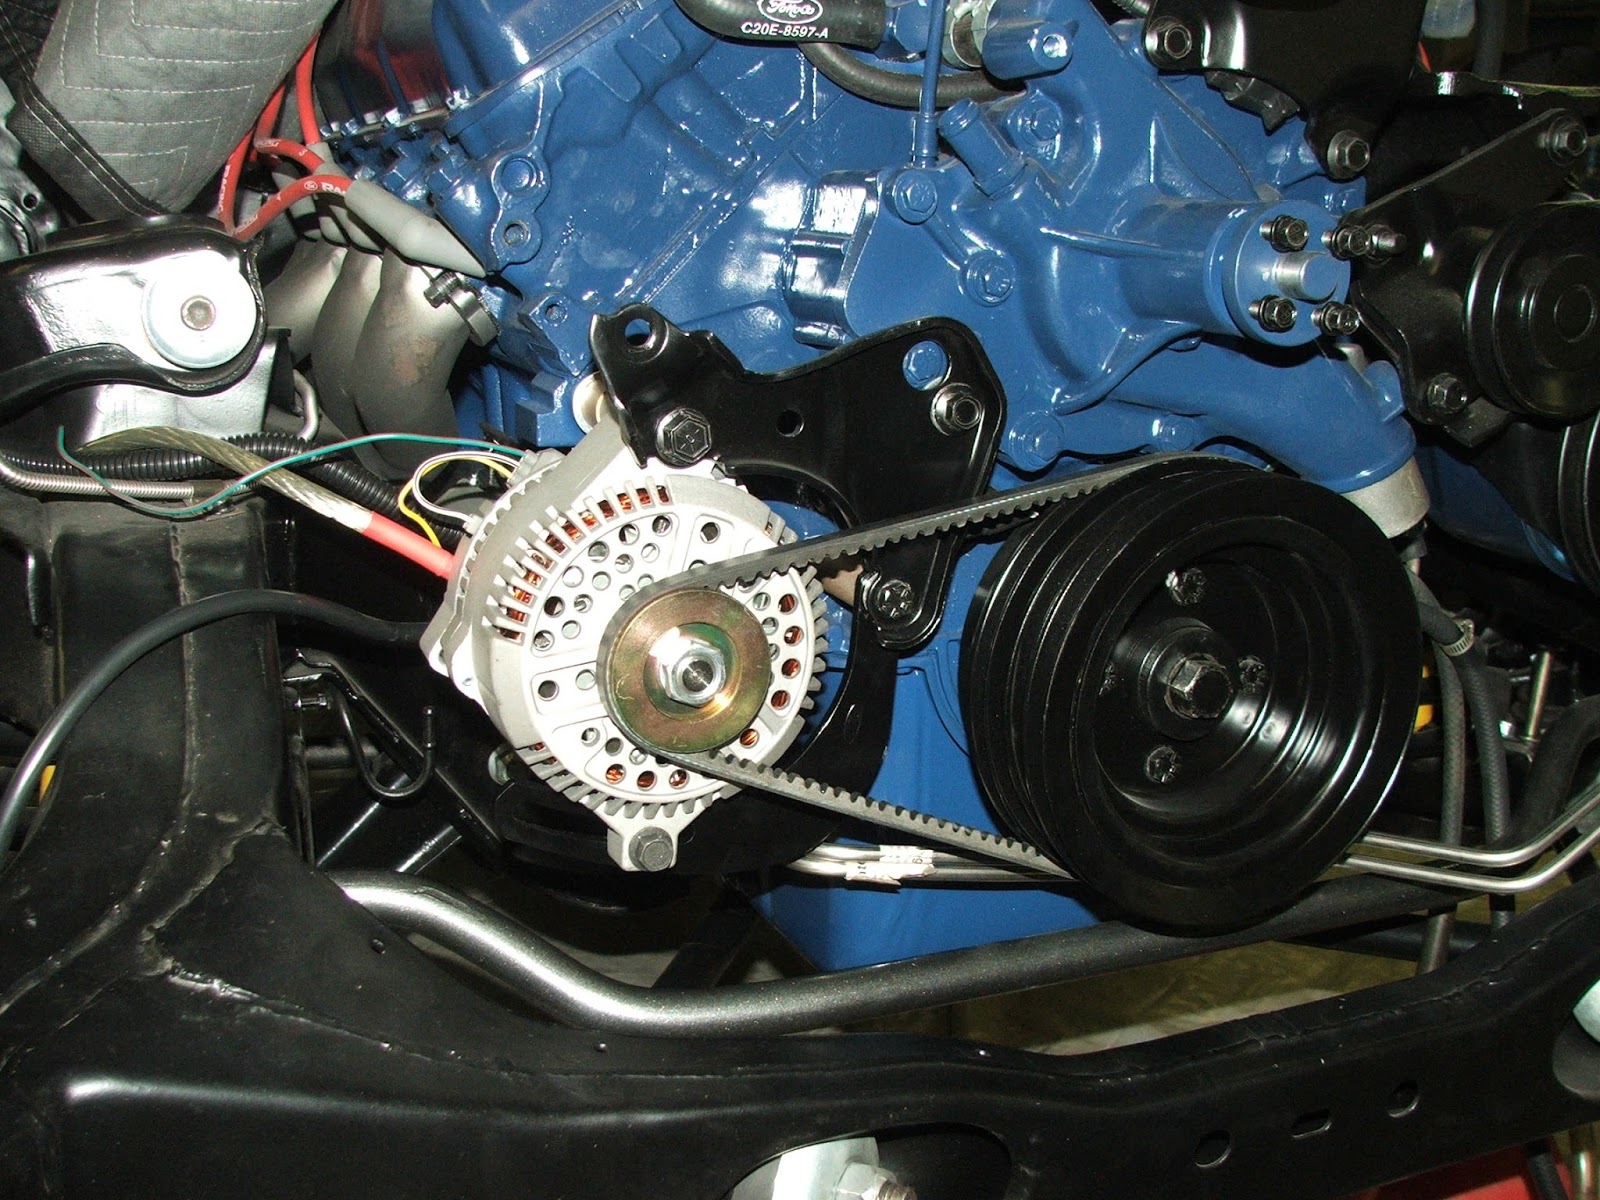  hit the tail light fillers and the windshield supports with a coat of Plastic Dip...   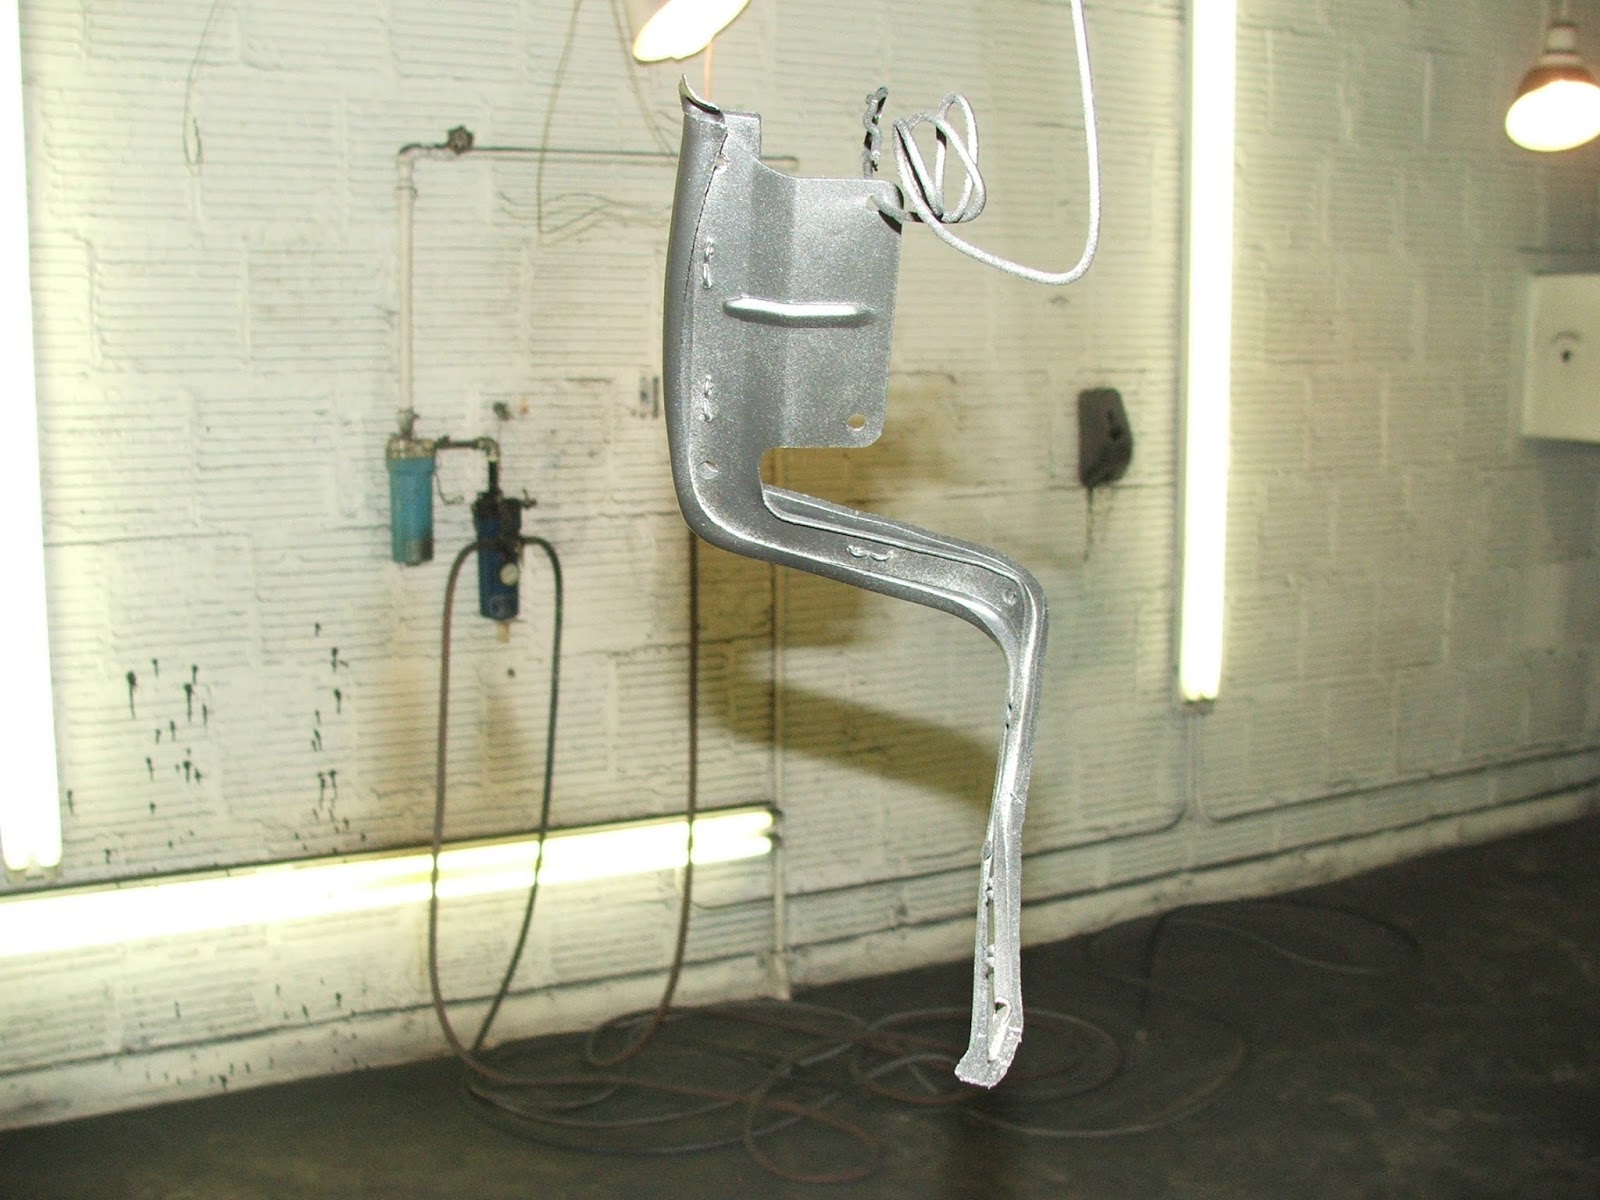 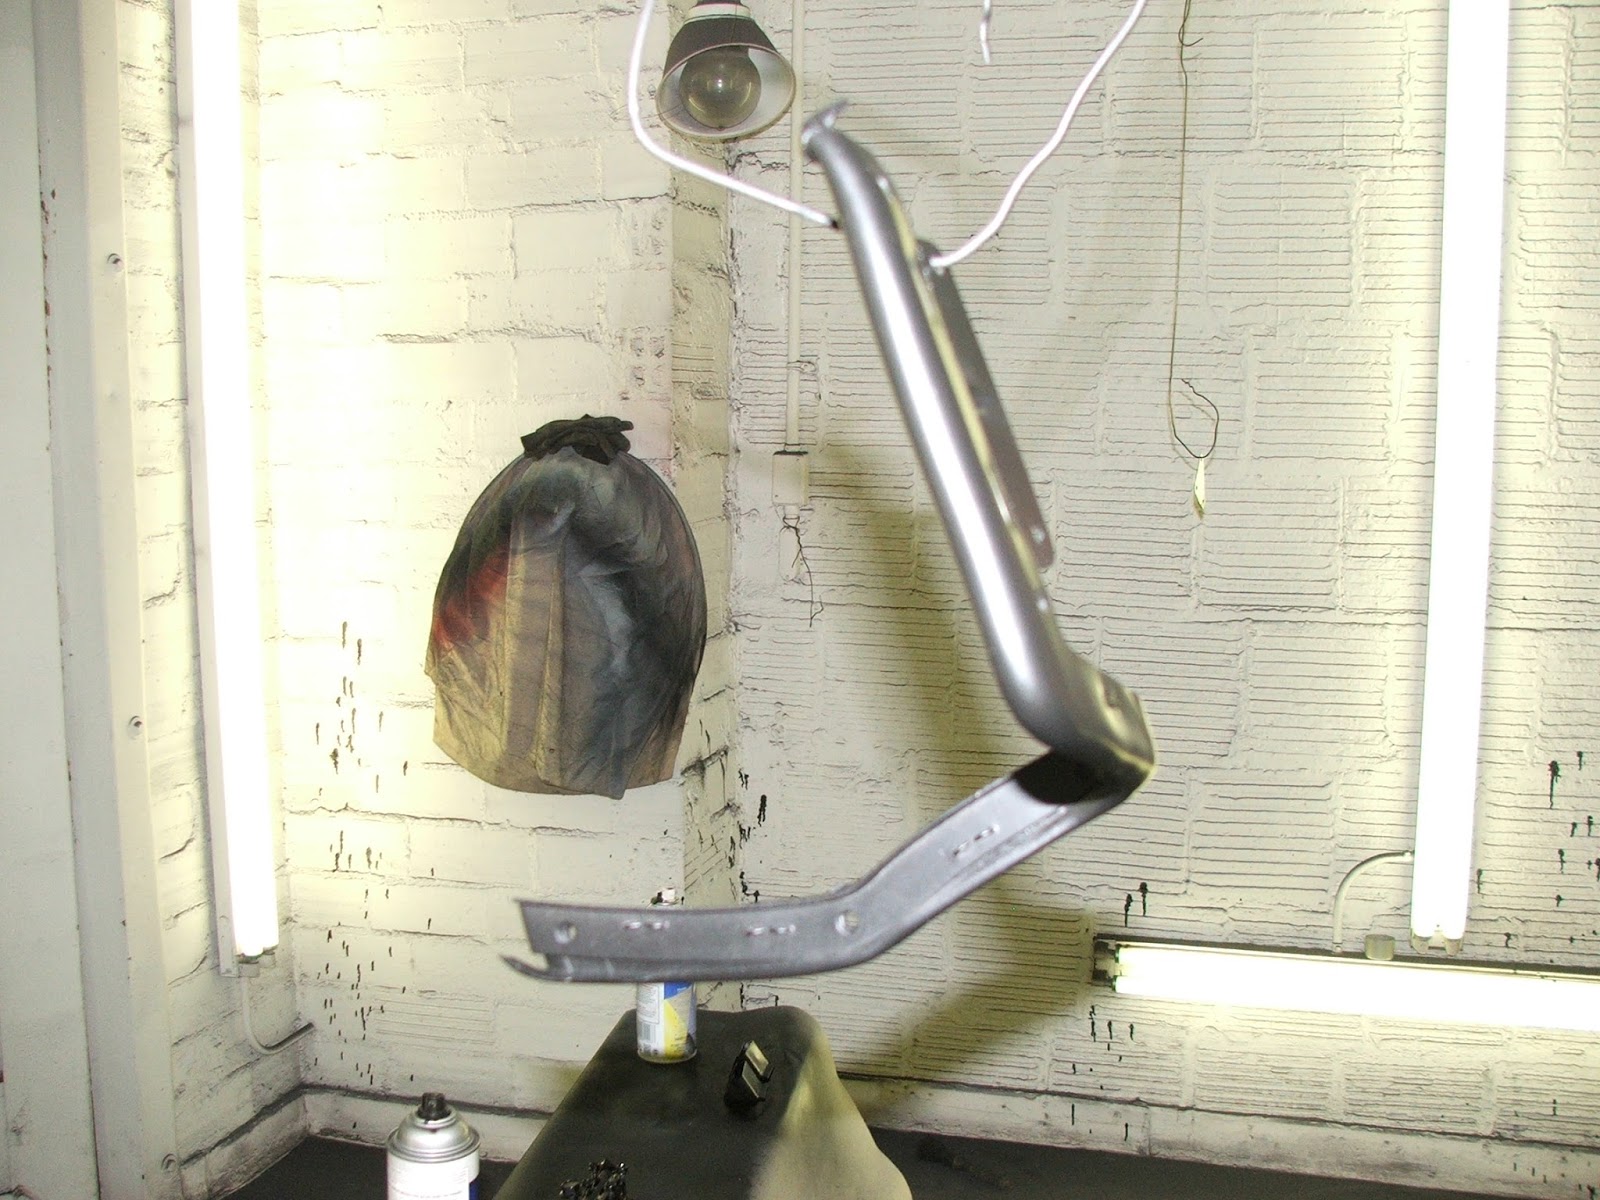 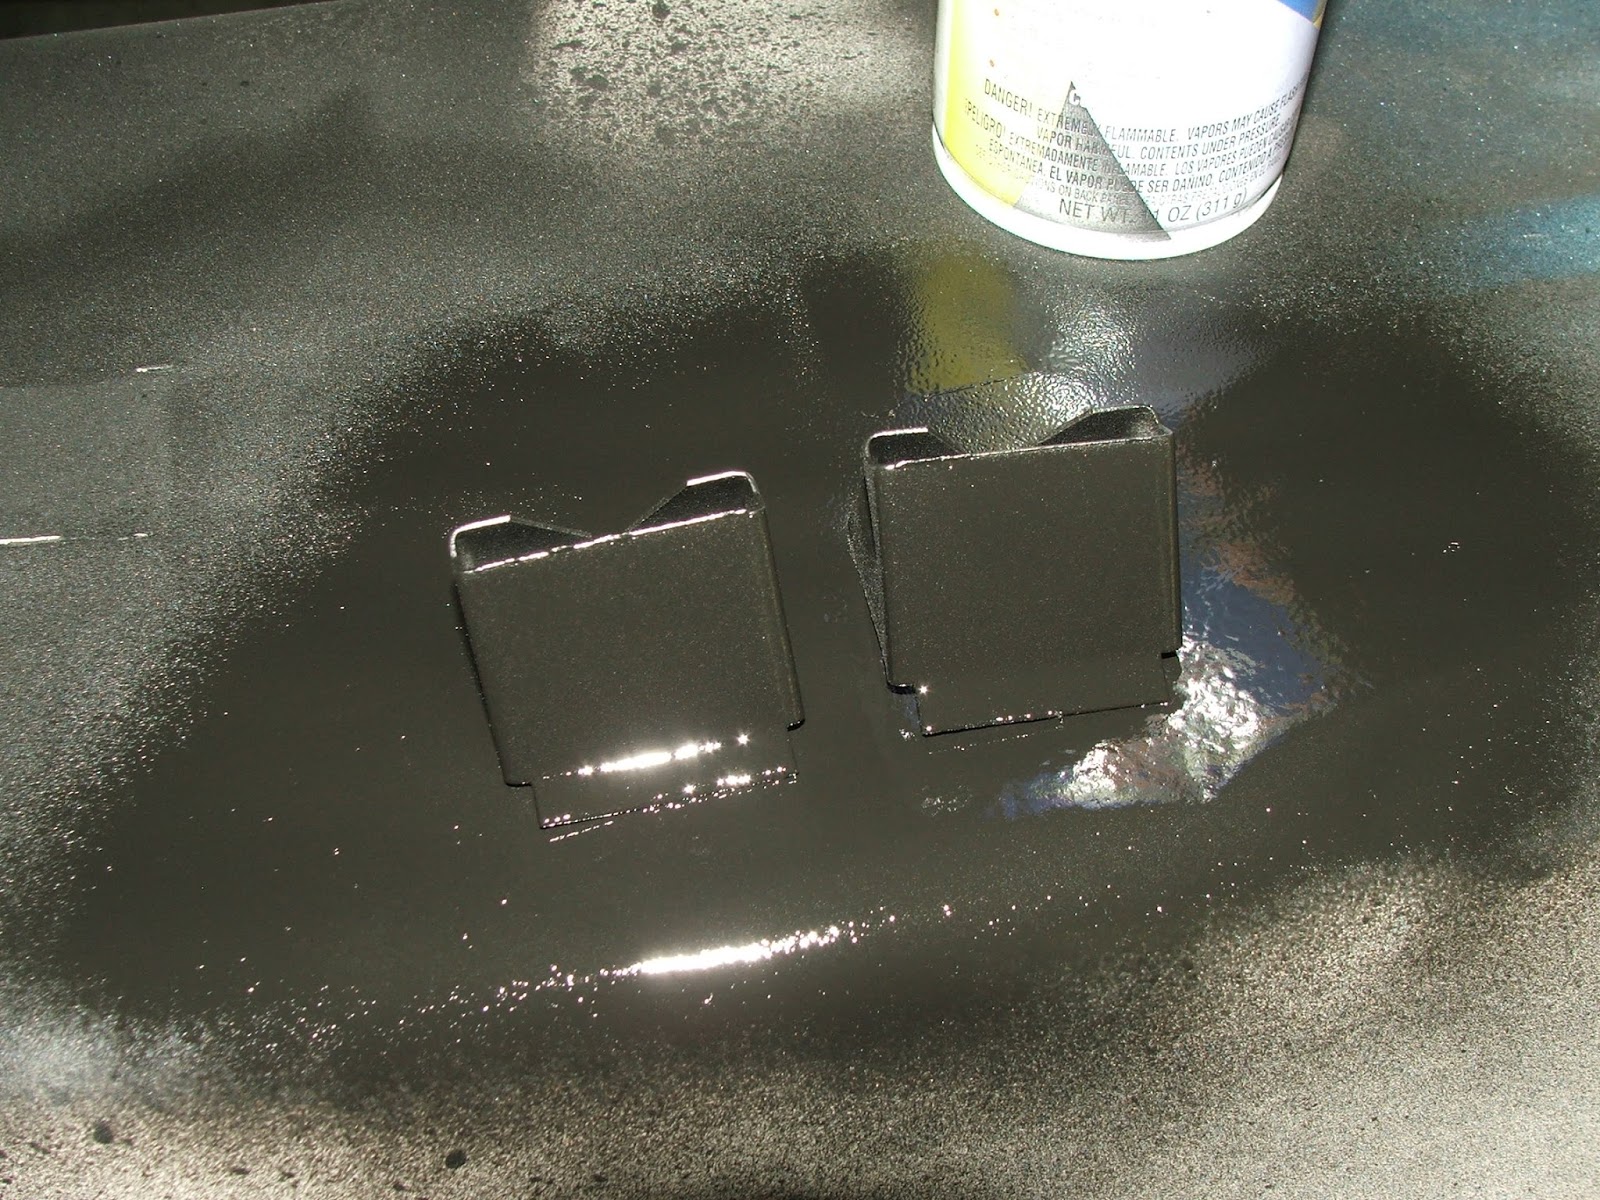 and made a bracket to mount the locking hood release. The drill bit I needed to use to drill the bracket was broken so I pulled out the ole Drill Doctor and cut a new tip on it and was good as new. Everyone should own a drill doctor if you do much drilling!!  Sunday, I got the front rims dropped off to Irwin Polishing to have them buffed out and made all brite and shiny again! Stay tuned for further updates... ZEBRA 3 OUT
Edited by TV 2M8O - 16-August-2017 at 12:52PM |
|
|
TV 2M8O OUT JOE 1976 Gran Torino S&H season 2-4 Clone Project Blog: http://tv2m8o.blogspot.com/ |
|
|
|
|
californiajohnny
Moderator Group 

Joined: 05-October-2013 Location: winlock, wa Status: Offline Points: 14609 |
Post Options
Thanks(0)
Quote Reply
Posted: 16-August-2017 at 4:28PM |
 gettin' there joe!! plastidip on the tail light fillers is a good idea! i just cleaned mine with lacquer thinner gettin' there joe!! plastidip on the tail light fillers is a good idea! i just cleaned mine with lacquer thinner |
|
|
JOHN
74 GRAN TORINO S&H CLONE 74 VETTE CUSTOM 90 S10 BLAZER 4X4 LIFTED 77 CELICA CUSTOM 75 V8 MONZA SUPERCHARGED 79 COURIER VERT. SLAMMED 75 VEGA V6 5 SPD 70 CHEV C10 P/U 68 MUSTANG FB CONVERSION |
|
|
|
|
TV 2M8O
Senior Member
Joined: 20-September-2006 Location: Southern Ohio Status: Offline Points: 2053 |
Post Options
Thanks(0)
Quote Reply
Posted: 20-August-2017 at 7:55AM |
|
**CLICK ON PICS TO ENLARGE AND CLICK AGAIN TO SUPERSIZE**
More little stuff taken care of... got the center brace, hood latch and siren brackets installed onto the core support... 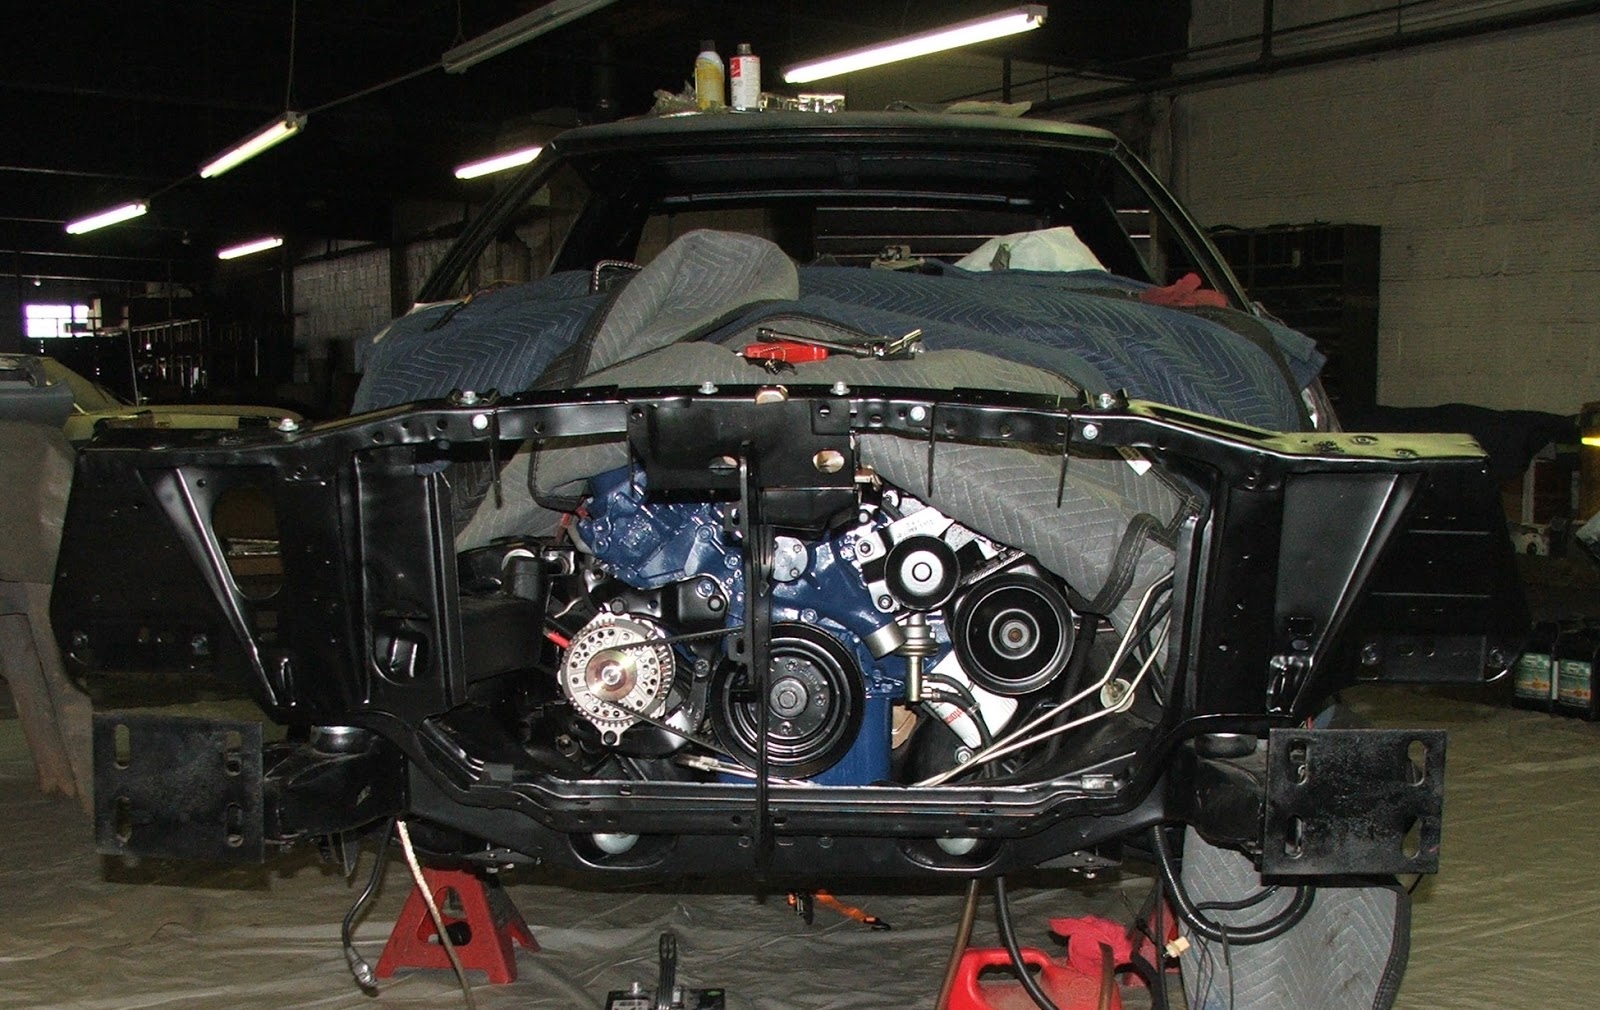  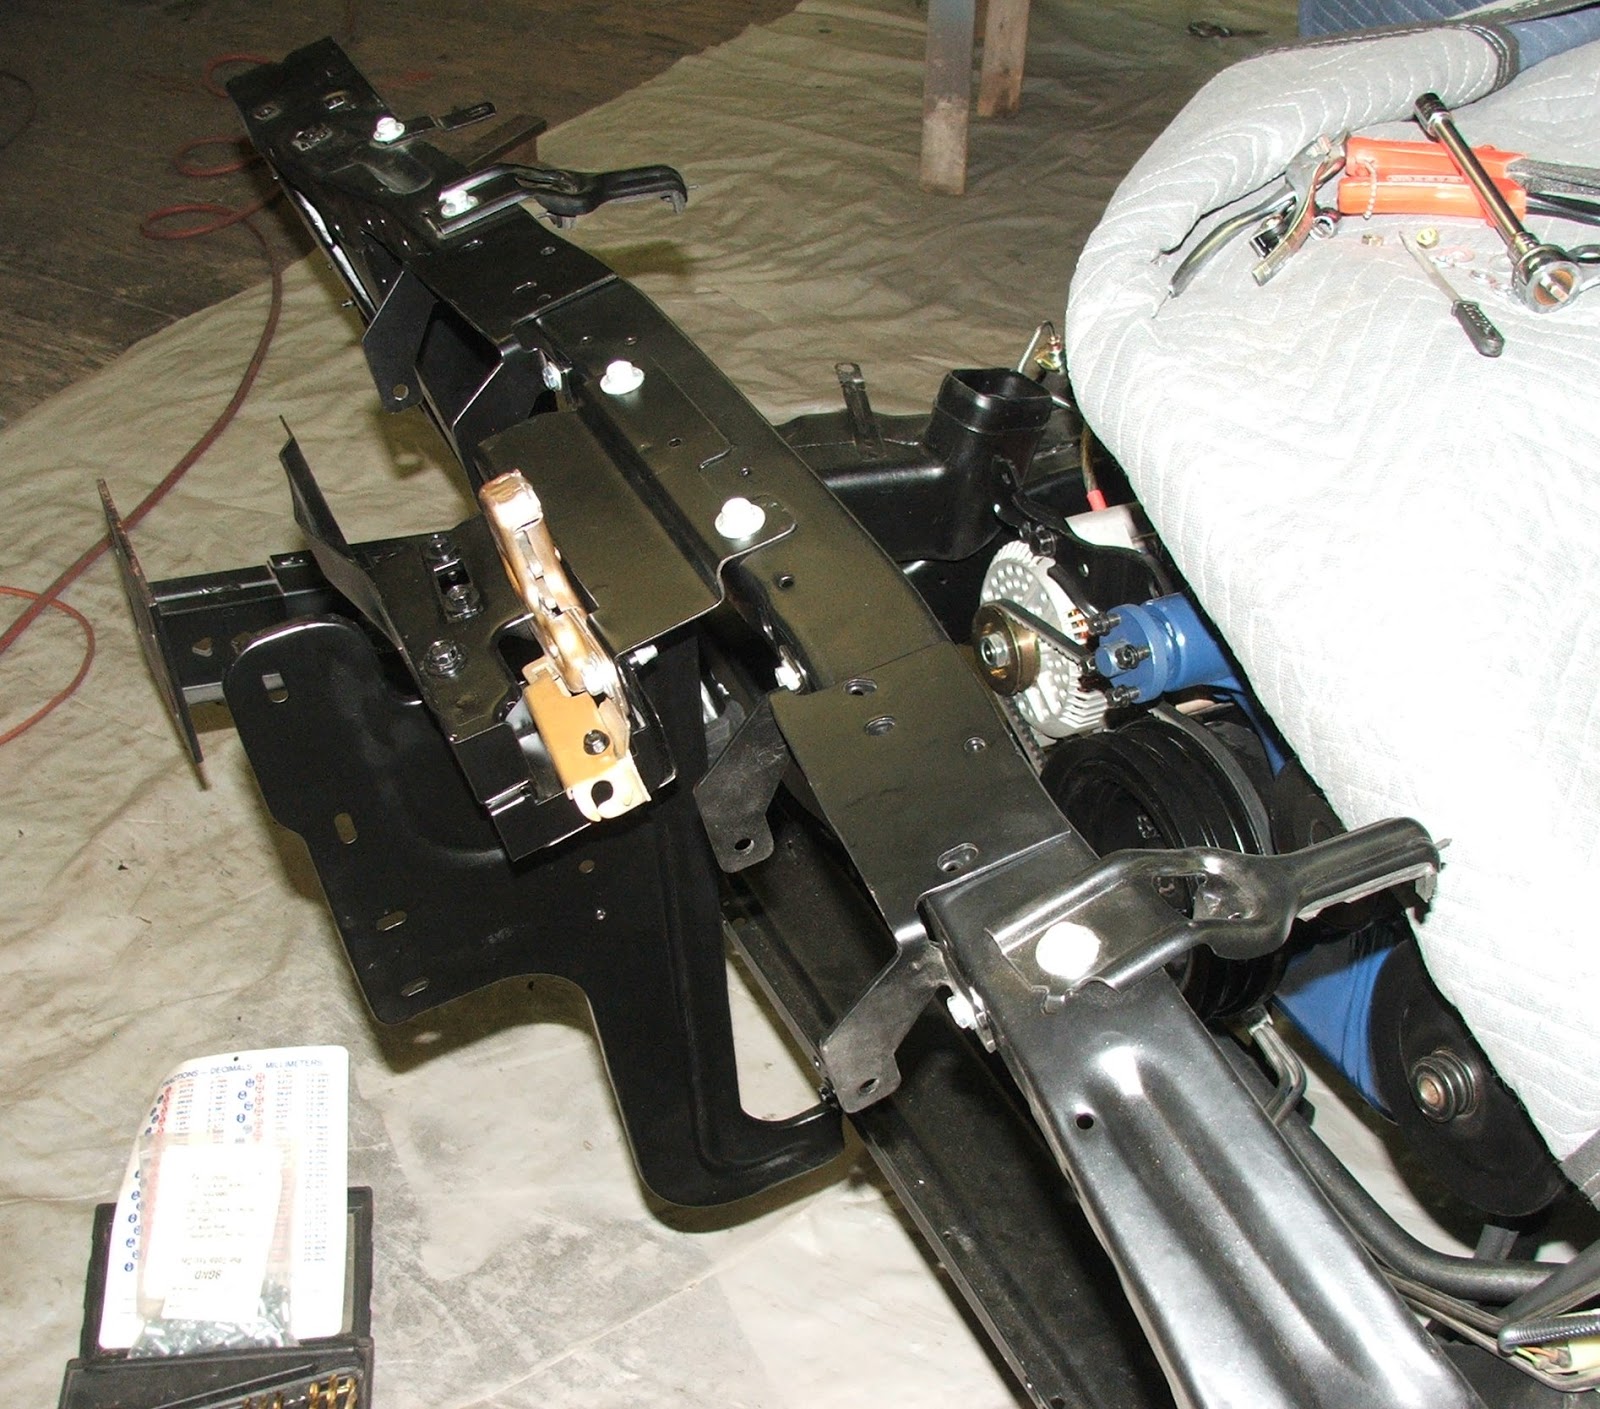 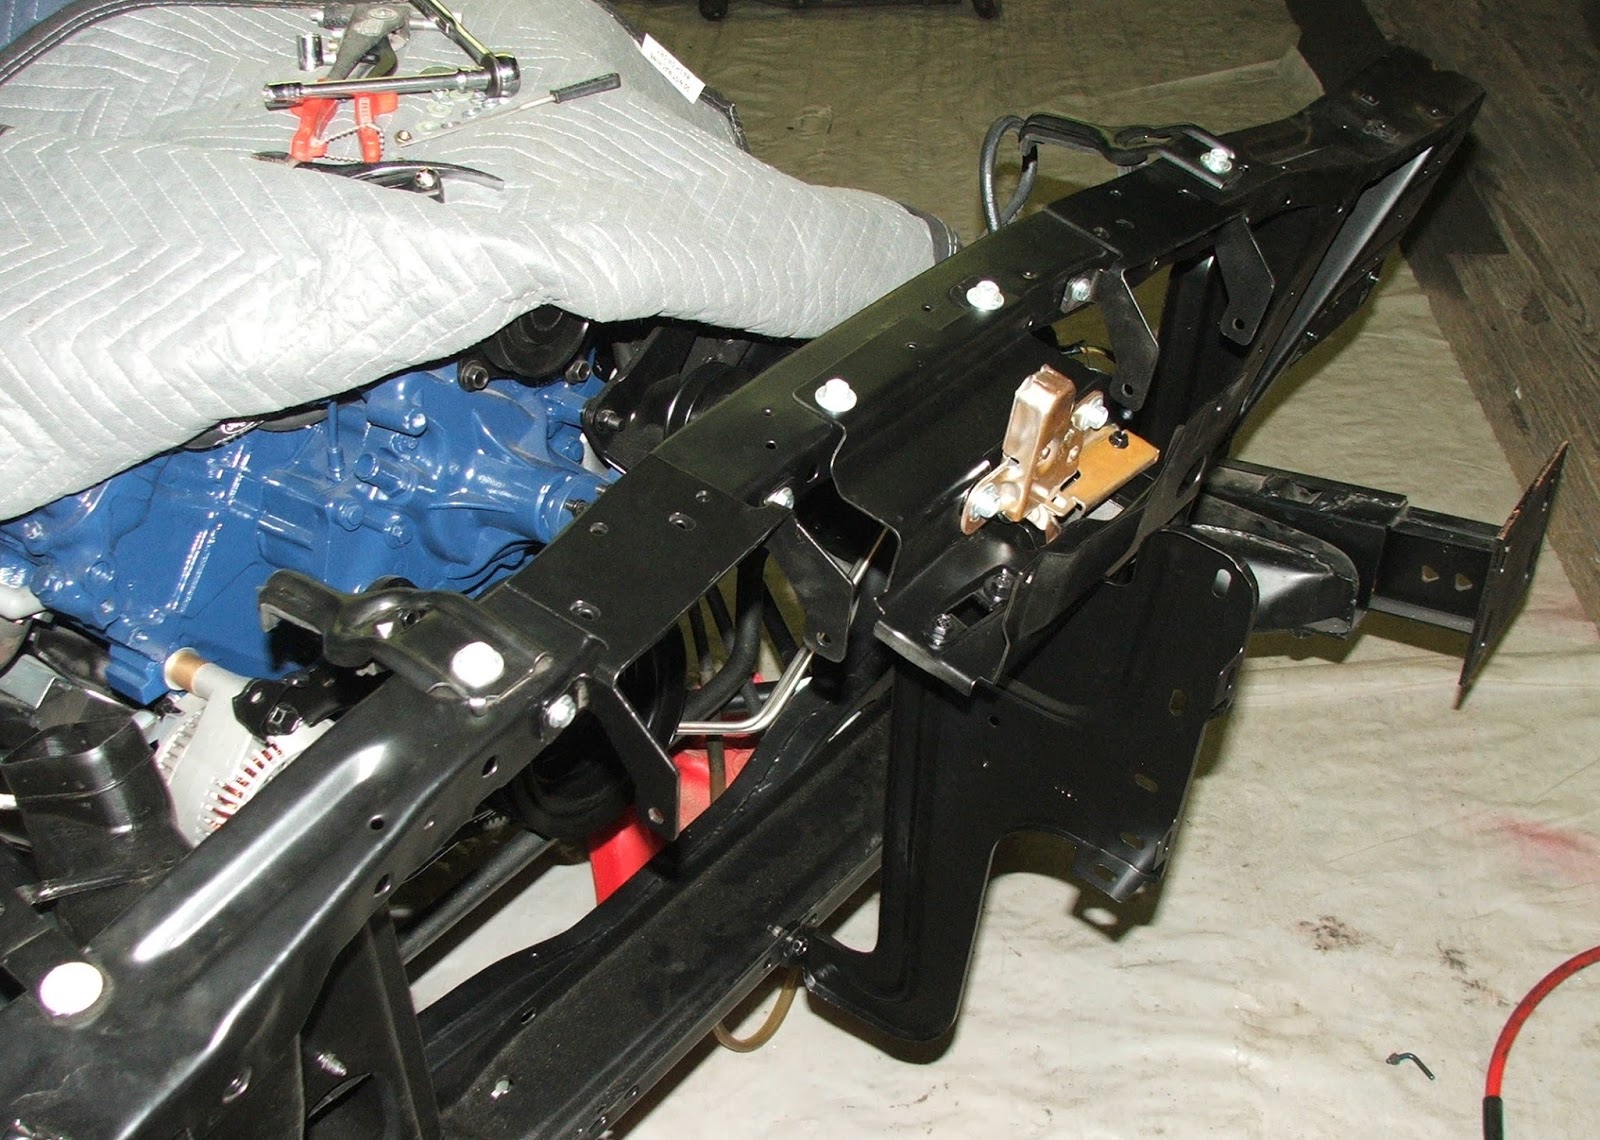 the jumper installed between the distribution block and the starter solenoid (sadly the seller didn't read my full message so I'll have to change the heat shrink to black)...  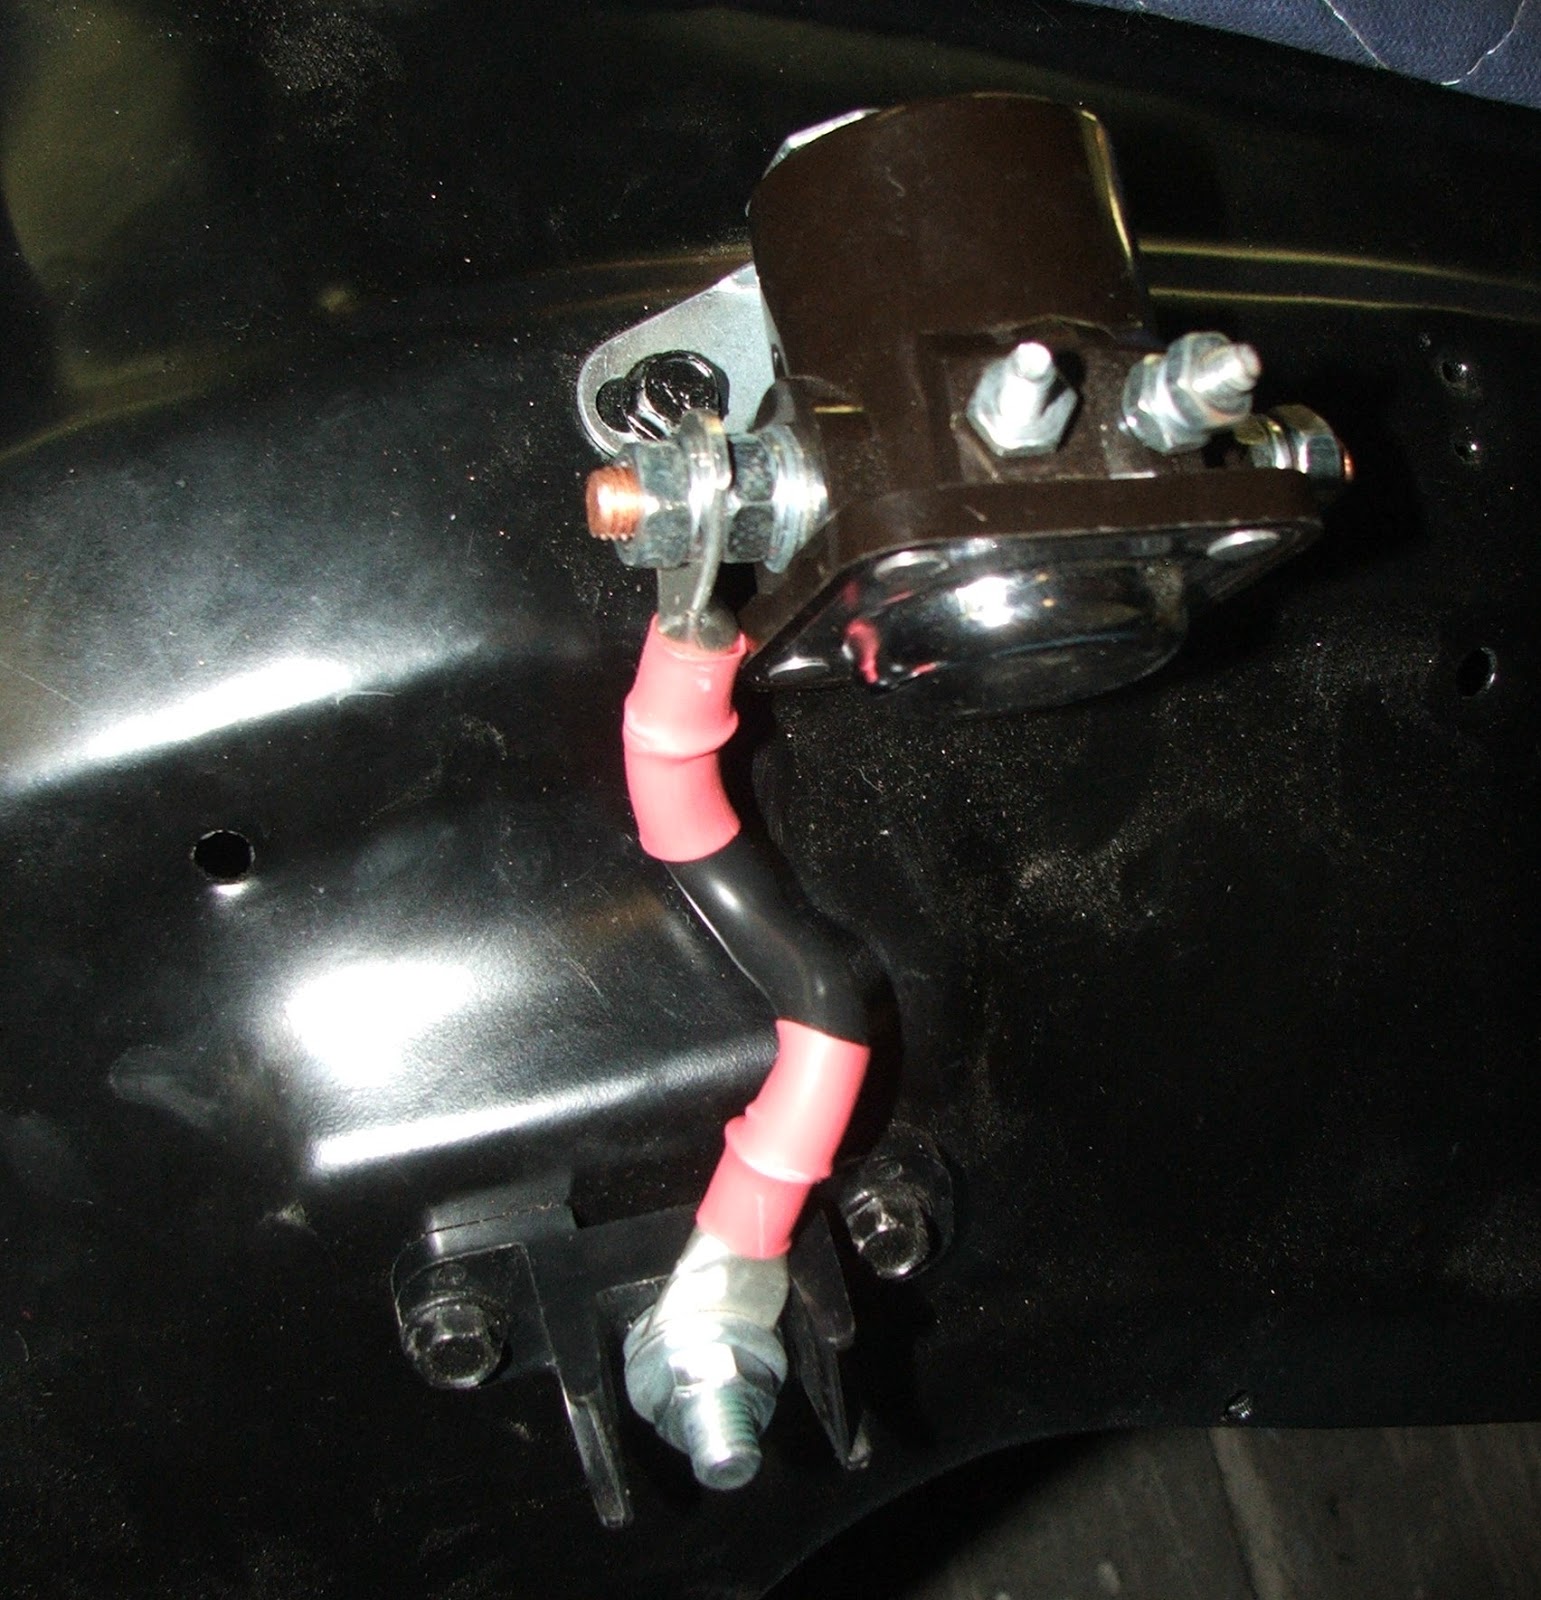 removed the tail light fillers and the windshield stops out of the spray booth...  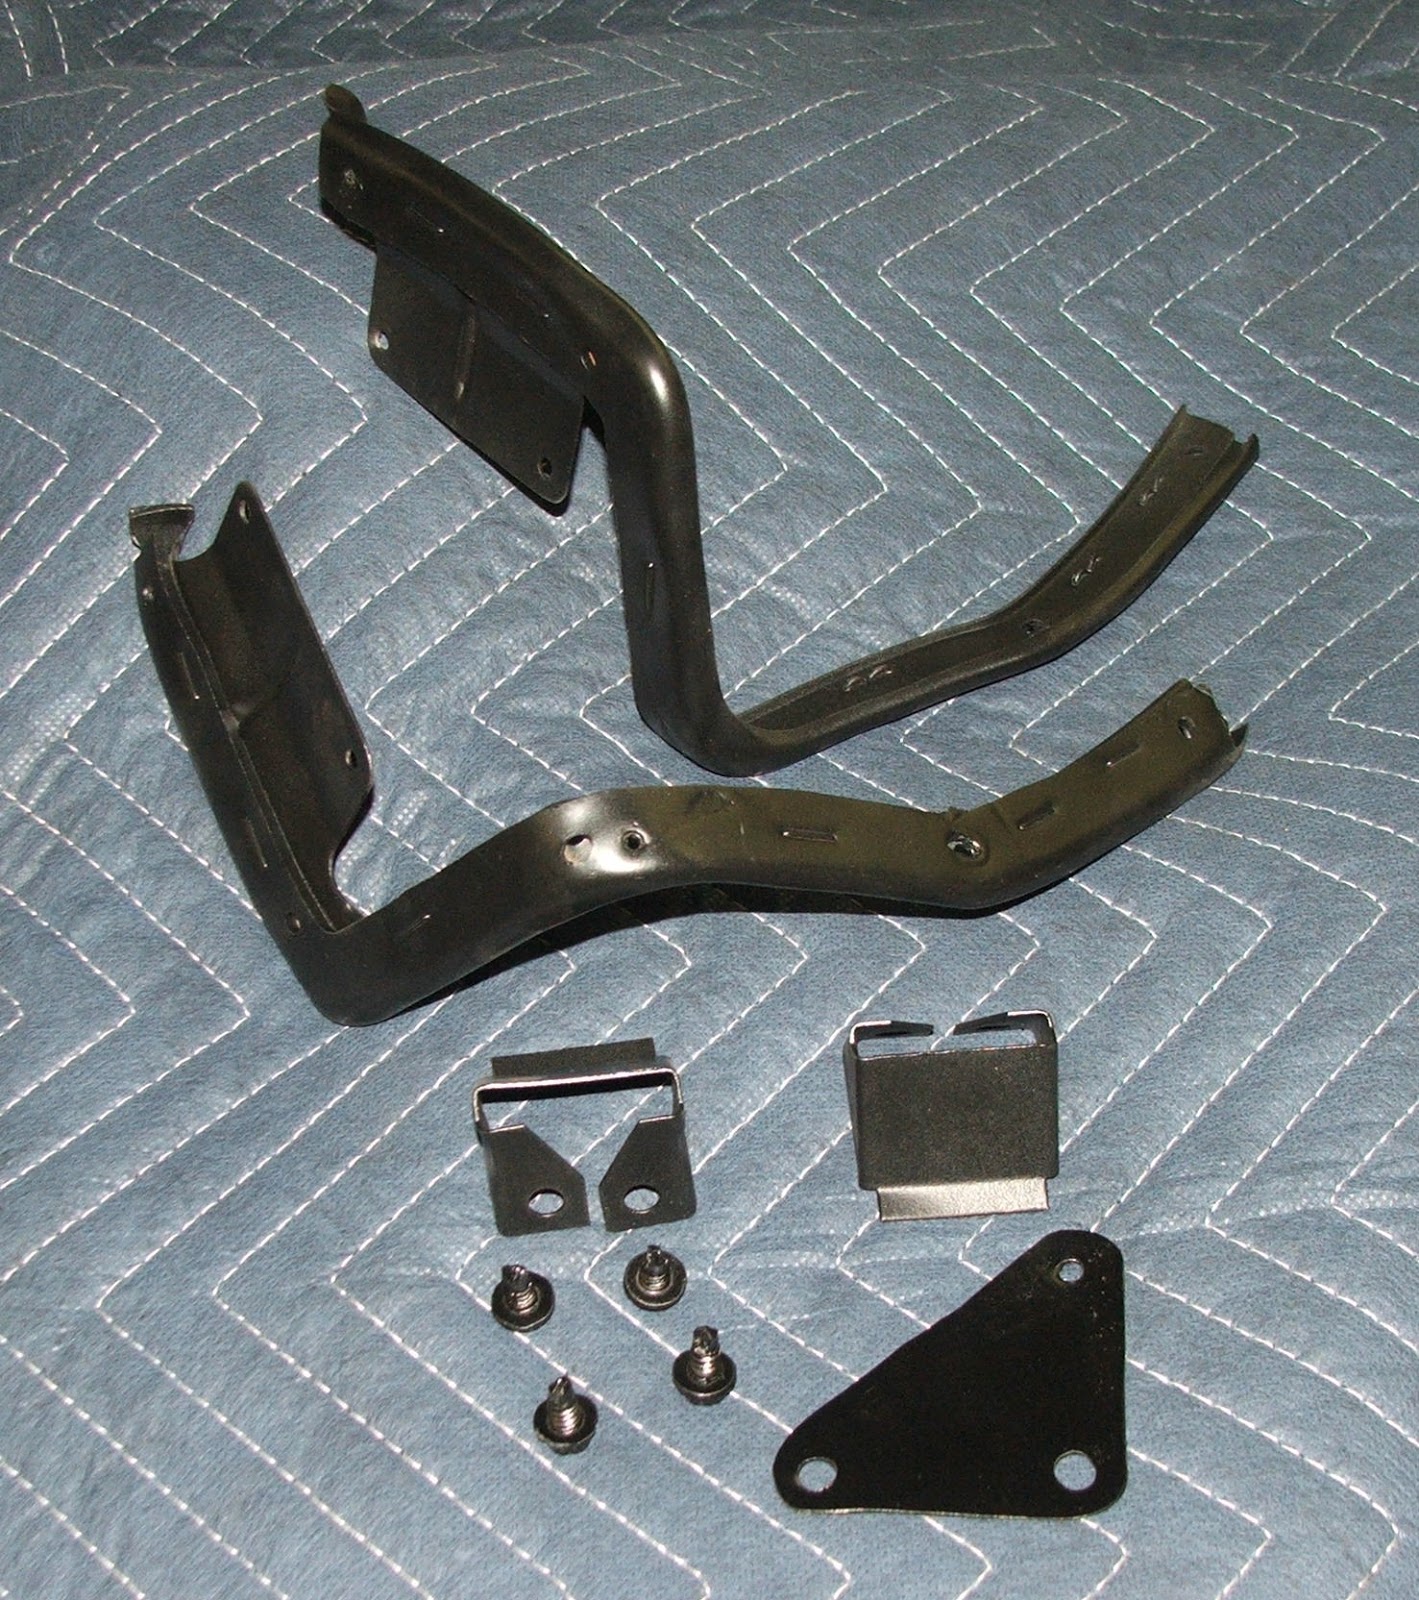 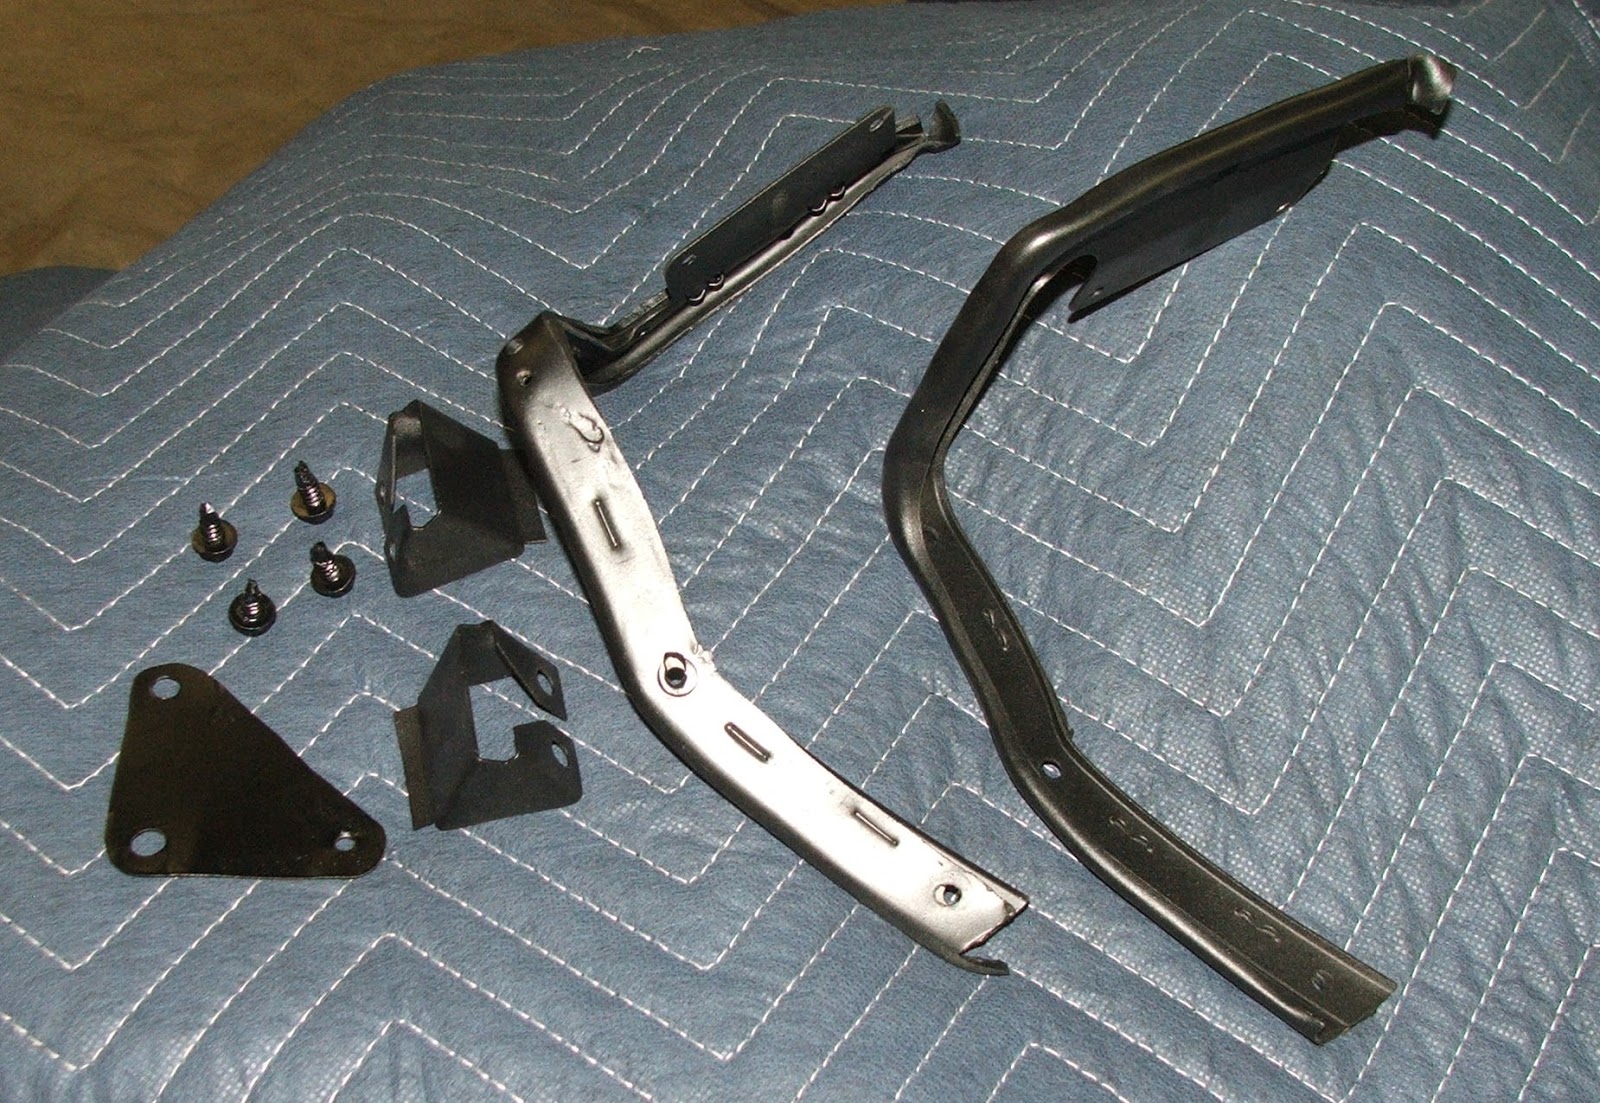 installed the locking hood release... 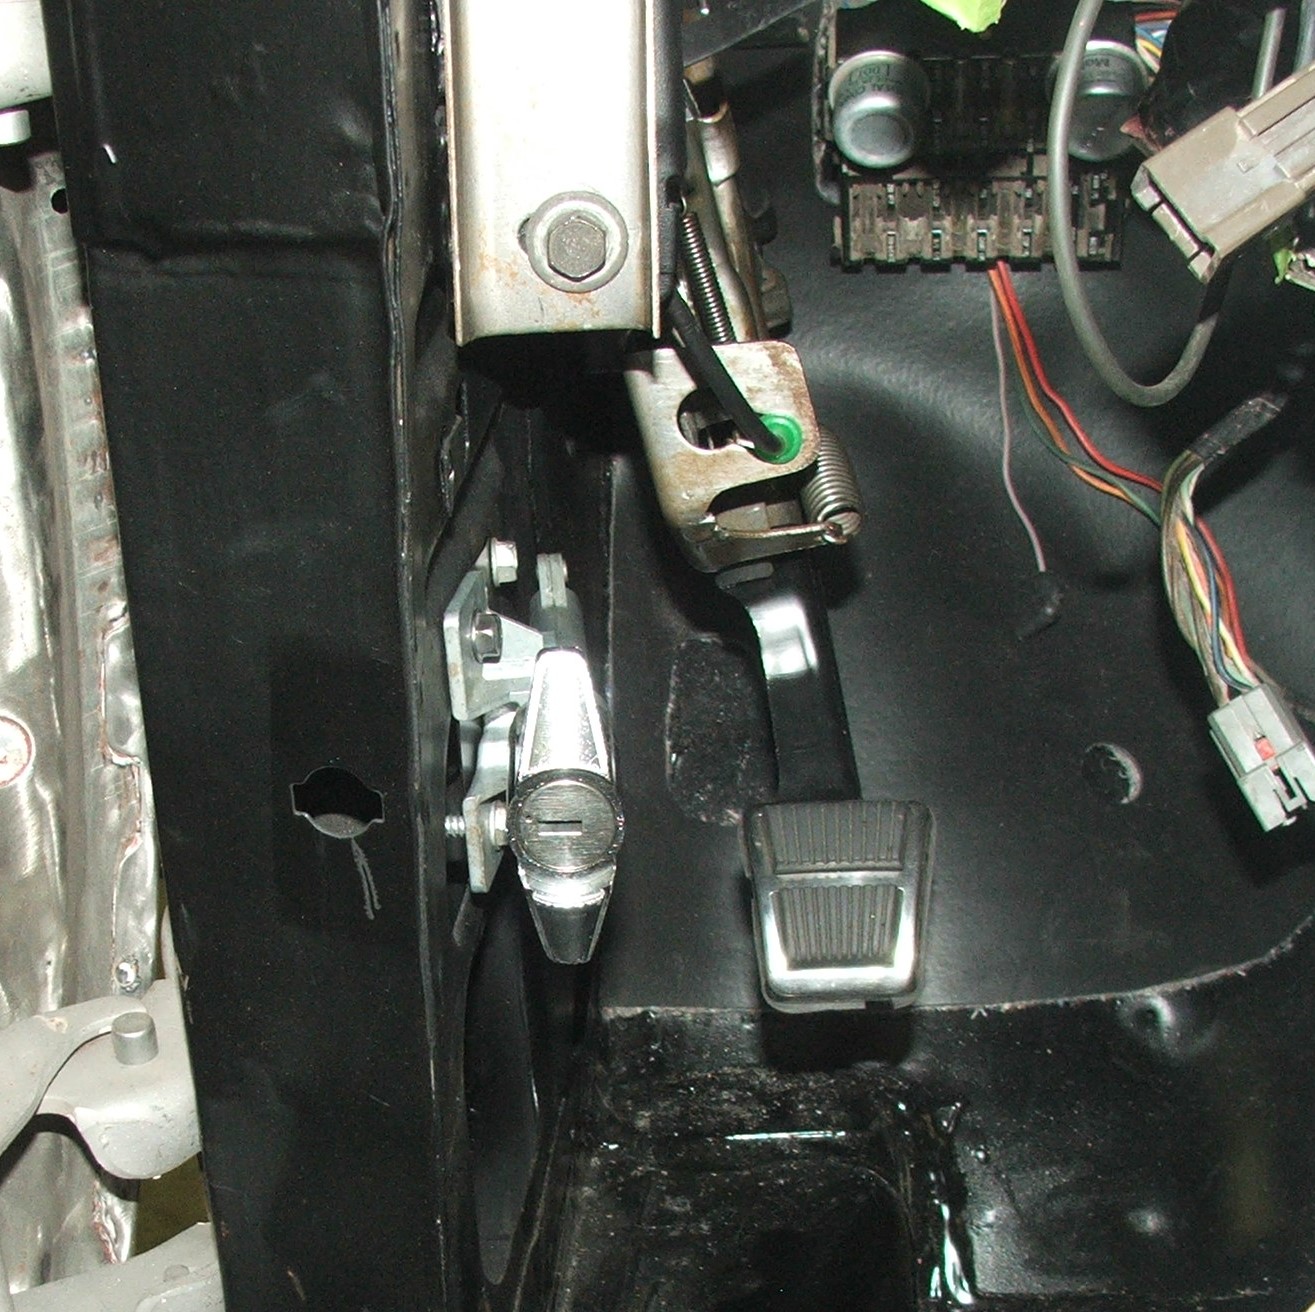 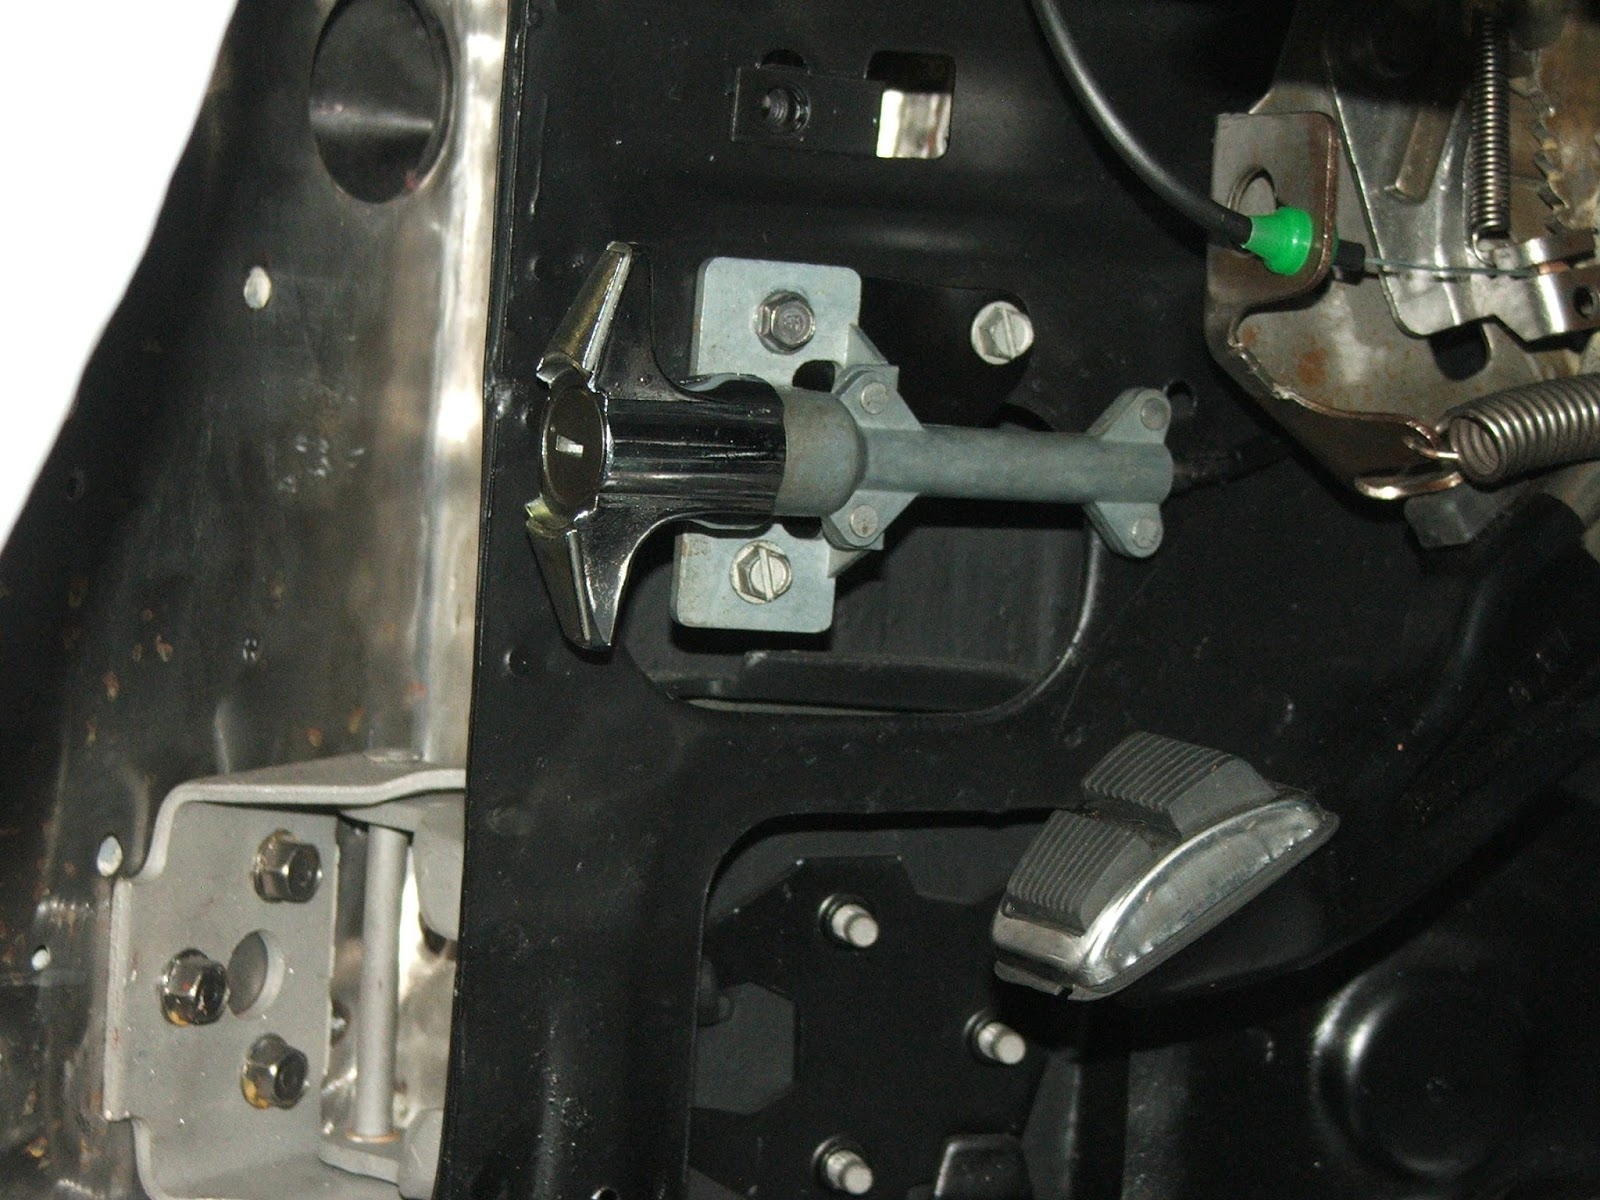 and got about 90% of the hood blasted. 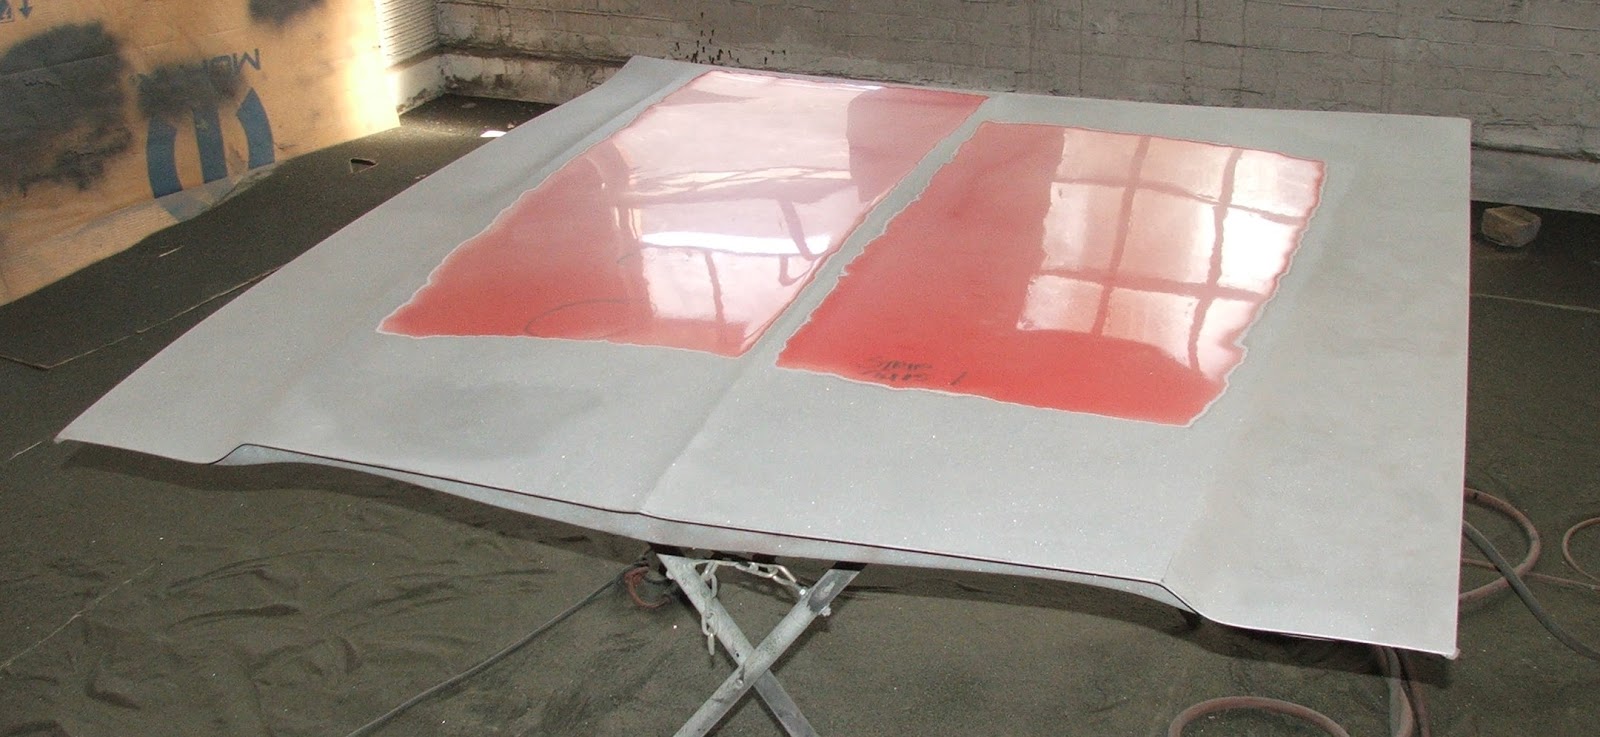 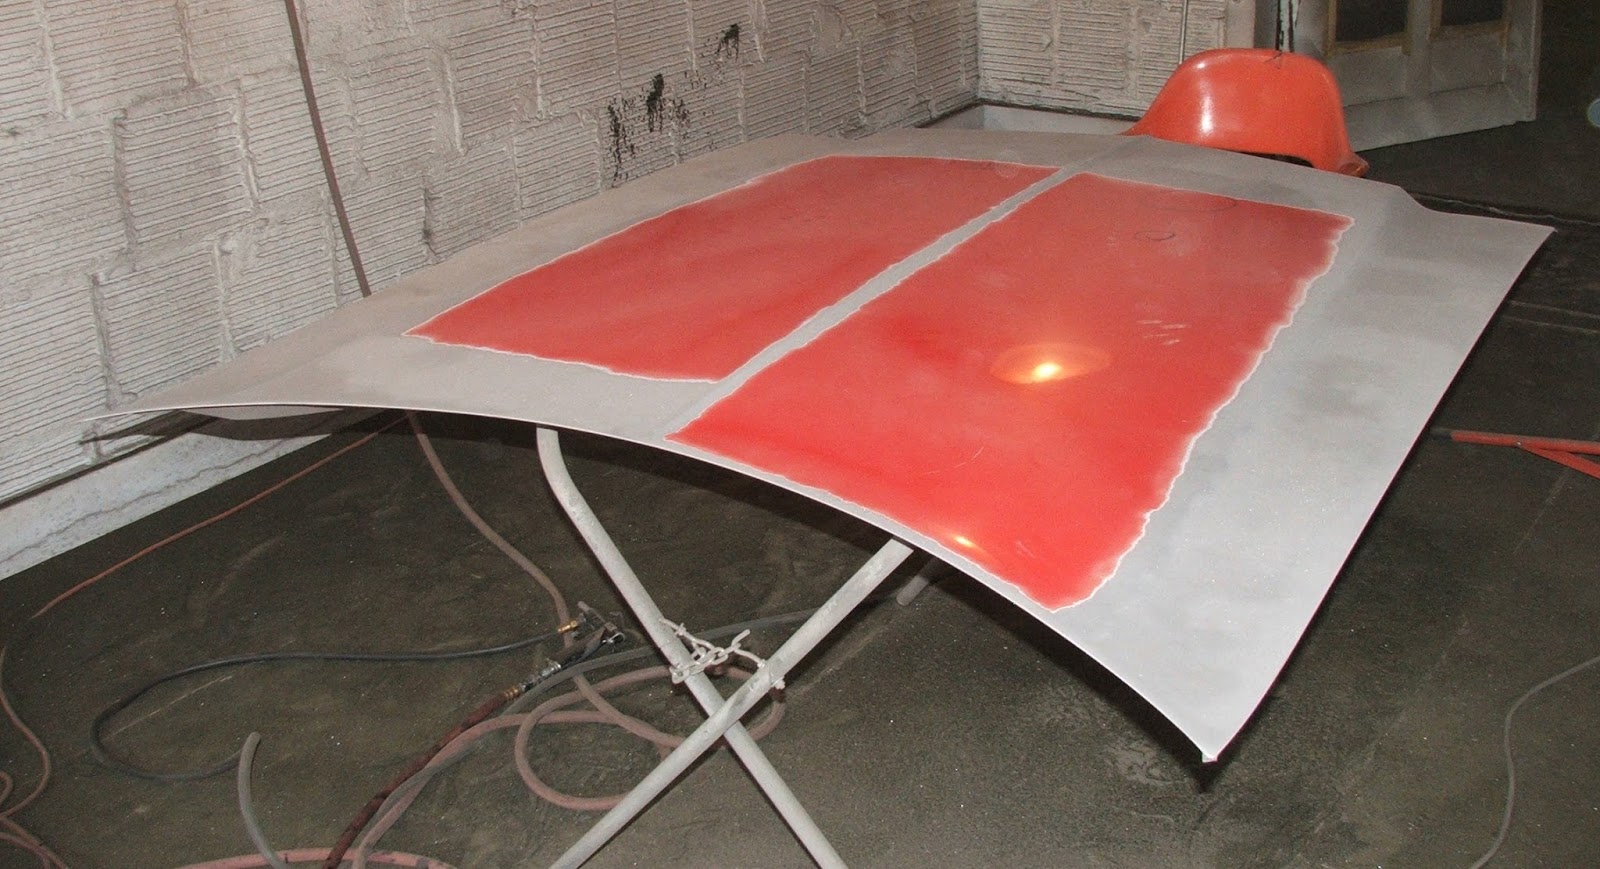 On my way home, I stopped at O'Reilly's and picked up a couple rolls of #16 ga wire so I can make a jumper for the dual horns as well as tapping the 3G alternator harness so I can connect it to the factory harness. More baby steps toward getting her ready to turn back over to the crew at Far From Factory for final bodywork and paint!! Stay tuned..... ZEBRA 3 OUT
Edited by TV 2M8O - 20-August-2017 at 7:57AM |
|
|
TV 2M8O OUT JOE 1976 Gran Torino S&H season 2-4 Clone Project Blog: http://tv2m8o.blogspot.com/ |
|
|
|
|
Dan the ranchero man
Senior Member

Joined: 24-July-2011 Location: Mchenry,IL Status: Offline Points: 1174 |
Post Options
Thanks(0)
Quote Reply
Posted: 20-August-2017 at 12:32PM |
|
You are doing a great job! Makes me what to "freshen up" the 74 ranchero (been 18 years since it's resto) can't wait to see it done and on the road.
|
|
|
|
|
californiajohnny
Moderator Group
Joined: 05-October-2013 Location: winlock, wa Status: Offline Points: 14609 |
Post Options
Thanks(0)
Quote Reply
Posted: 20-August-2017 at 3:07PM |
|
lookin' good joe!
 |
|
|
JOHN
74 GRAN TORINO S&H CLONE 74 VETTE CUSTOM 90 S10 BLAZER 4X4 LIFTED 77 CELICA CUSTOM 75 V8 MONZA SUPERCHARGED 79 COURIER VERT. SLAMMED 75 VEGA V6 5 SPD 70 CHEV C10 P/U 68 MUSTANG FB CONVERSION |
|
|
|
|
TV 2M8O
Senior Member
Joined: 20-September-2006 Location: Southern Ohio Status: Offline Points: 2053 |
Post Options
Thanks(0)
Quote Reply
Posted: 28-August-2017 at 6:14AM |
|
**CLICK ON PICS TO ENLARGE AND CLICK AGAIN TO SUPERSIZE**
A bit more progress this weekend, picked up my polished front rims (shown before & after) from Irwin Polishing... 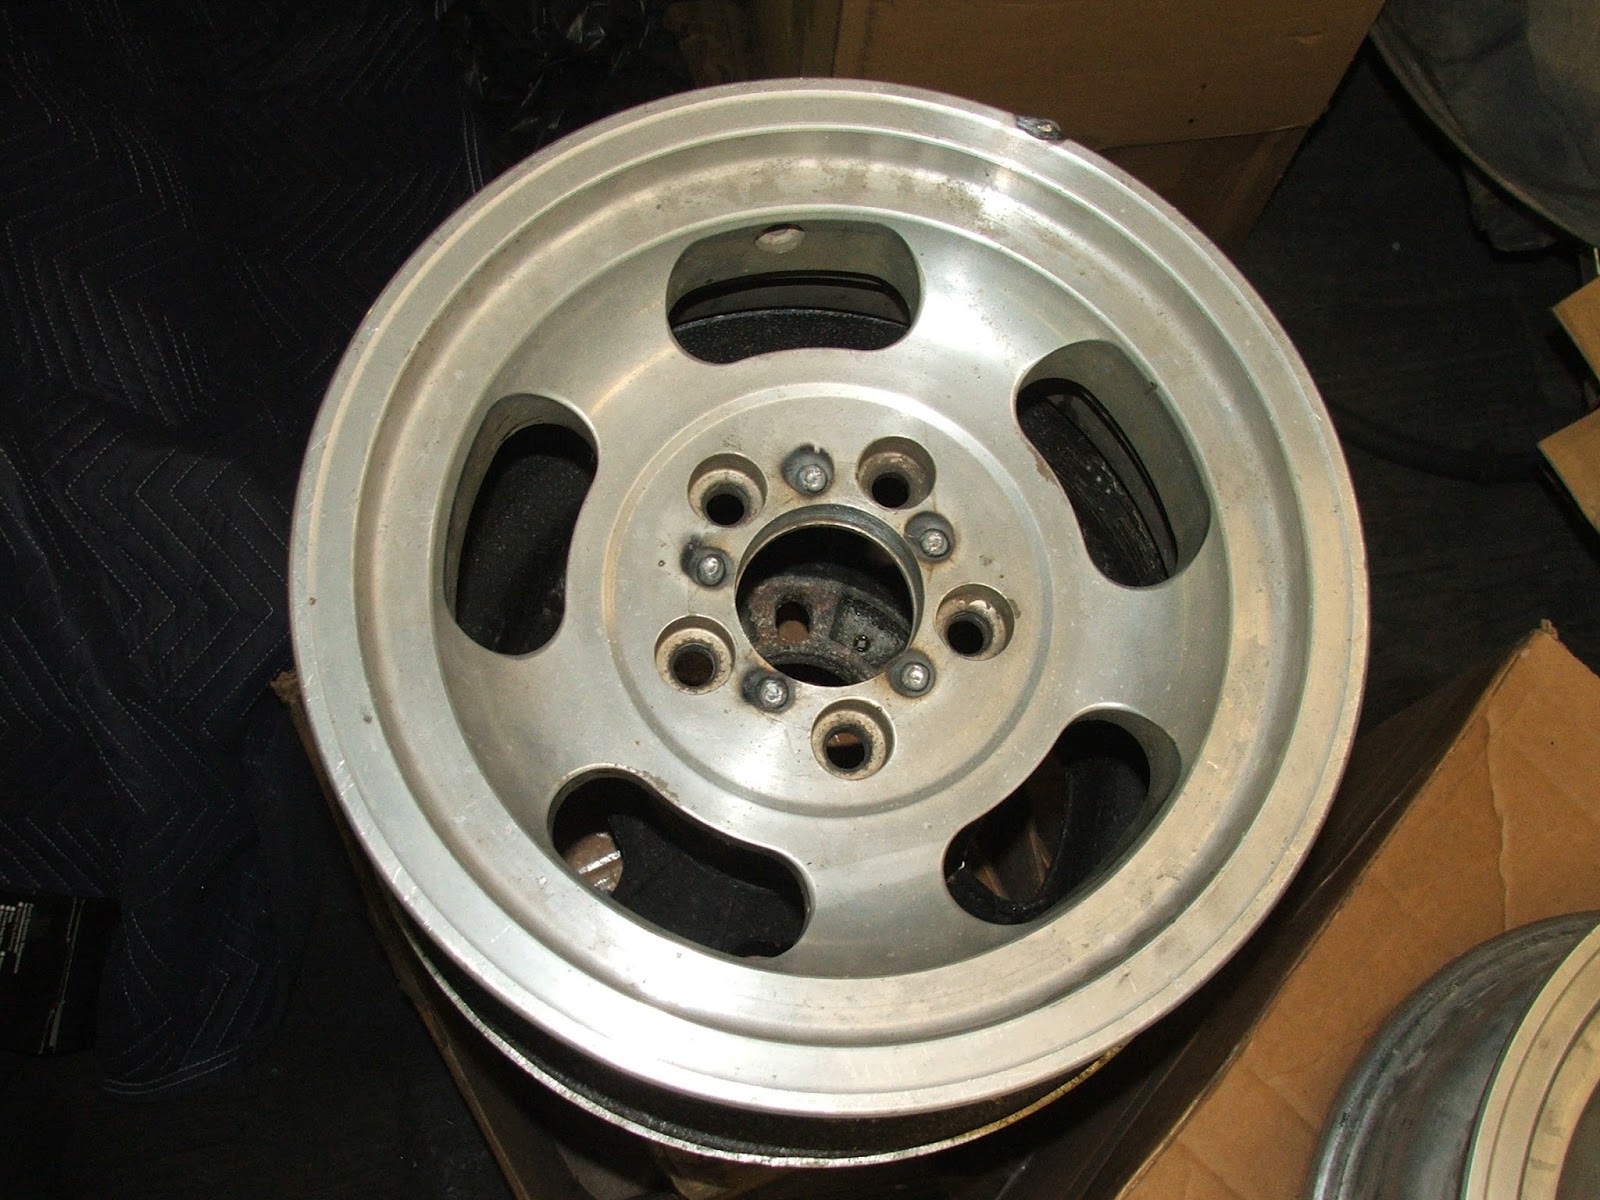 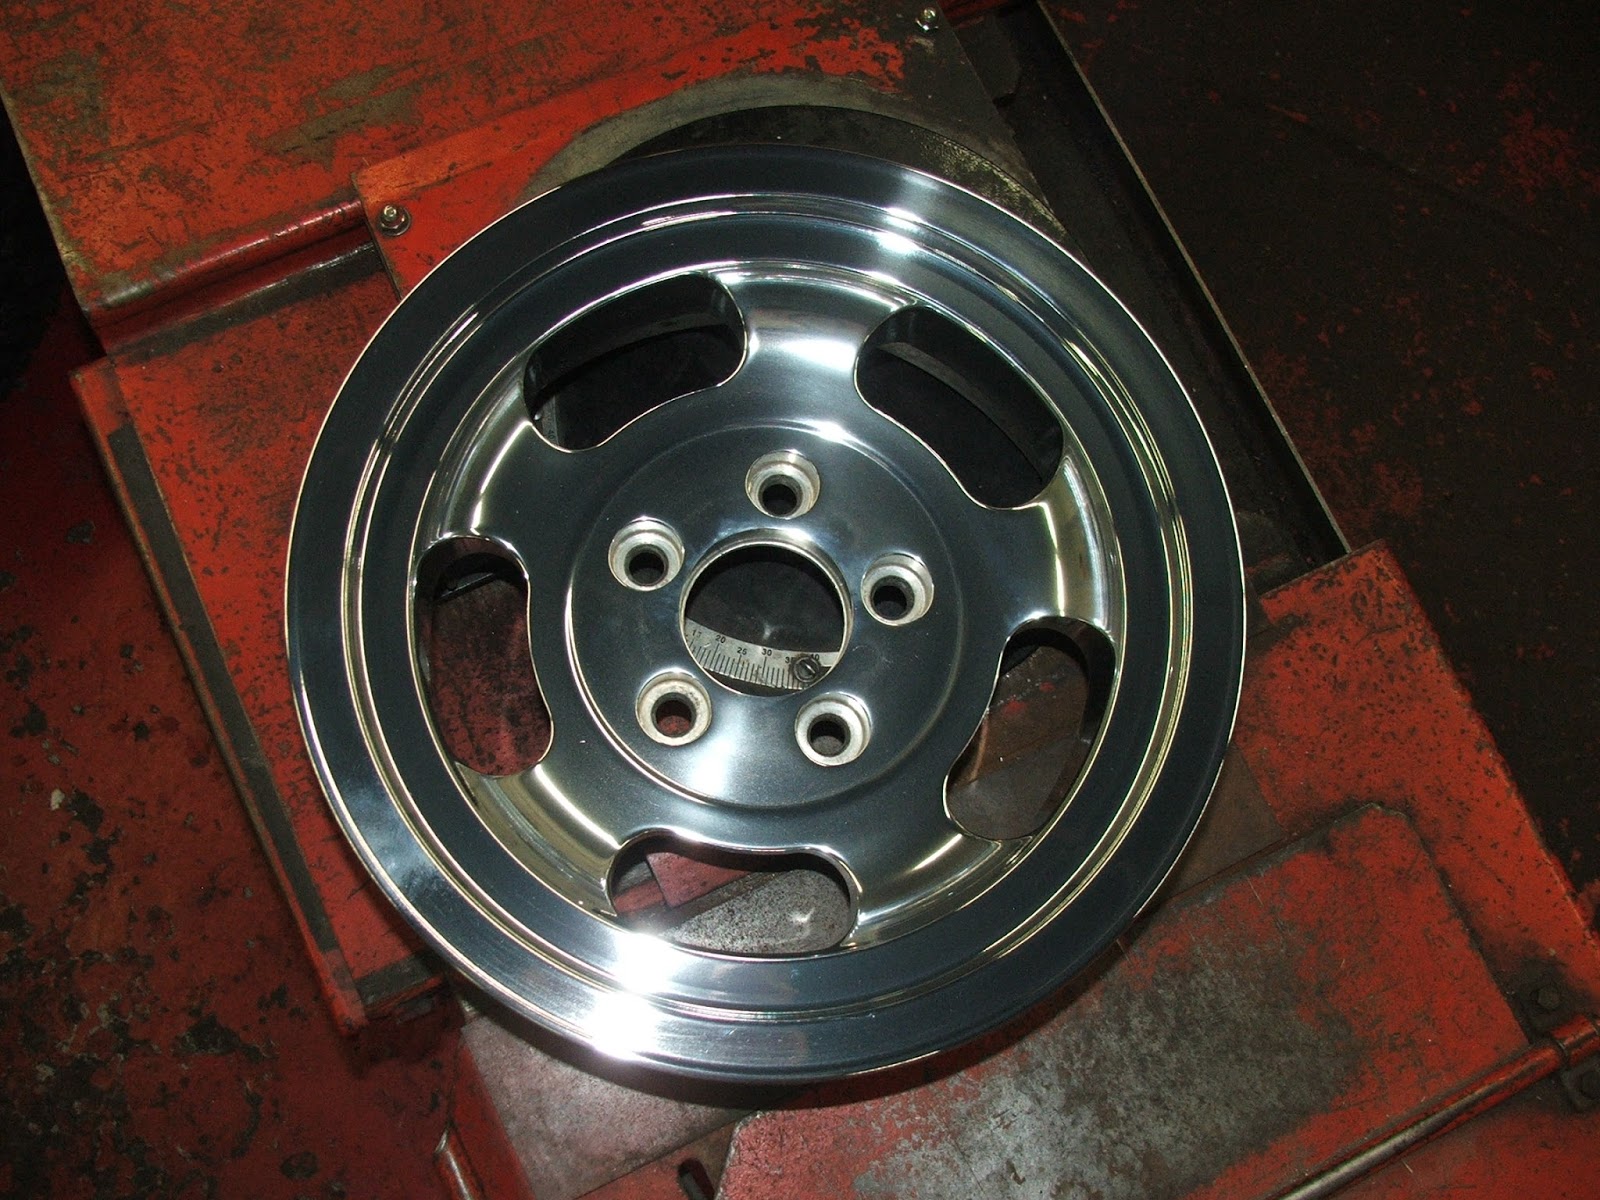  and my brutha Jim got them mounted for me...  and I got them installed on the car. 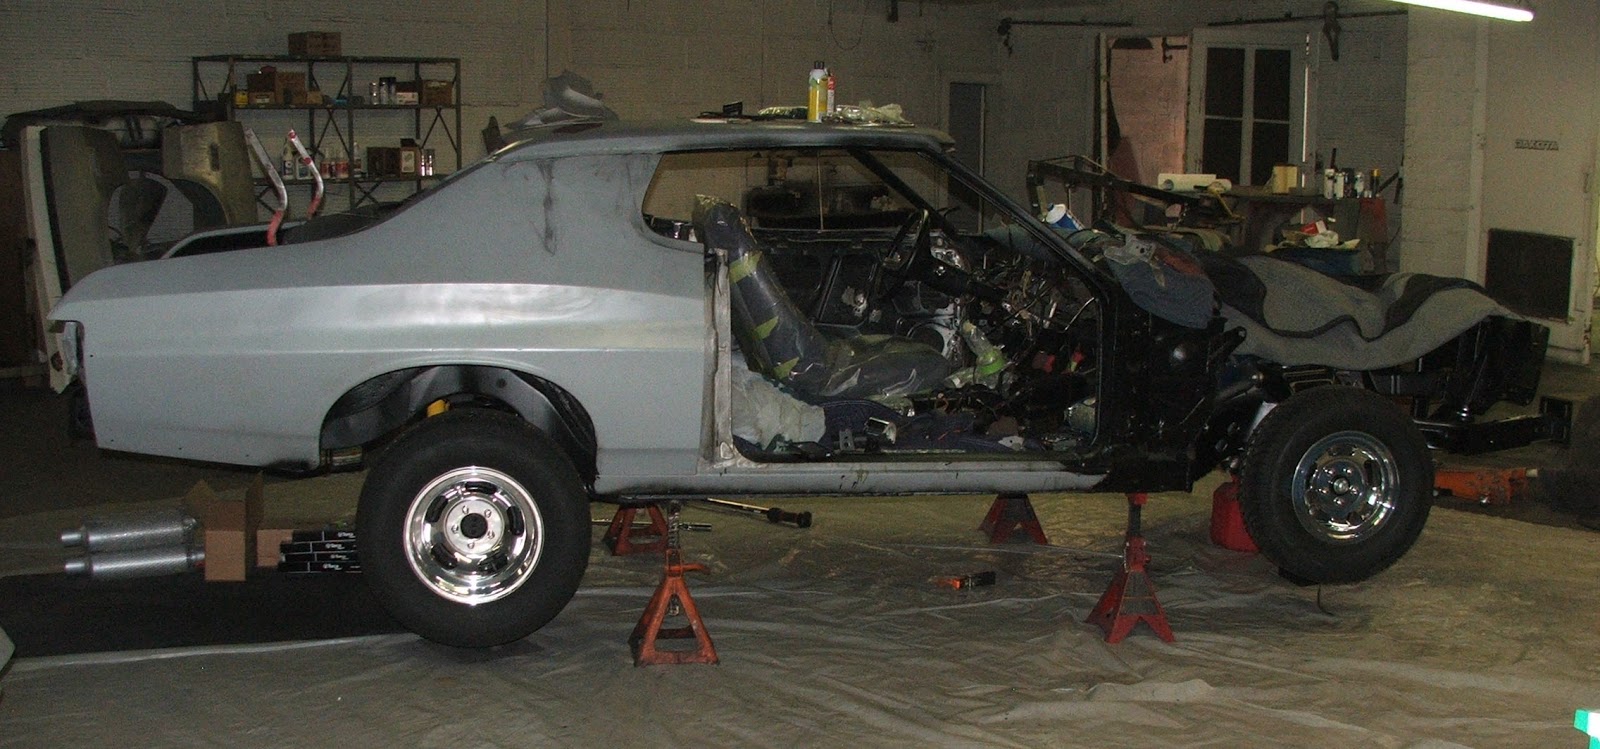 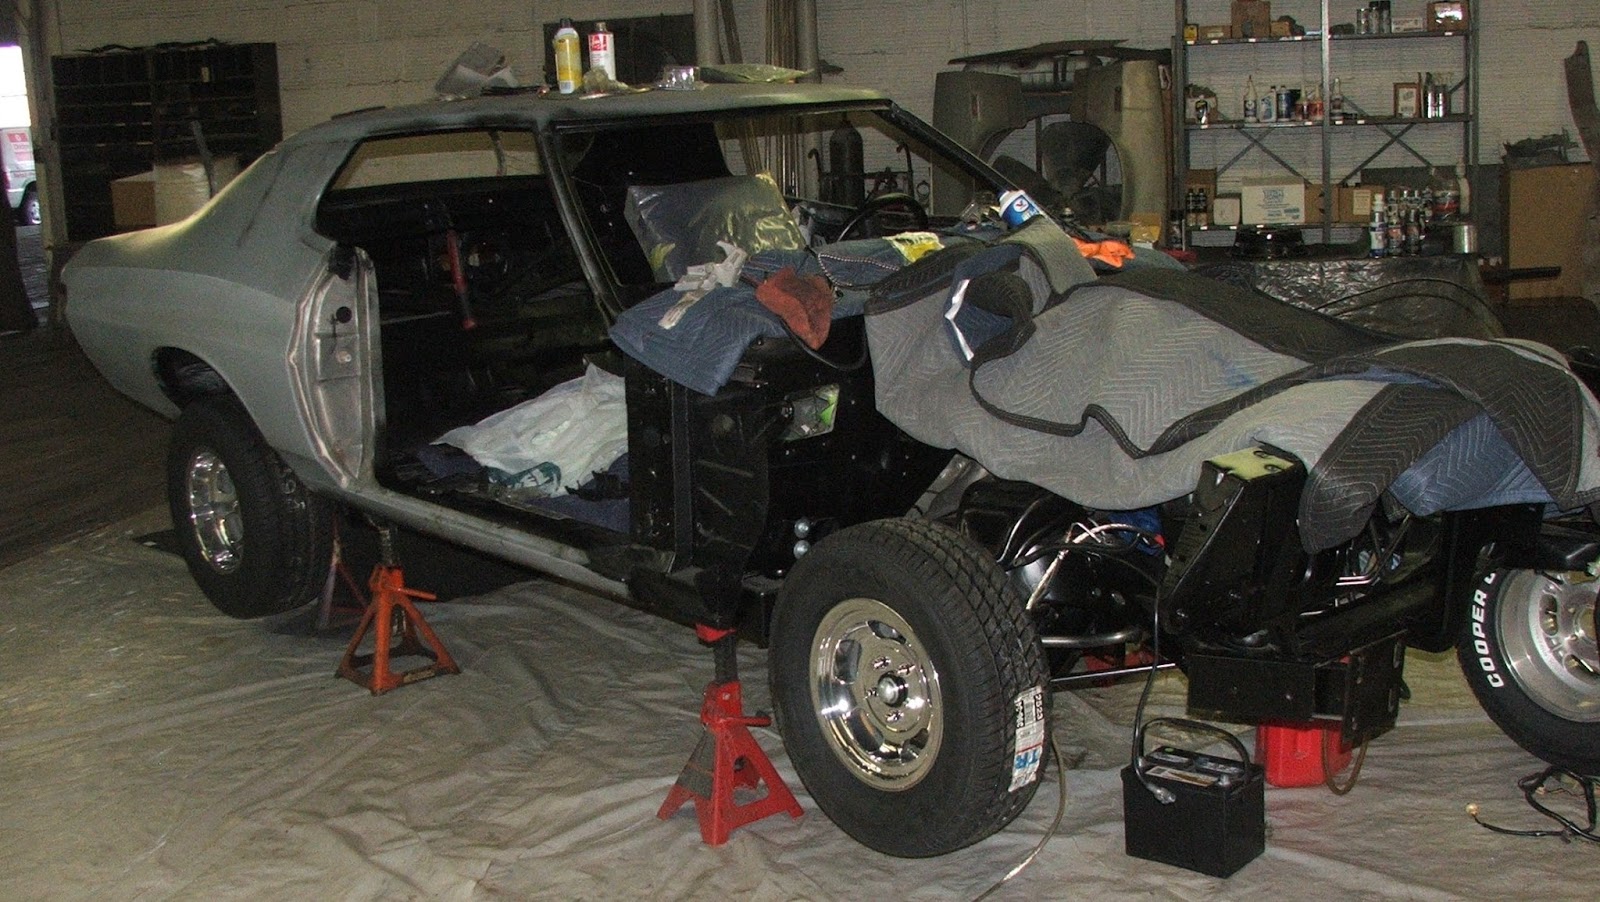 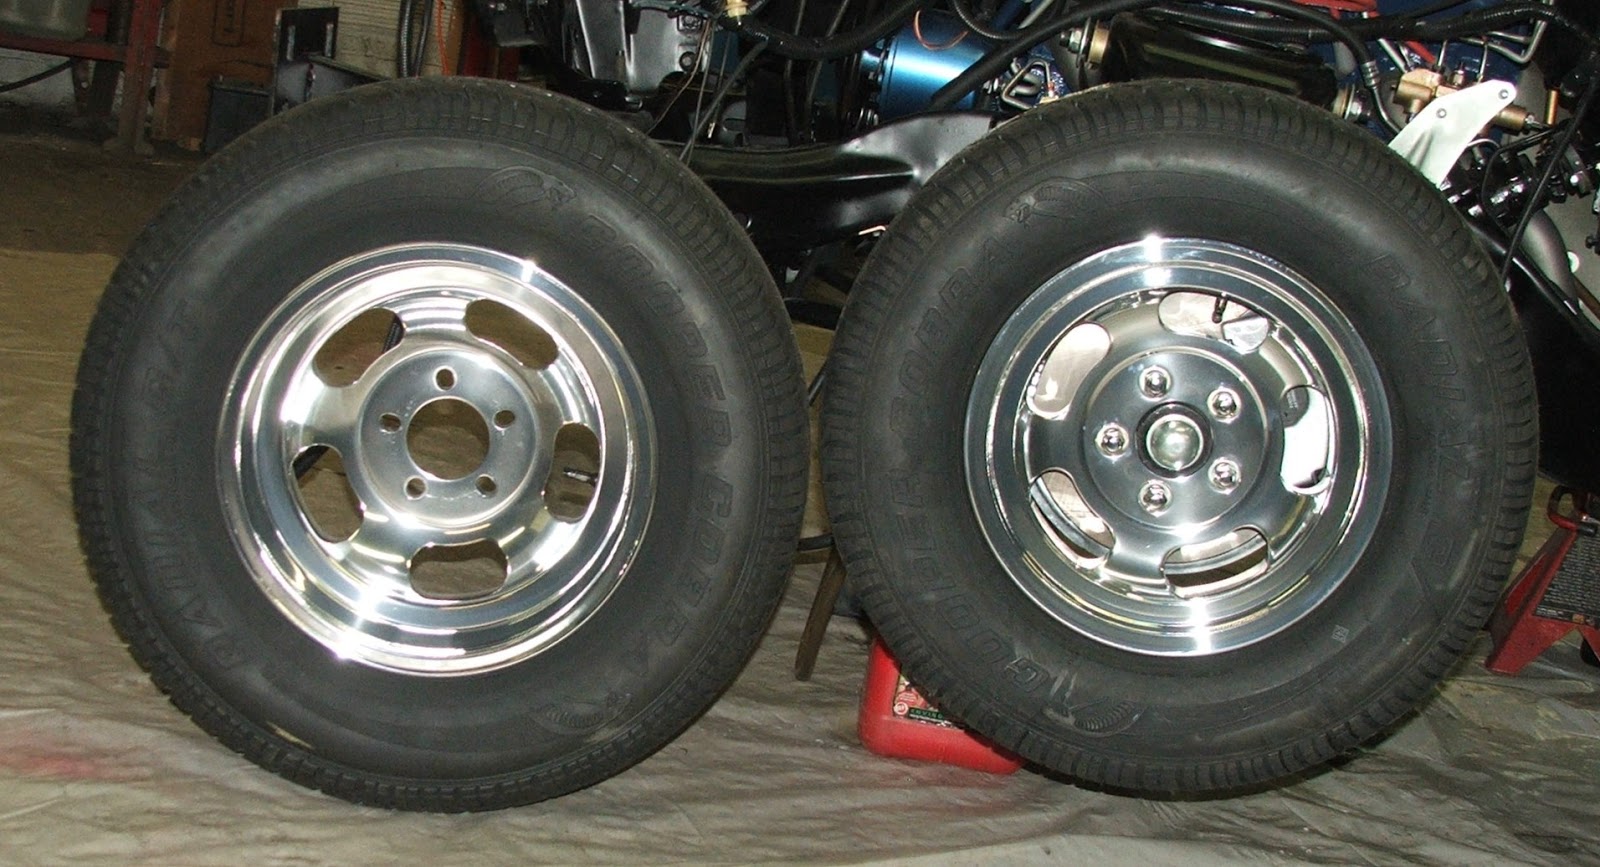 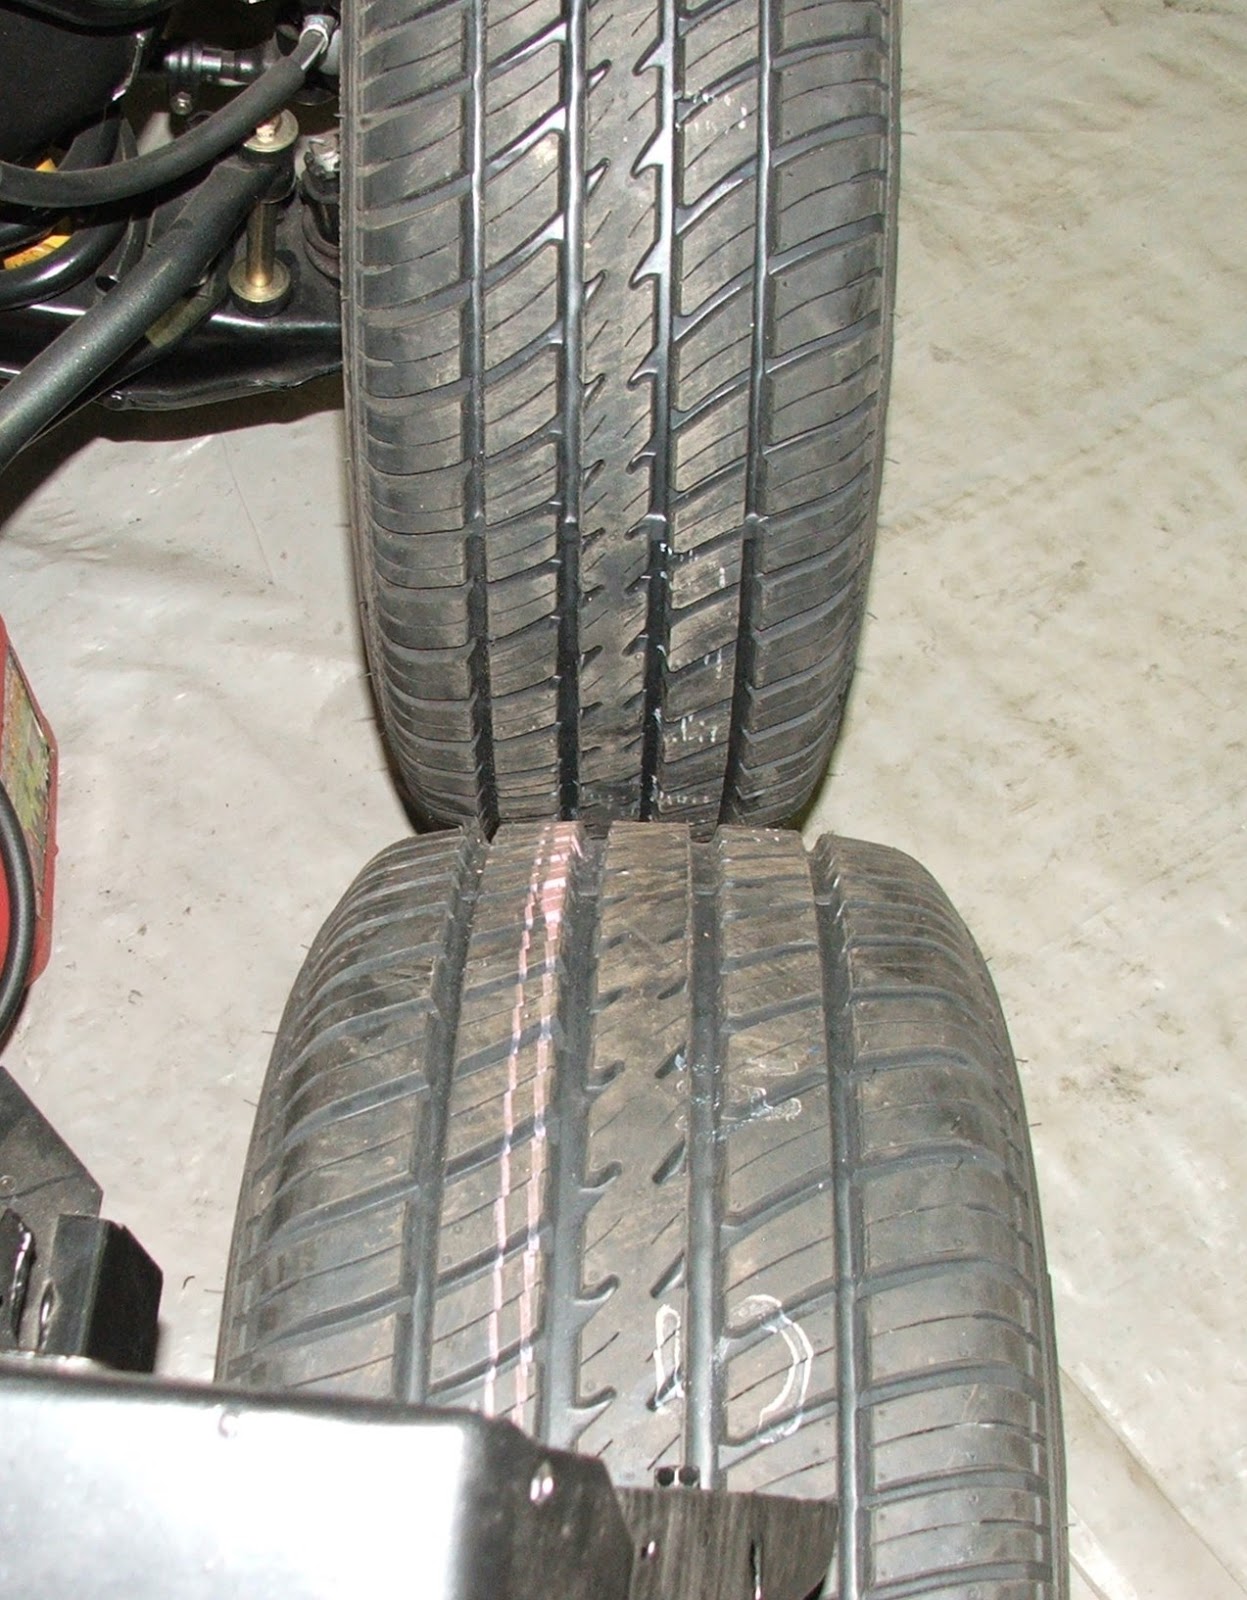 I also finished assembling the hood latching reinforcement... 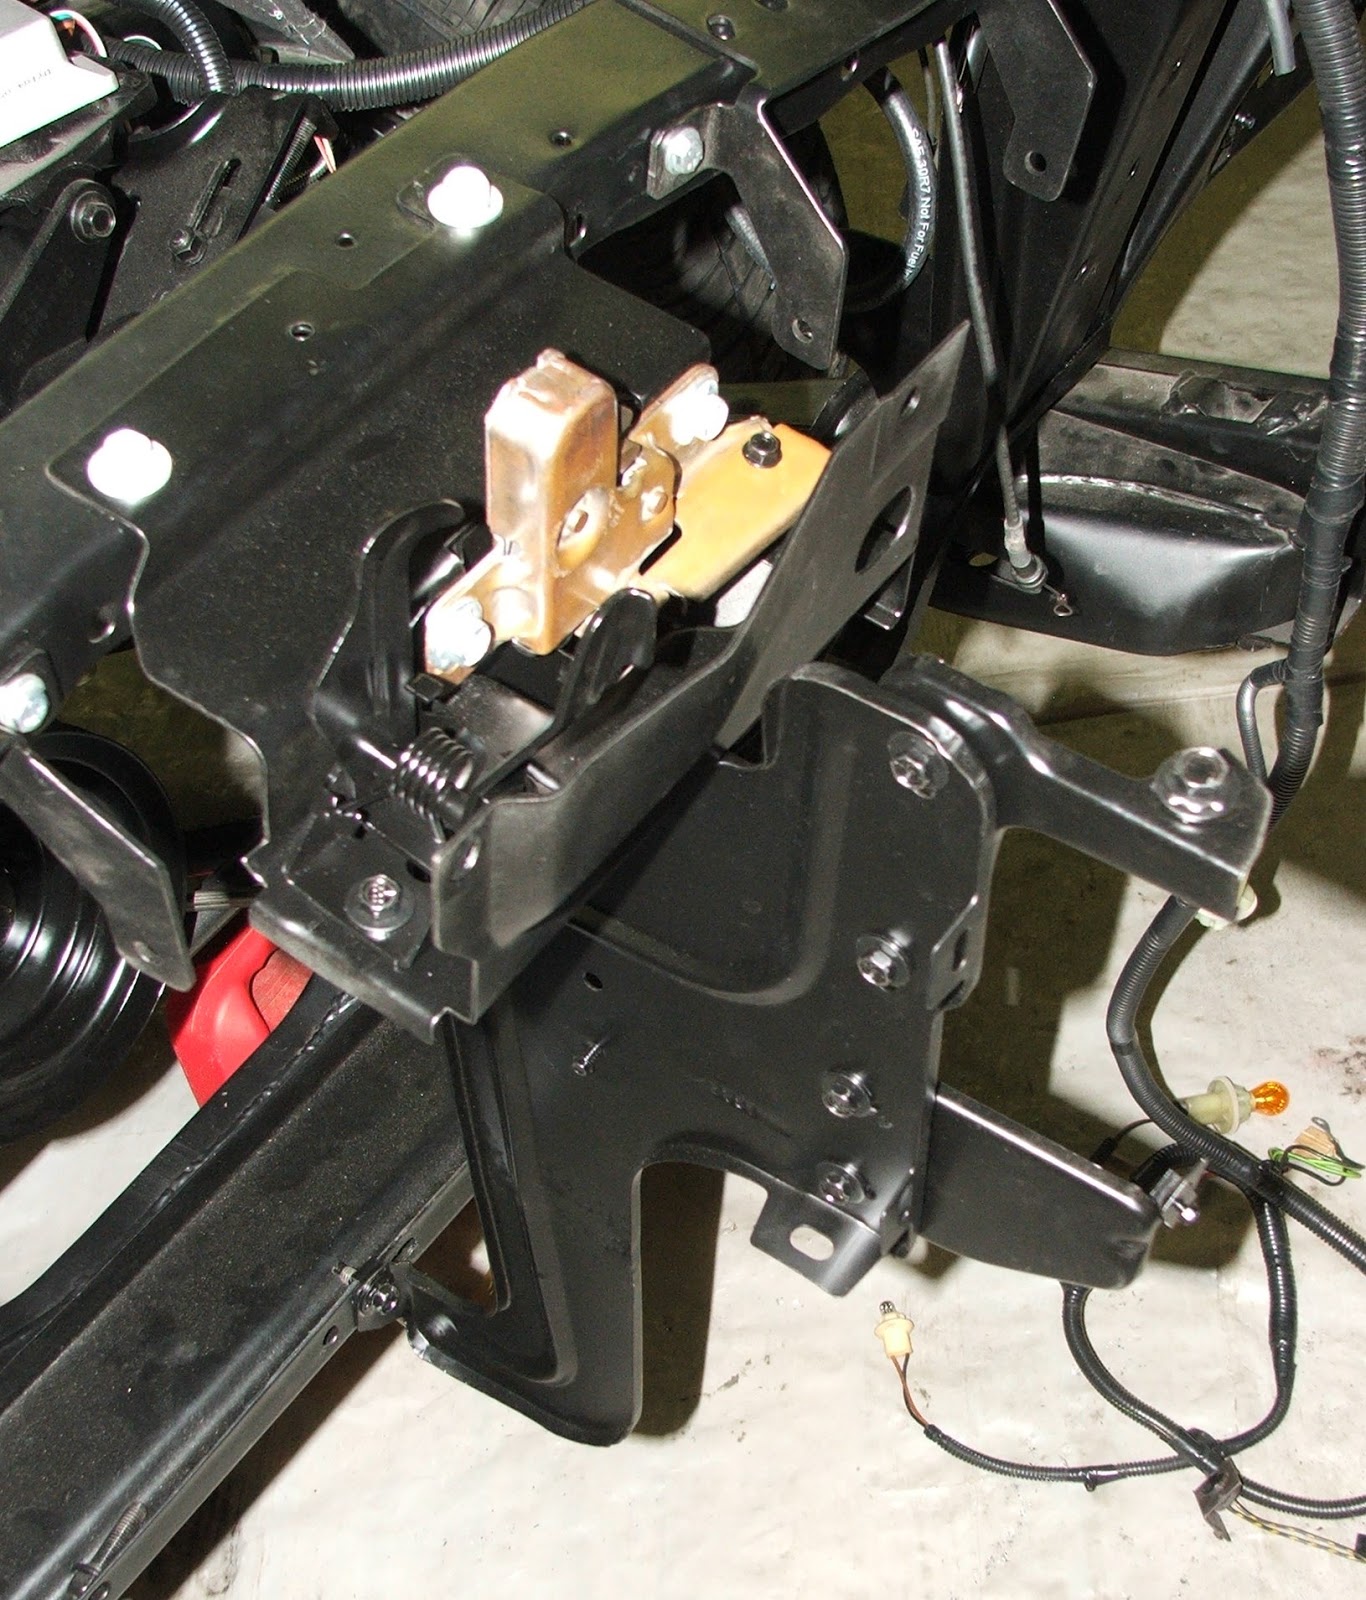 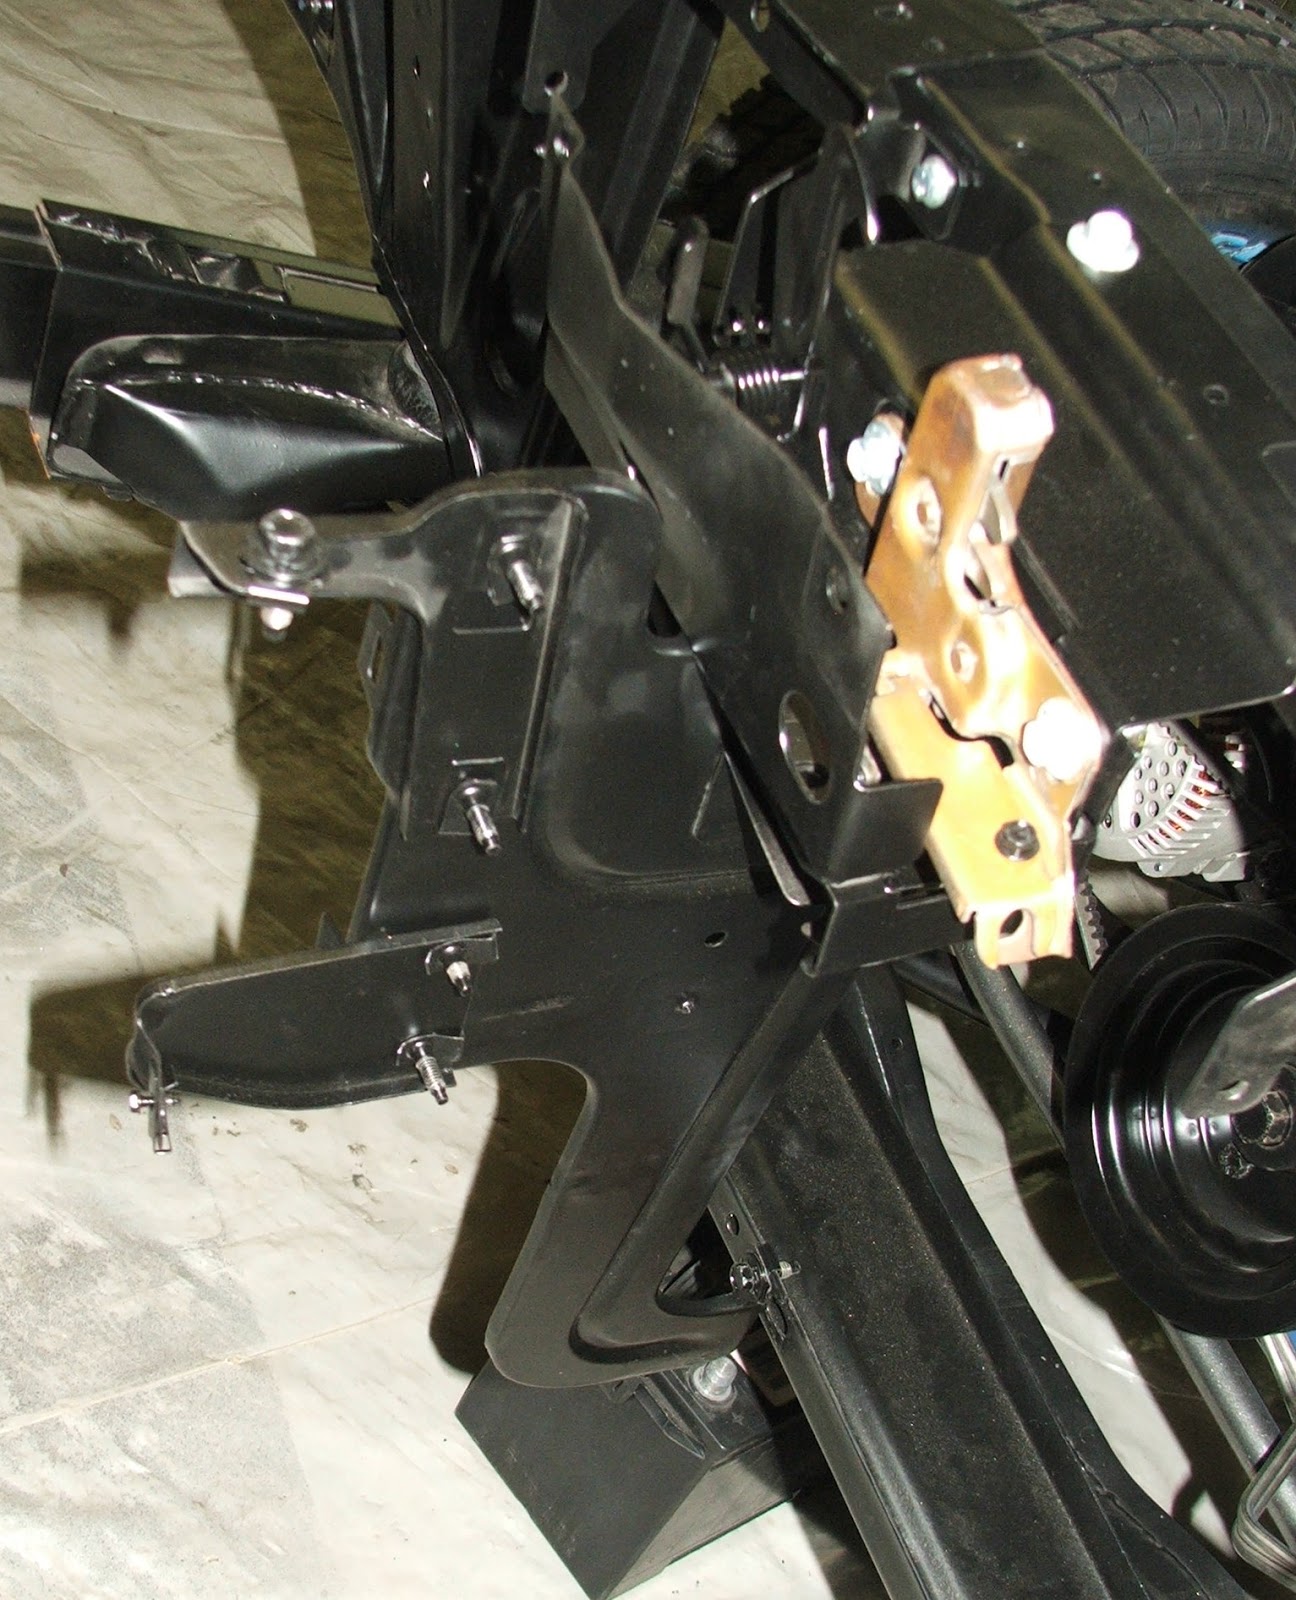 removed the modified Fiero vacuum canister from the paint booth and placed aside for later use... 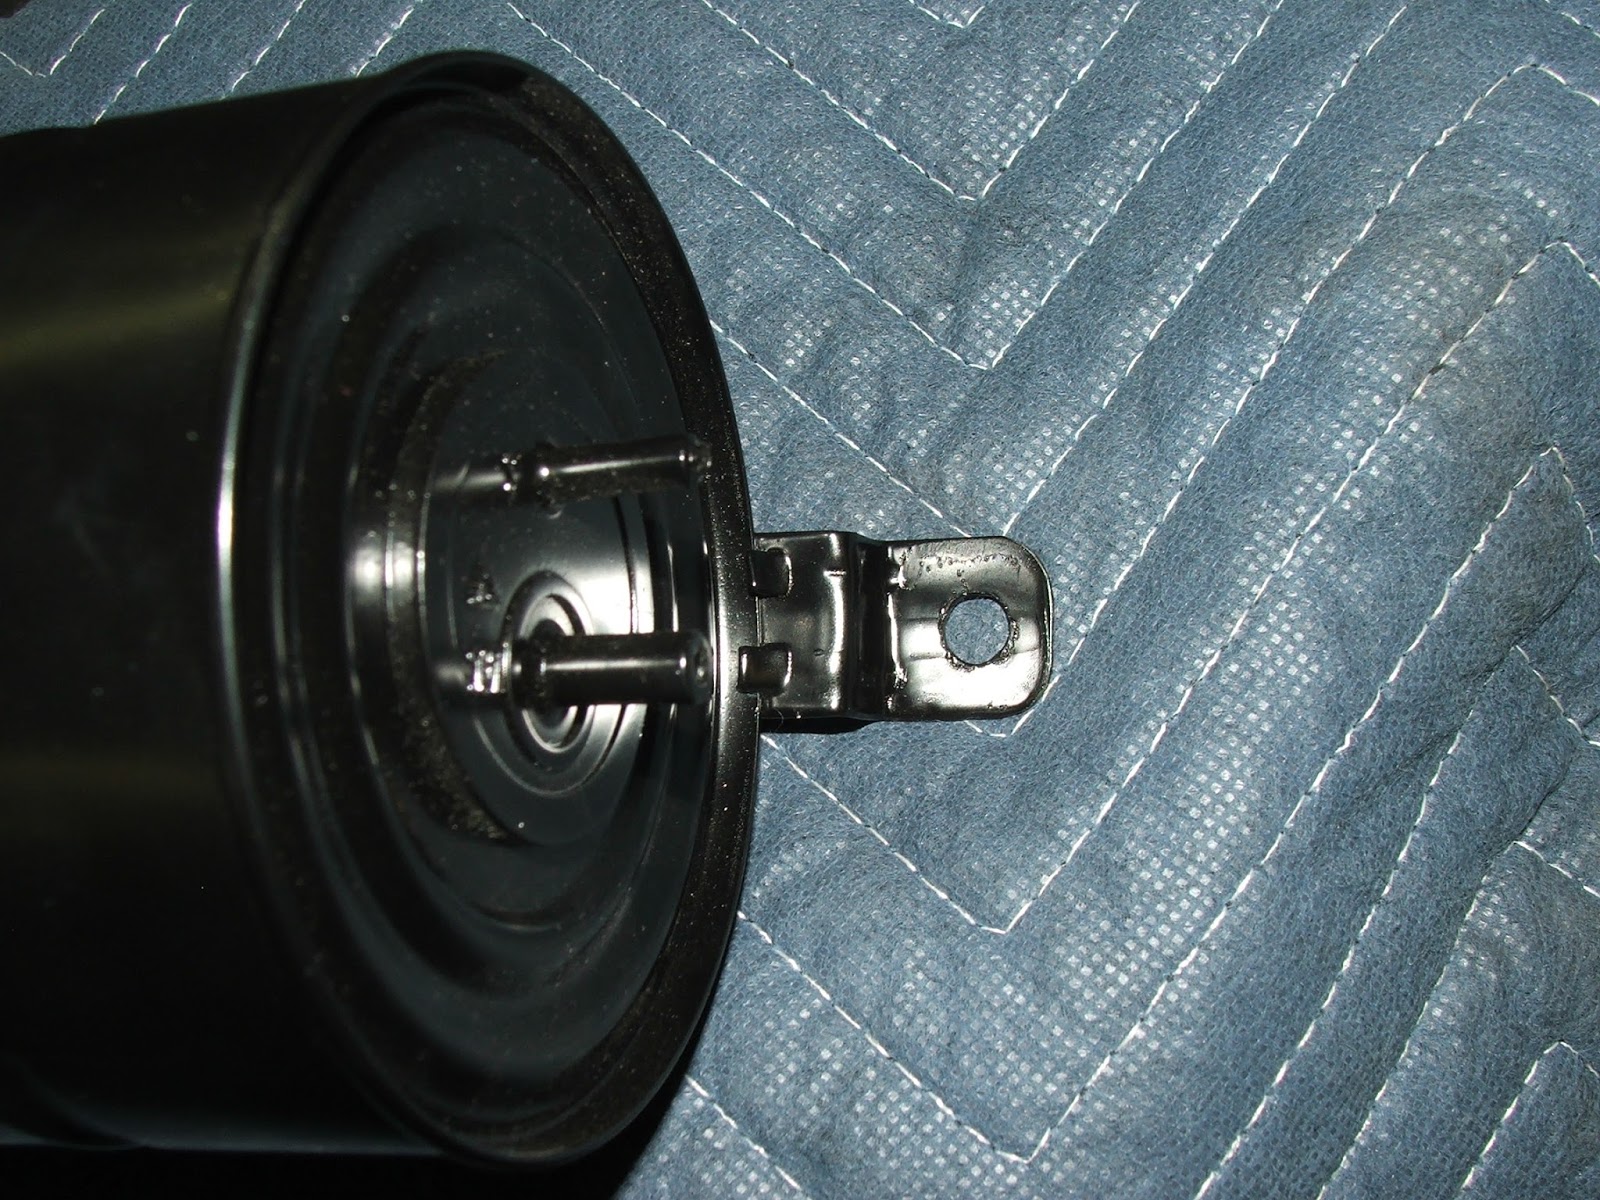 made a jumper wire for the dual horns and tapped into the alternator harness to mate to the factory wiring harness. I fitted my alternator adjustment slug... 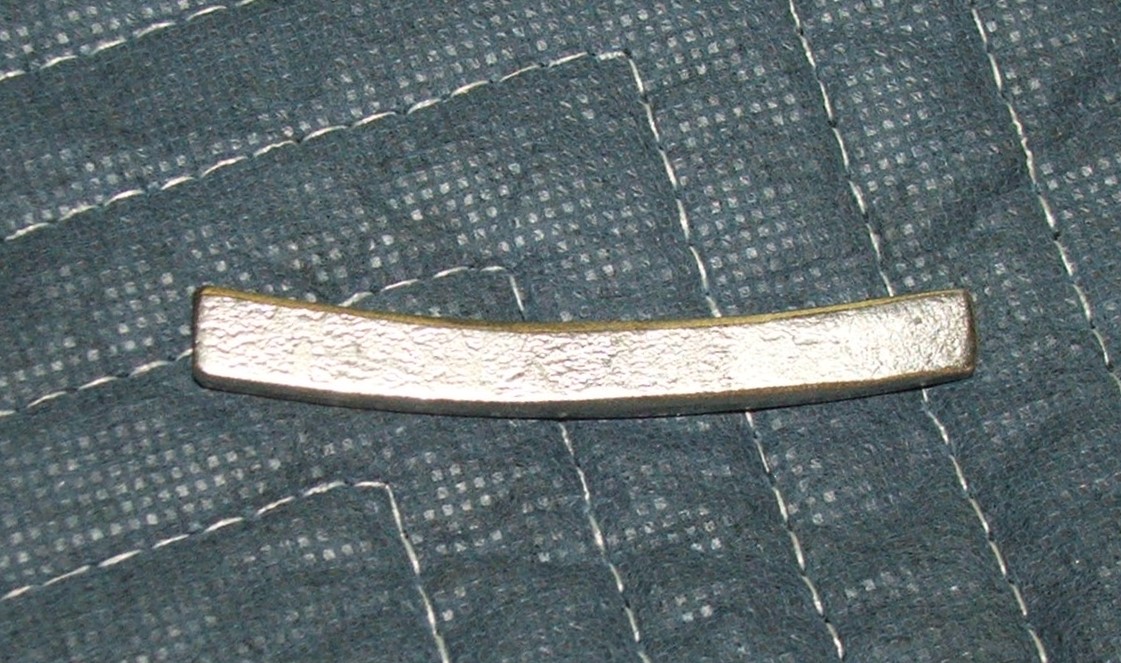 into the adjuster bracket... 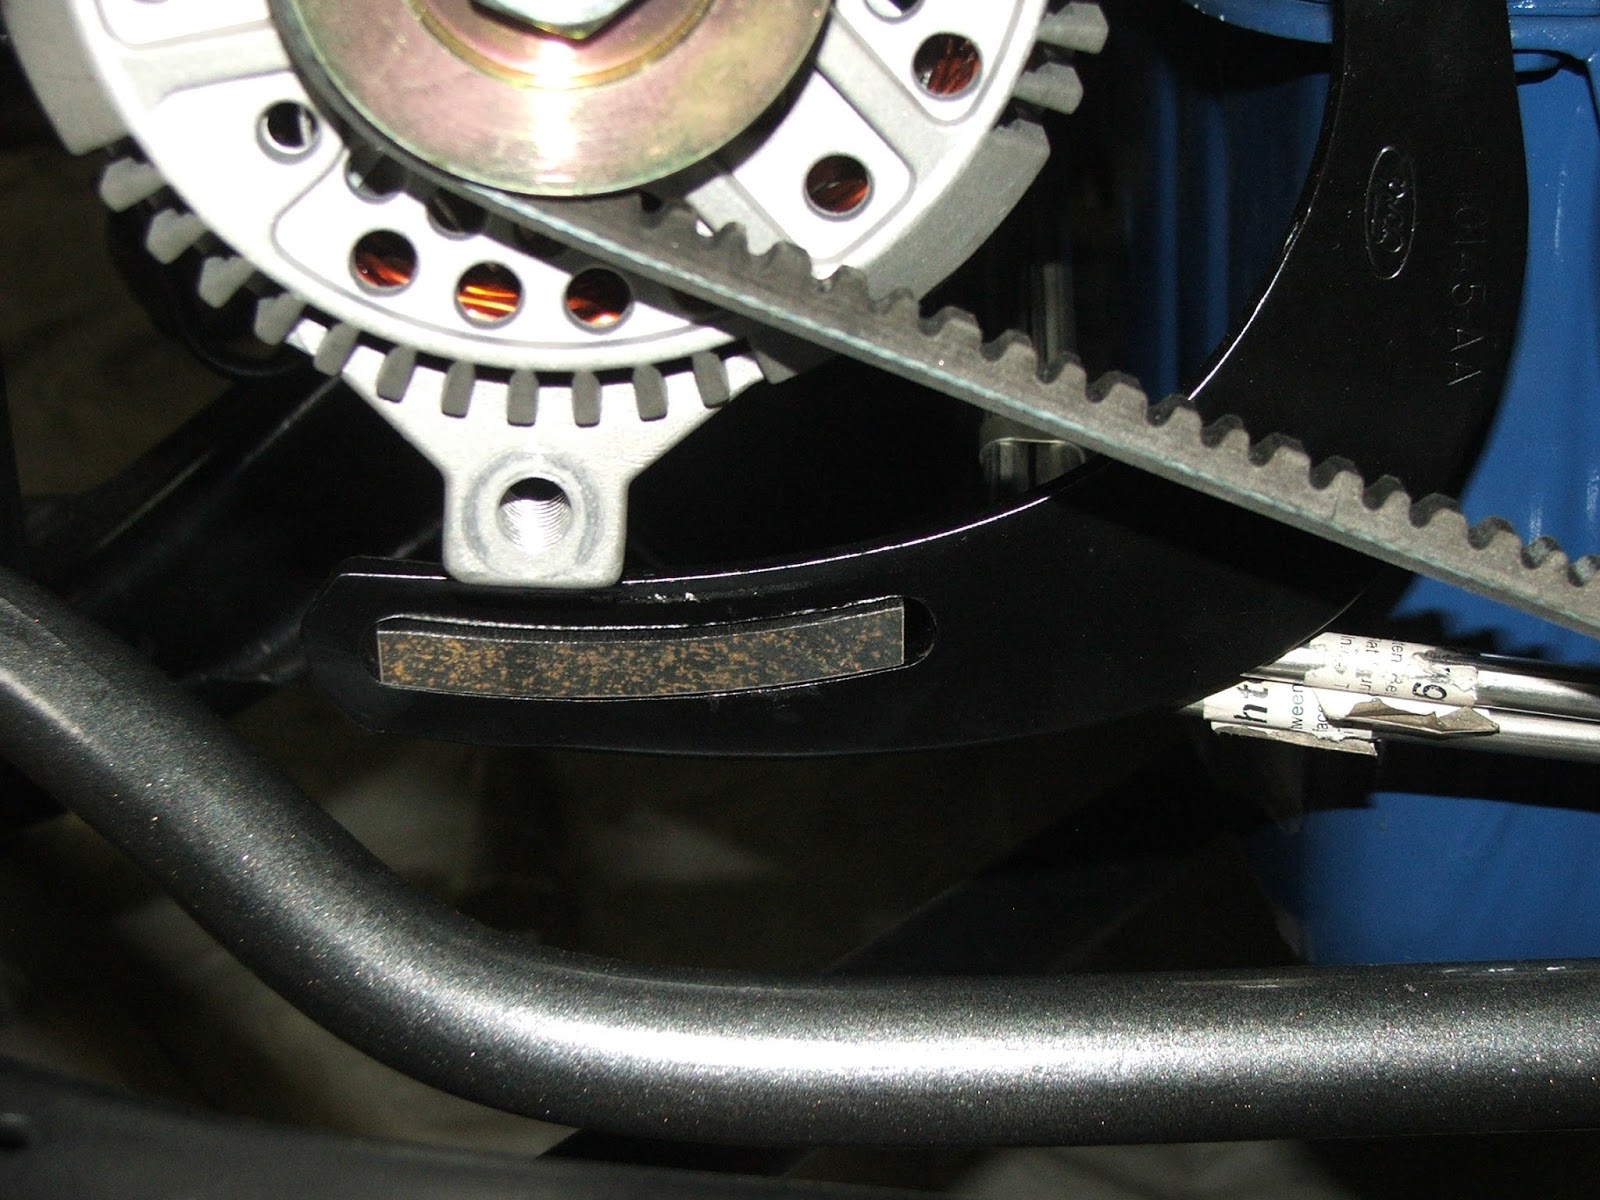 so I could make my captive nut to wrap up my 3G alternator installation. 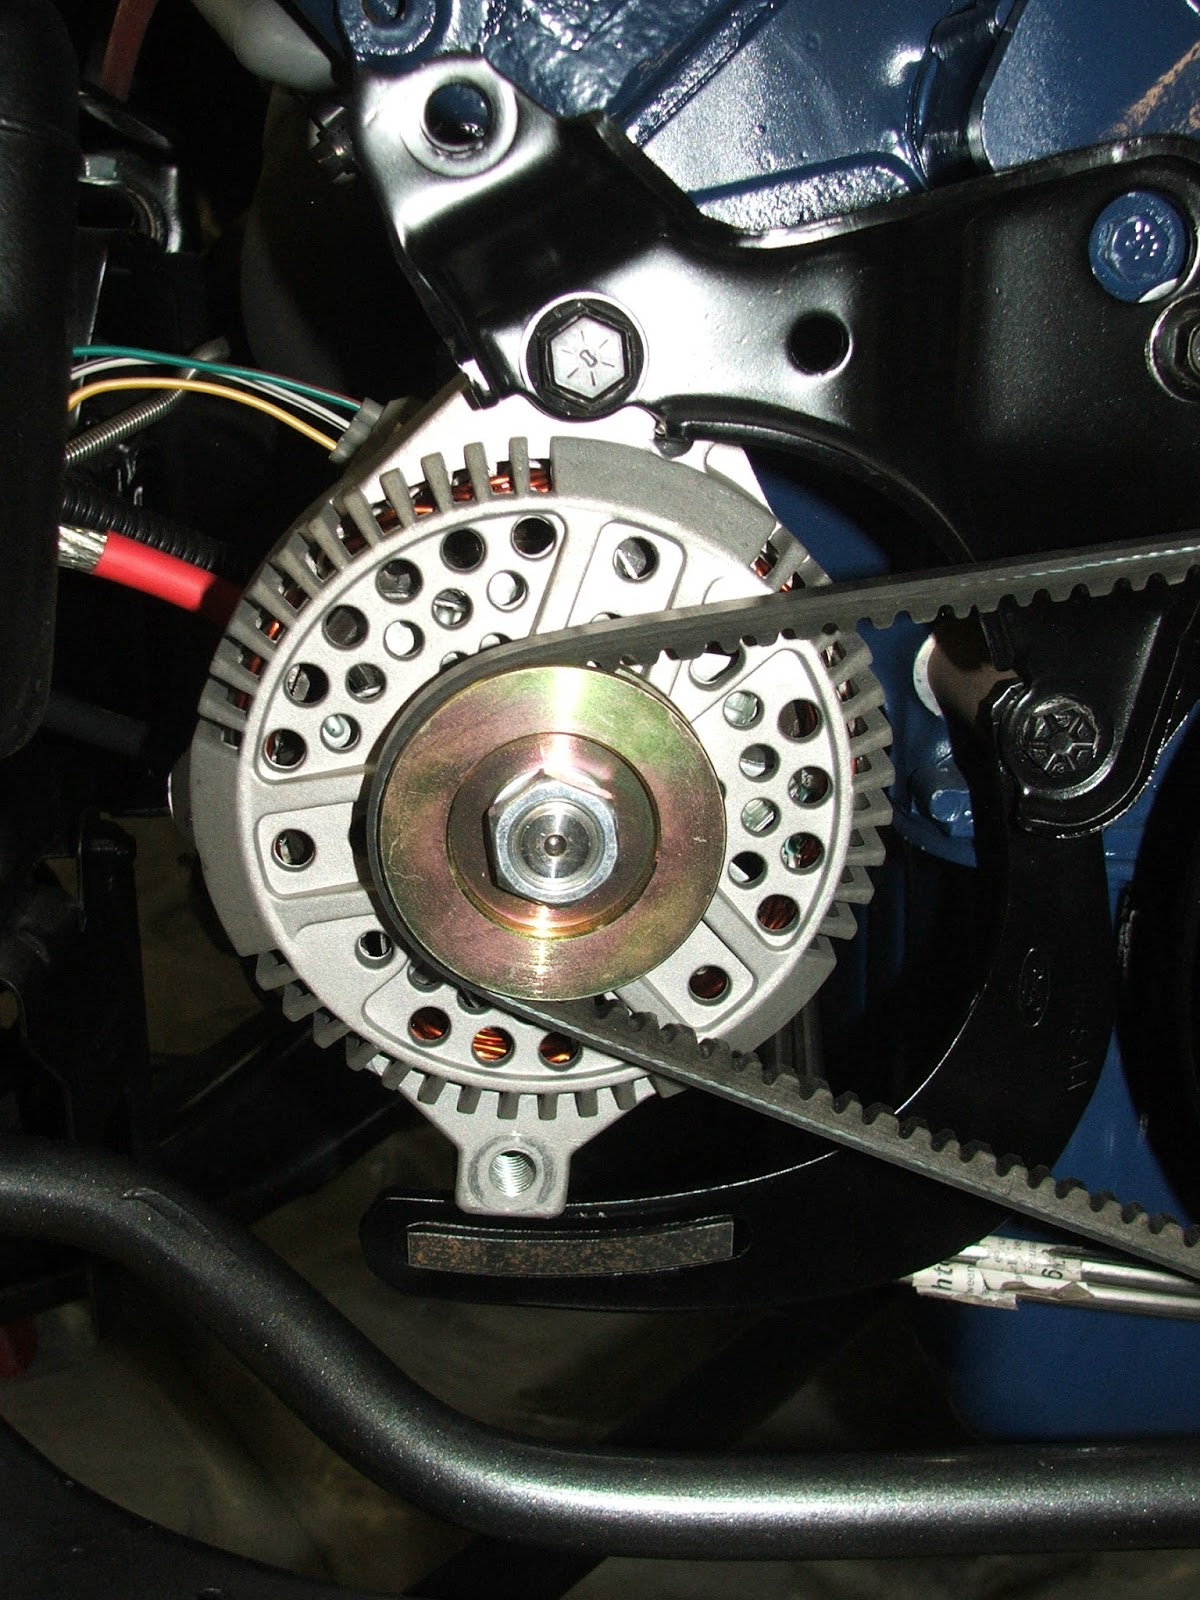 We also got the braking system bled but the rear brakes wouldn't really bleed out like they should, so I'm thinking I may need to reset the proportioning valve. Edited by TV 2M8O - 28-August-2017 at 6:16AM |
|
|
TV 2M8O OUT JOE 1976 Gran Torino S&H season 2-4 Clone Project Blog: http://tv2m8o.blogspot.com/ |
|
|
|
|
TV 2M8O
Senior Member
Joined: 20-September-2006 Location: Southern Ohio Status: Offline Points: 2053 |
Post Options
Thanks(0)
Quote Reply
Posted: 03-September-2017 at 7:13AM |
|
Not a lot to show for myself this weekend..... putzed around a while trying to center the proportioning valve without success. i then then swept up the sand in the blast booth, sifted the sand, filled the hopper and started blasting on the remainder of the hood. Got it about 95% stripped before it was time to call it a day. Hopefully more to show for myself next weekend!
|
|
|
TV 2M8O OUT JOE 1976 Gran Torino S&H season 2-4 Clone Project Blog: http://tv2m8o.blogspot.com/ |
|
|
|
|
TV 2M8O
Senior Member
Joined: 20-September-2006 Location: Southern Ohio Status: Offline Points: 2053 |
Post Options
Thanks(0)
Quote Reply
Posted: 17-September-2017 at 5:04AM |
|
**CLICK ON PICS TO ENLARGE AND CLICK AGAIN TO SUPERSIZE** Last weekend was another fun filled day of sandblasting!! I finished the hood...  and started on the deck lid. 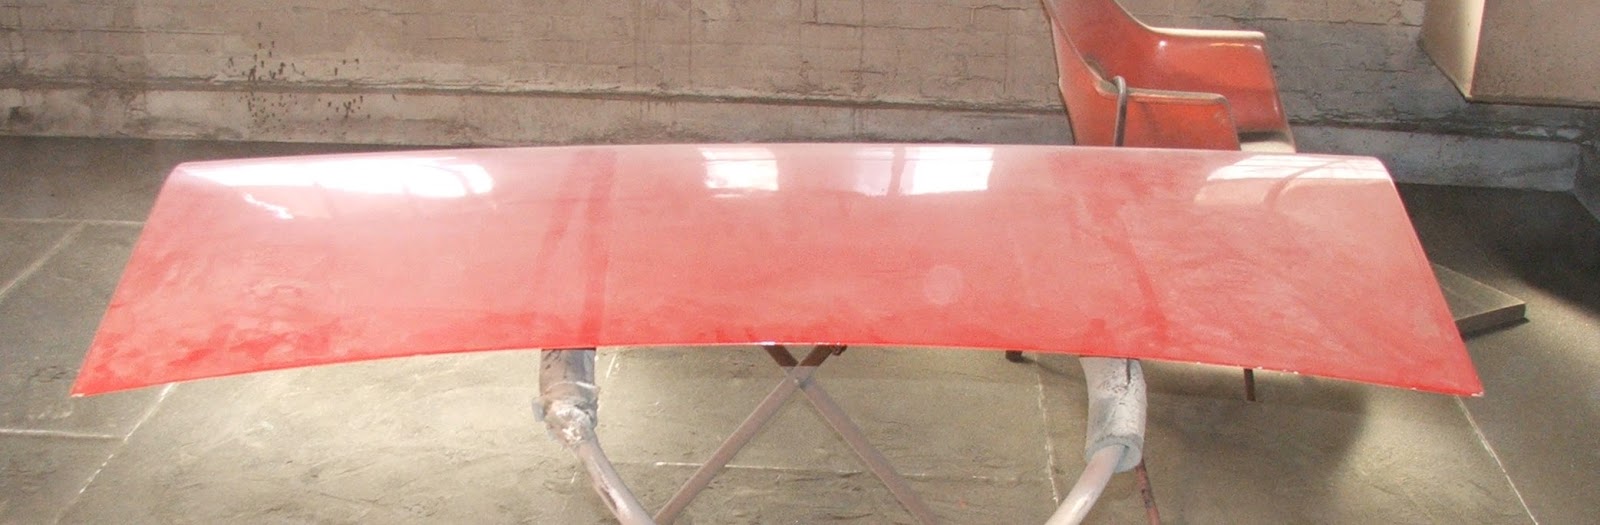 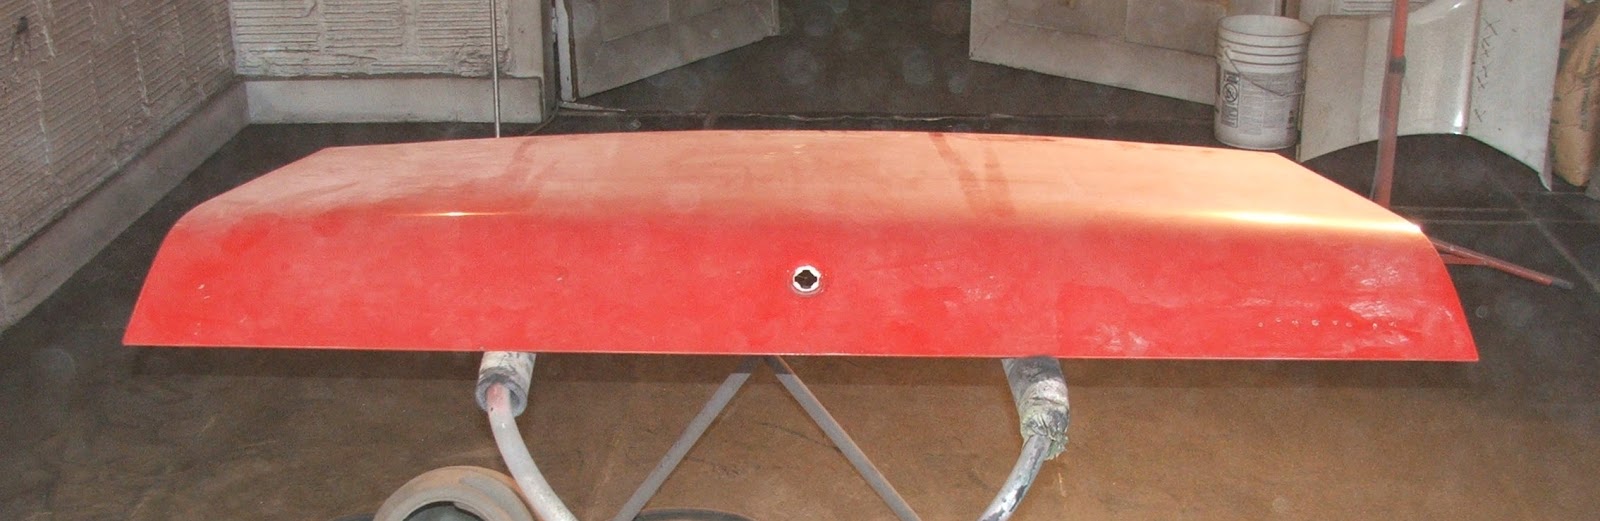 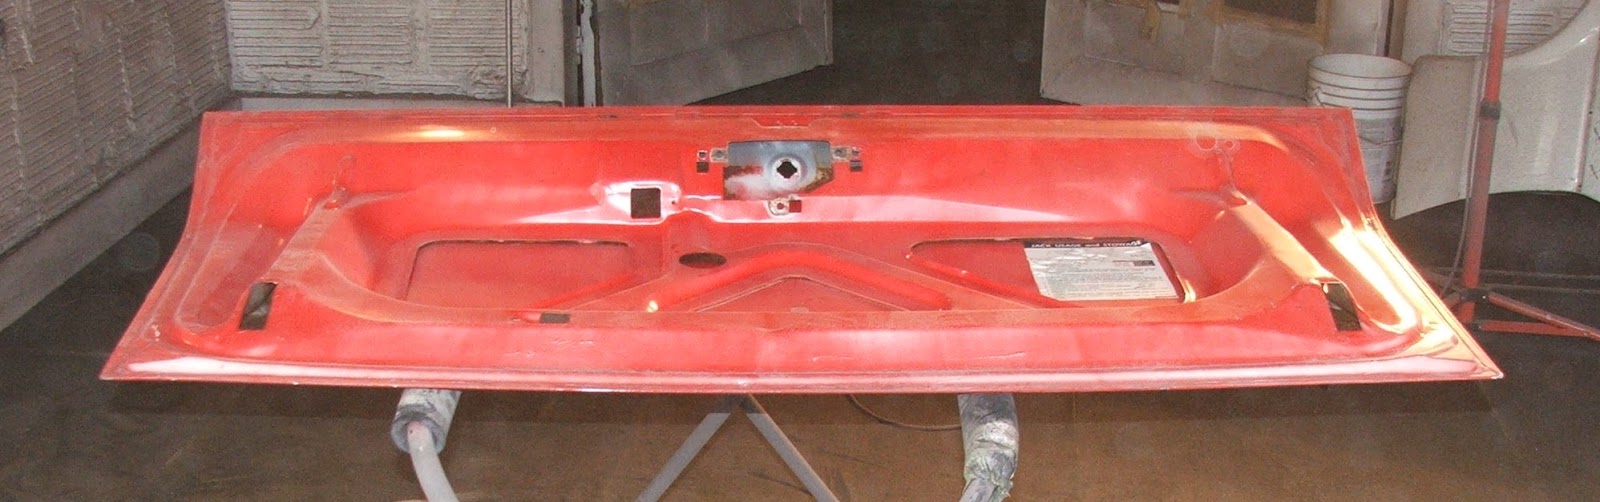 A bit of surface rust on the underside of the metal... 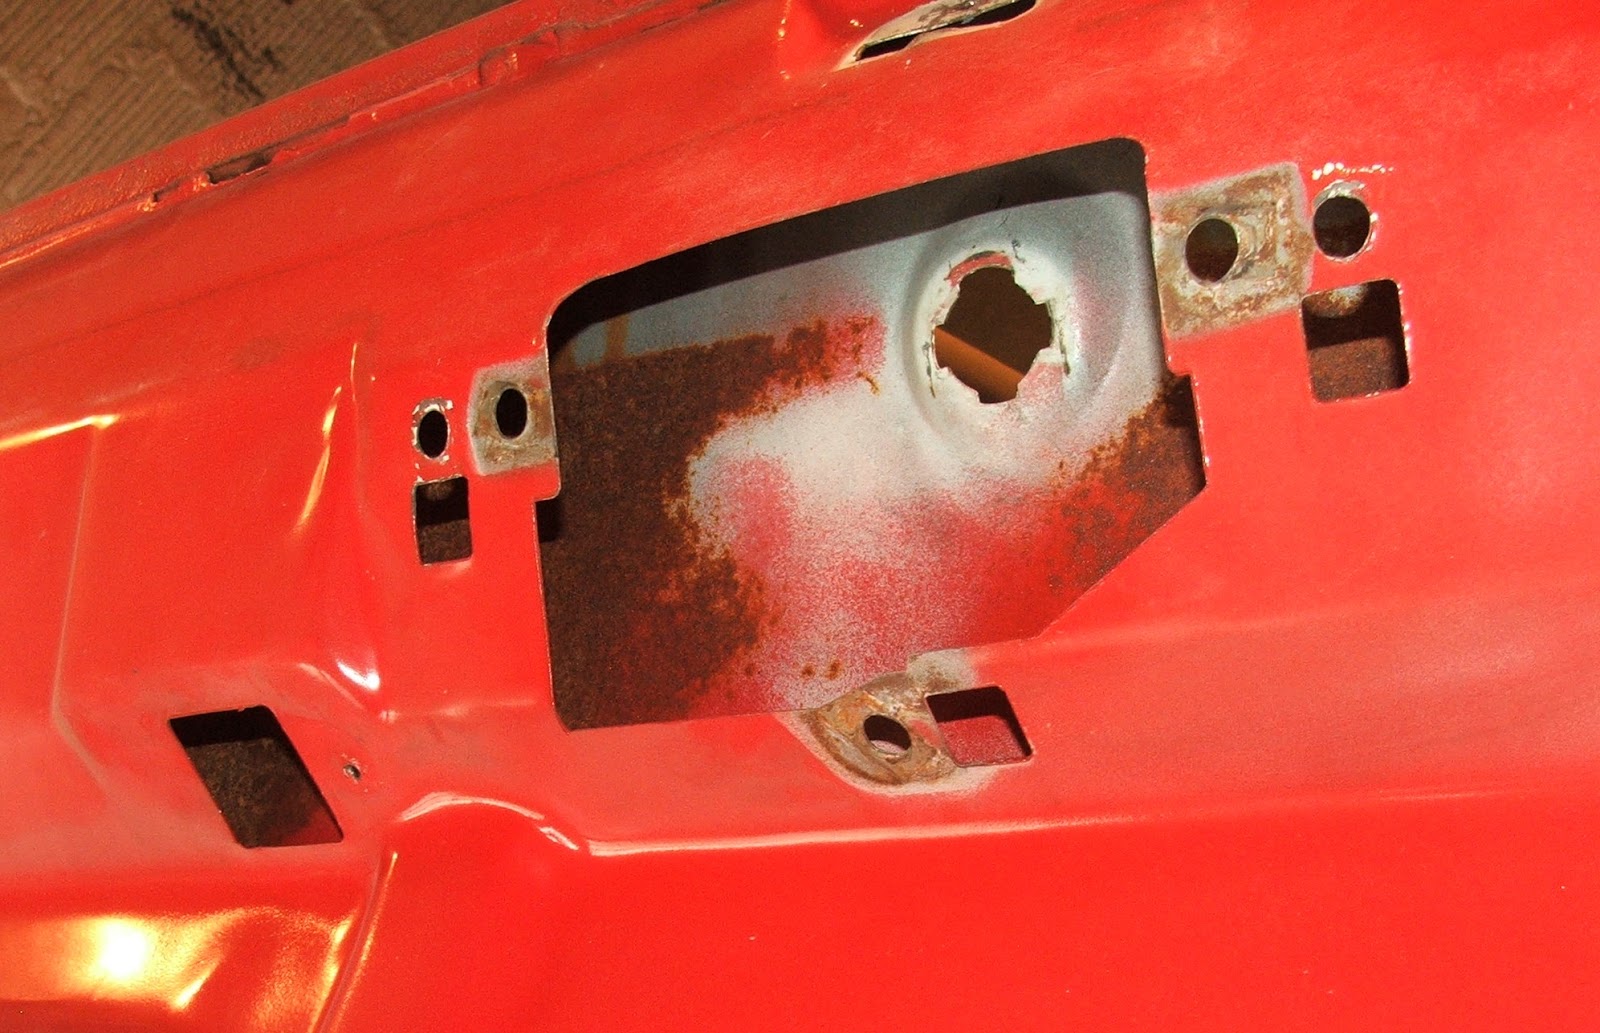 and a remnant of the CB days...  but nothing major. Hit the edges and corners first to make sure there was no major rust in those spots before proceeding with the rest of the lid.  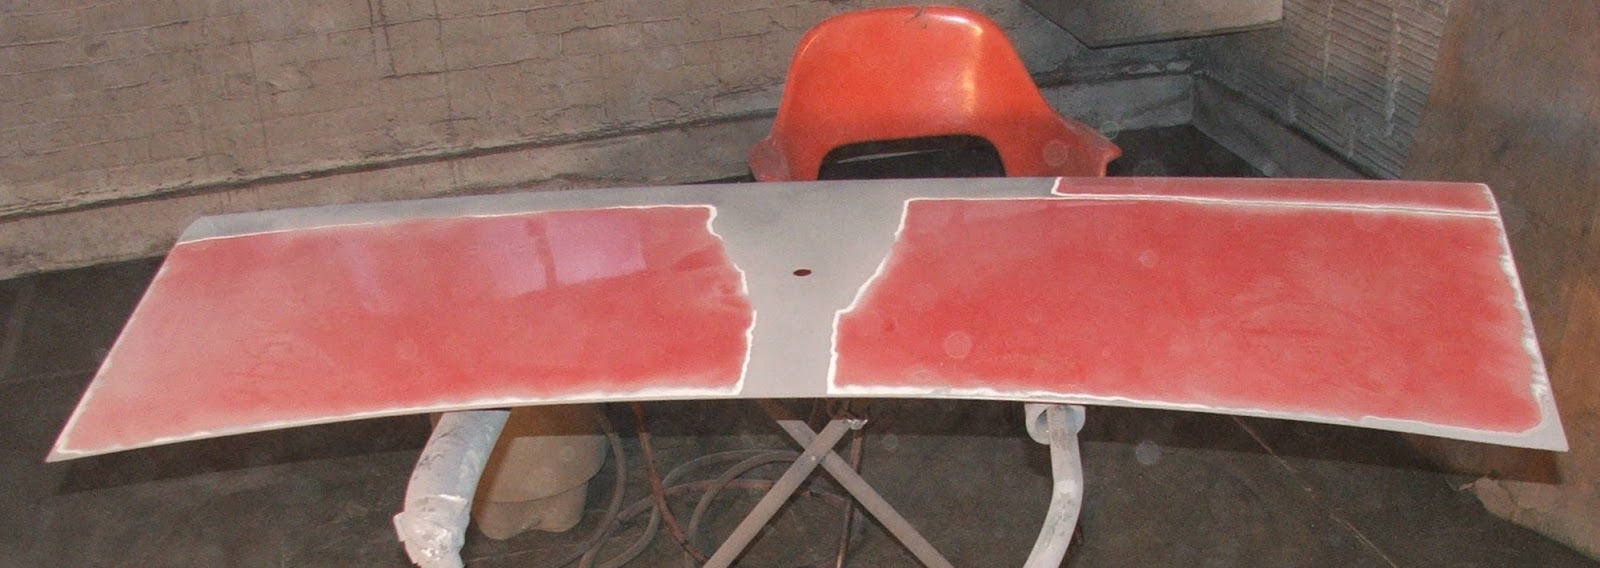 My lil' hopper blaster...  is a bit slow but at least I know it won't damage the sheet metal... but she gits-r-dun! This Saturday was pretty much a wasted day... waited on someone to arrive at the body shop so I could pick up my windshield and rear glass but they never showed up. Got to the dealership a bit after 1, so I worked on a few miscellaneous tasks that needed to get done..... stripped the paint off the deck lid springs... 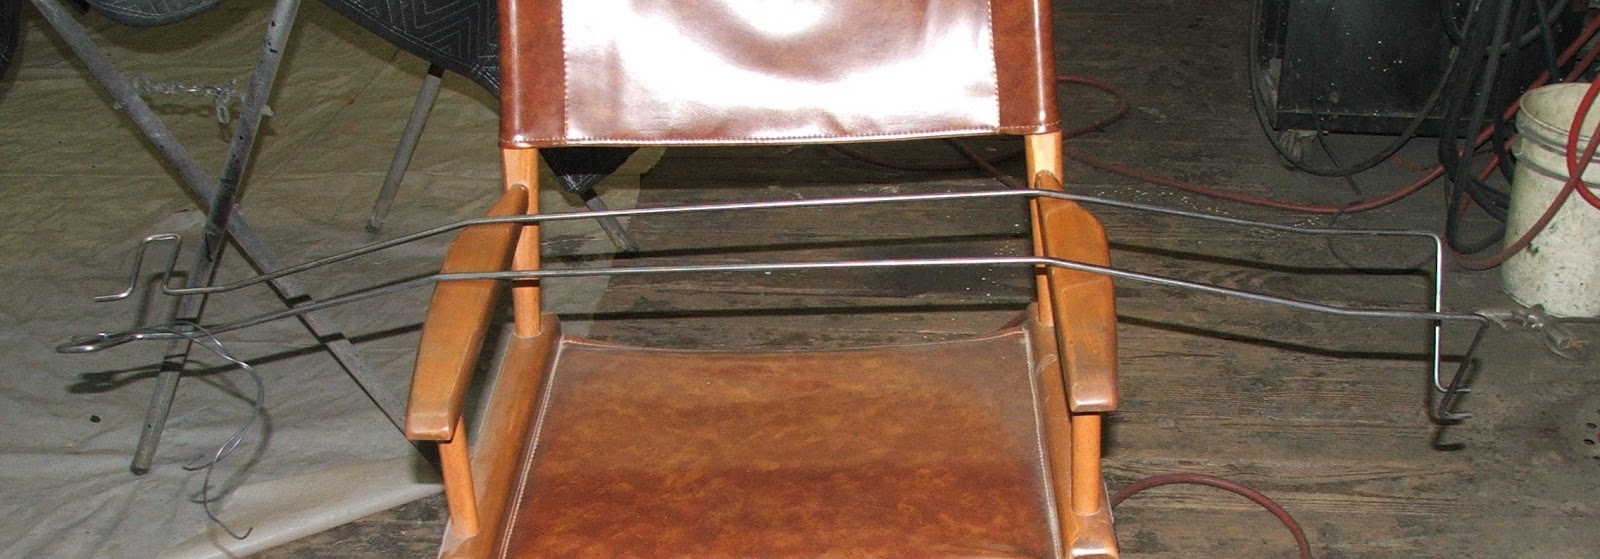 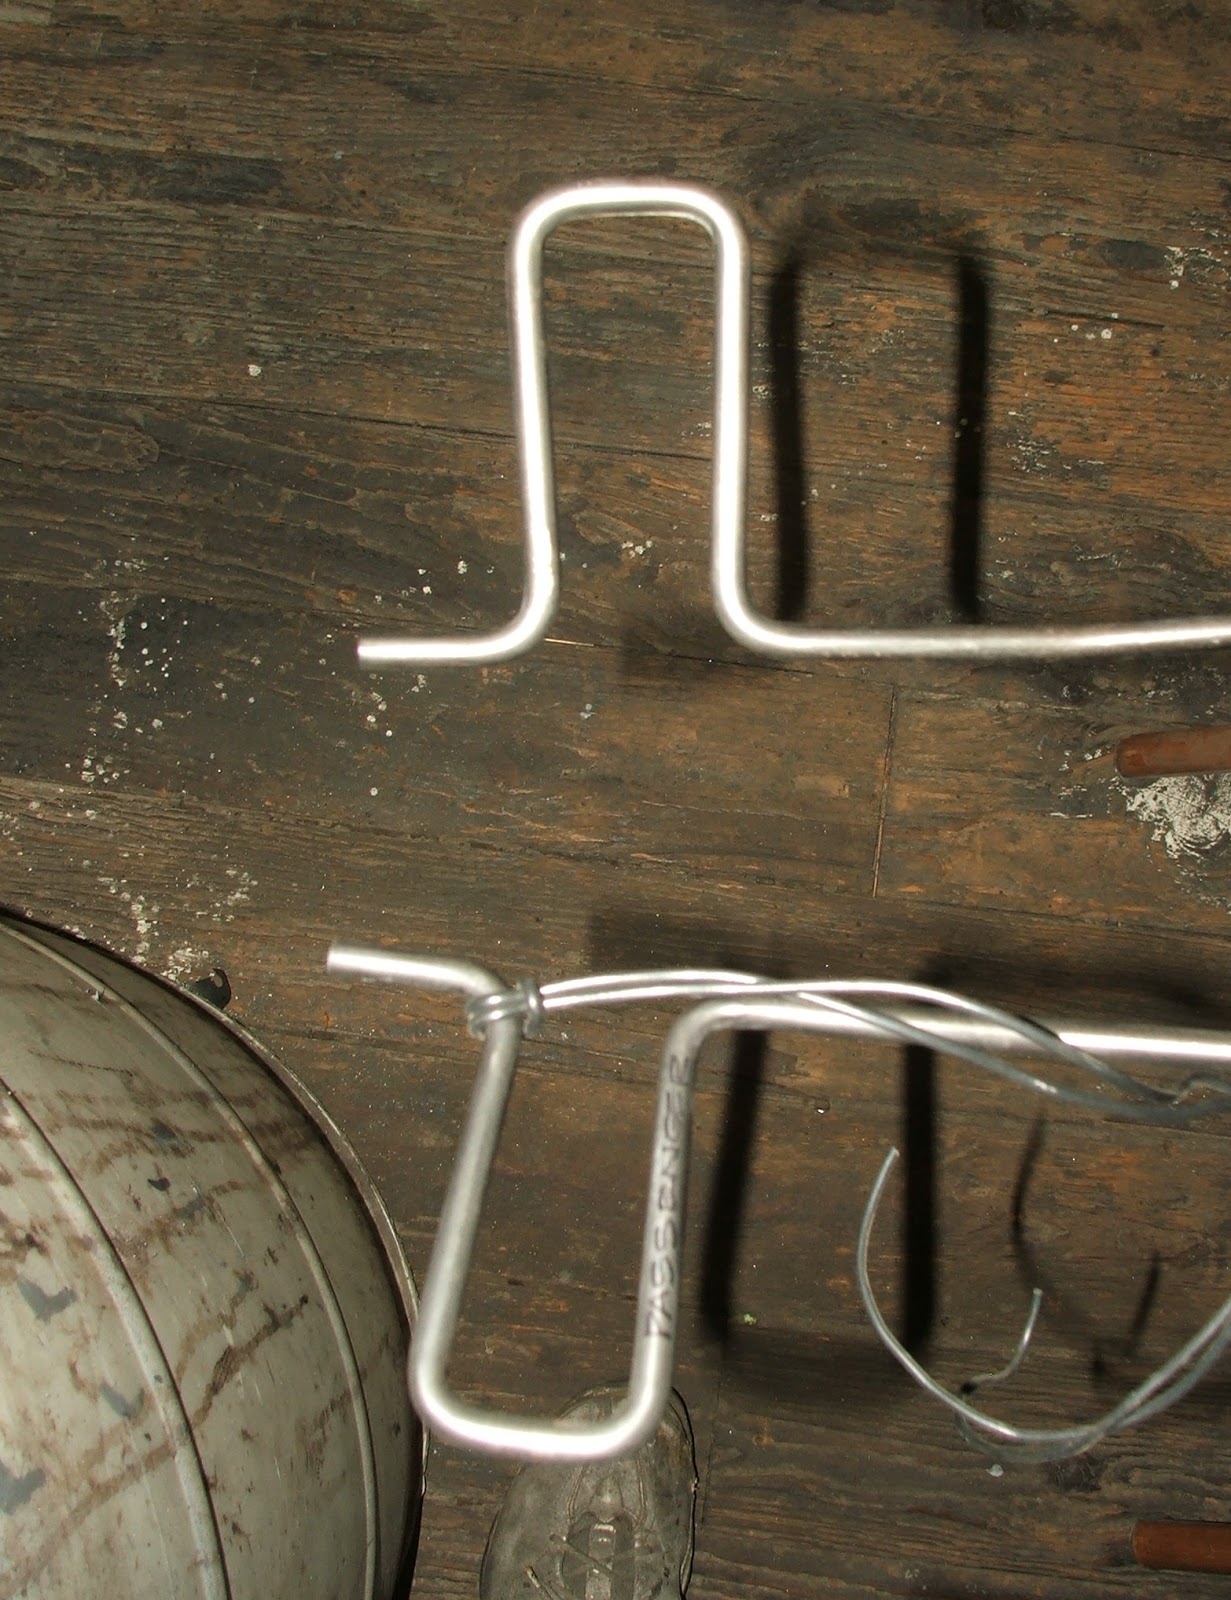 made the captive nut for the alternator adjustment arm...  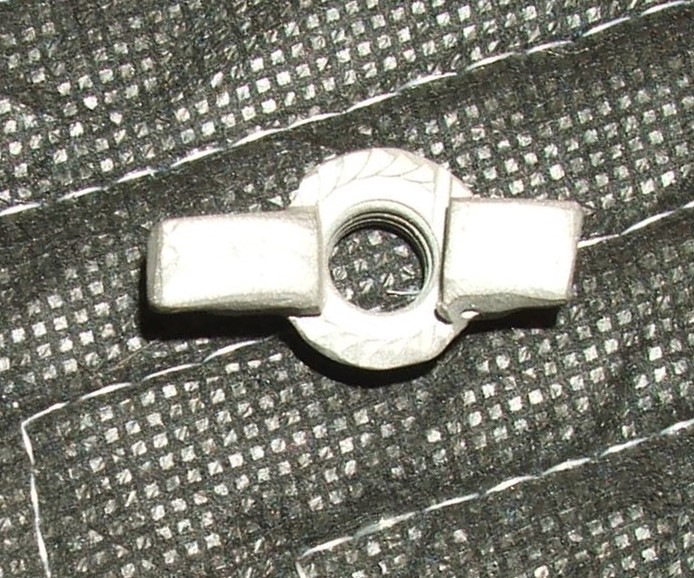   and disassembled and blasted the cruise control servo...  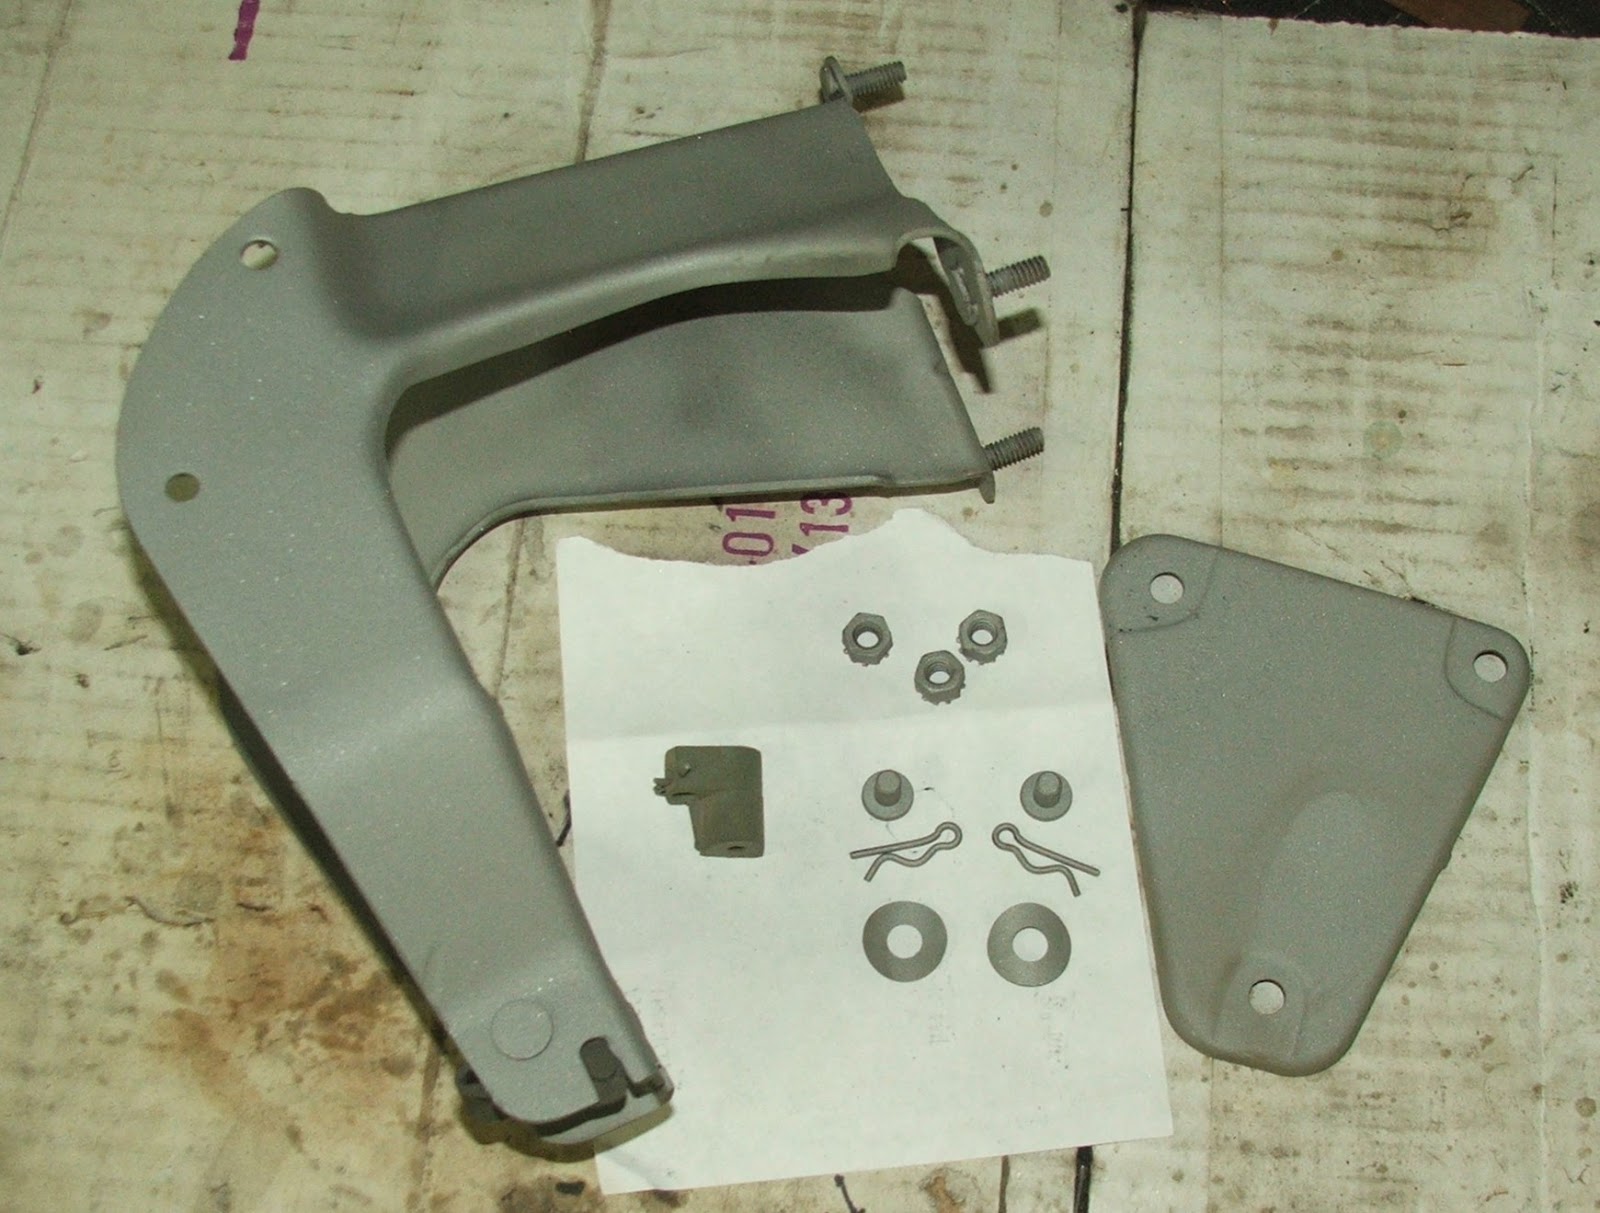 So there was SOME PROGRESS! I also drug out the front & rear bumper reinforcements to see how I could reduce their mass and weight by a cutting away some of the metal.
Edited by TV 2M8O - 17-September-2017 at 5:08AM |
|
|
TV 2M8O OUT JOE 1976 Gran Torino S&H season 2-4 Clone Project Blog: http://tv2m8o.blogspot.com/ |
|
|
|
|
californiajohnny
Moderator Group
Joined: 05-October-2013 Location: winlock, wa Status: Offline Points: 14609 |
Post Options
Thanks(0)
Quote Reply
Posted: 17-September-2017 at 5:52AM |
|
AHHHHHH!!! this is just like T.V....just when it's gettin' good , f**king commercial!!!!
  gettin' there joe , damn you should be close to paint  |
|
|
JOHN
74 GRAN TORINO S&H CLONE 74 VETTE CUSTOM 90 S10 BLAZER 4X4 LIFTED 77 CELICA CUSTOM 75 V8 MONZA SUPERCHARGED 79 COURIER VERT. SLAMMED 75 VEGA V6 5 SPD 70 CHEV C10 P/U 68 MUSTANG FB CONVERSION |
|
|
|
|
Rockatansky
Senior Member
Joined: 30-July-2010 Location: On The Road Status: Offline Points: 6072 |
Post Options
Thanks(0)
Quote Reply
Posted: 17-September-2017 at 6:15AM |
|
|
|
72 GT Ute
|
|
|
|
|
TV 2M8O
Senior Member
Joined: 20-September-2006 Location: Southern Ohio Status: Offline Points: 2053 |
Post Options
Thanks(0)
Quote Reply
Posted: 17-September-2017 at 7:24AM |
Good point Max... THANKS Johnny, I'm really close, but now I need to find a new shop to handle the body and paint. The shop I was gonna use is closing it's doors the end of September. My target it to have it in the body shop before the holidays... if I can find a shop I feel can do the work to my standards. I'm kind anal! LOL
Edited by TV 2M8O - 17-September-2017 at 7:24AM |
|
|
TV 2M8O OUT JOE 1976 Gran Torino S&H season 2-4 Clone Project Blog: http://tv2m8o.blogspot.com/ |
|
|
|
|
californiajohnny
Moderator Group
Joined: 05-October-2013 Location: winlock, wa Status: Offline Points: 14609 |
Post Options
Thanks(0)
Quote Reply
Posted: 17-September-2017 at 9:23AM |
|
oh i know what you mean!
i thought the owner was still going to do it for you at his house??? or did he flake out on you? |
|
|
JOHN
74 GRAN TORINO S&H CLONE 74 VETTE CUSTOM 90 S10 BLAZER 4X4 LIFTED 77 CELICA CUSTOM 75 V8 MONZA SUPERCHARGED 79 COURIER VERT. SLAMMED 75 VEGA V6 5 SPD 70 CHEV C10 P/U 68 MUSTANG FB CONVERSION |
|
|
|
|
TV 2M8O
Senior Member
Joined: 20-September-2006 Location: Southern Ohio Status: Offline Points: 2053 |
Post Options
Thanks(0)
Quote Reply
Posted: 17-September-2017 at 10:51AM |
John, He still wants to do it but I'm concerned about the quality until I see how his home shop is set up. Come too far to let it get screwed up now!!!
 |
|
|
TV 2M8O OUT JOE 1976 Gran Torino S&H season 2-4 Clone Project Blog: http://tv2m8o.blogspot.com/ |
|
|
|
|
californiajohnny
Moderator Group
Joined: 05-October-2013 Location: winlock, wa Status: Offline Points: 14609 |
Post Options
Thanks(0)
Quote Reply
Posted: 17-September-2017 at 2:11PM |
|
true!the guy with the knowledge makes a big difference the shop, well i can tell you i've done some damn nice paint jobs in a dirt floor garage
 not that i'd recommend doing that lol, and i've done some in a shop that was like an electronics "clean room" and every piece of dust and lint from 2 counties found it's way into the clear! not that i'd recommend doing that lol, and i've done some in a shop that was like an electronics "clean room" and every piece of dust and lint from 2 counties found it's way into the clear! .... .... |
|
|
JOHN
74 GRAN TORINO S&H CLONE 74 VETTE CUSTOM 90 S10 BLAZER 4X4 LIFTED 77 CELICA CUSTOM 75 V8 MONZA SUPERCHARGED 79 COURIER VERT. SLAMMED 75 VEGA V6 5 SPD 70 CHEV C10 P/U 68 MUSTANG FB CONVERSION |
|
|
|
|
TV 2M8O
Senior Member
Joined: 20-September-2006 Location: Southern Ohio Status: Offline Points: 2053 |
Post Options
Thanks(0)
Quote Reply
Posted: 01-October-2017 at 4:54AM |
|
**CLICK ON PICS TO ENLARGE AND CLICK AGAIN TO SUPERSIZE** Well Saturday sucked sand..... NO REALLY, I sucked sand most of the day! LOL, I had to vacuum up all the sand from the blast booth so I could continue blasting the deck lid and a few other major components that can't fit into the blast cabinet. Had I remembered, I could have done that last Saturday while recuperating from elbow surgery rather than waiting around at the house for F3 to let me know they were at the shop to pick up my windshield and heated back glass!  Here is my little bucket blaster that has served me well in blasting the undercarriage and other larger items on this build 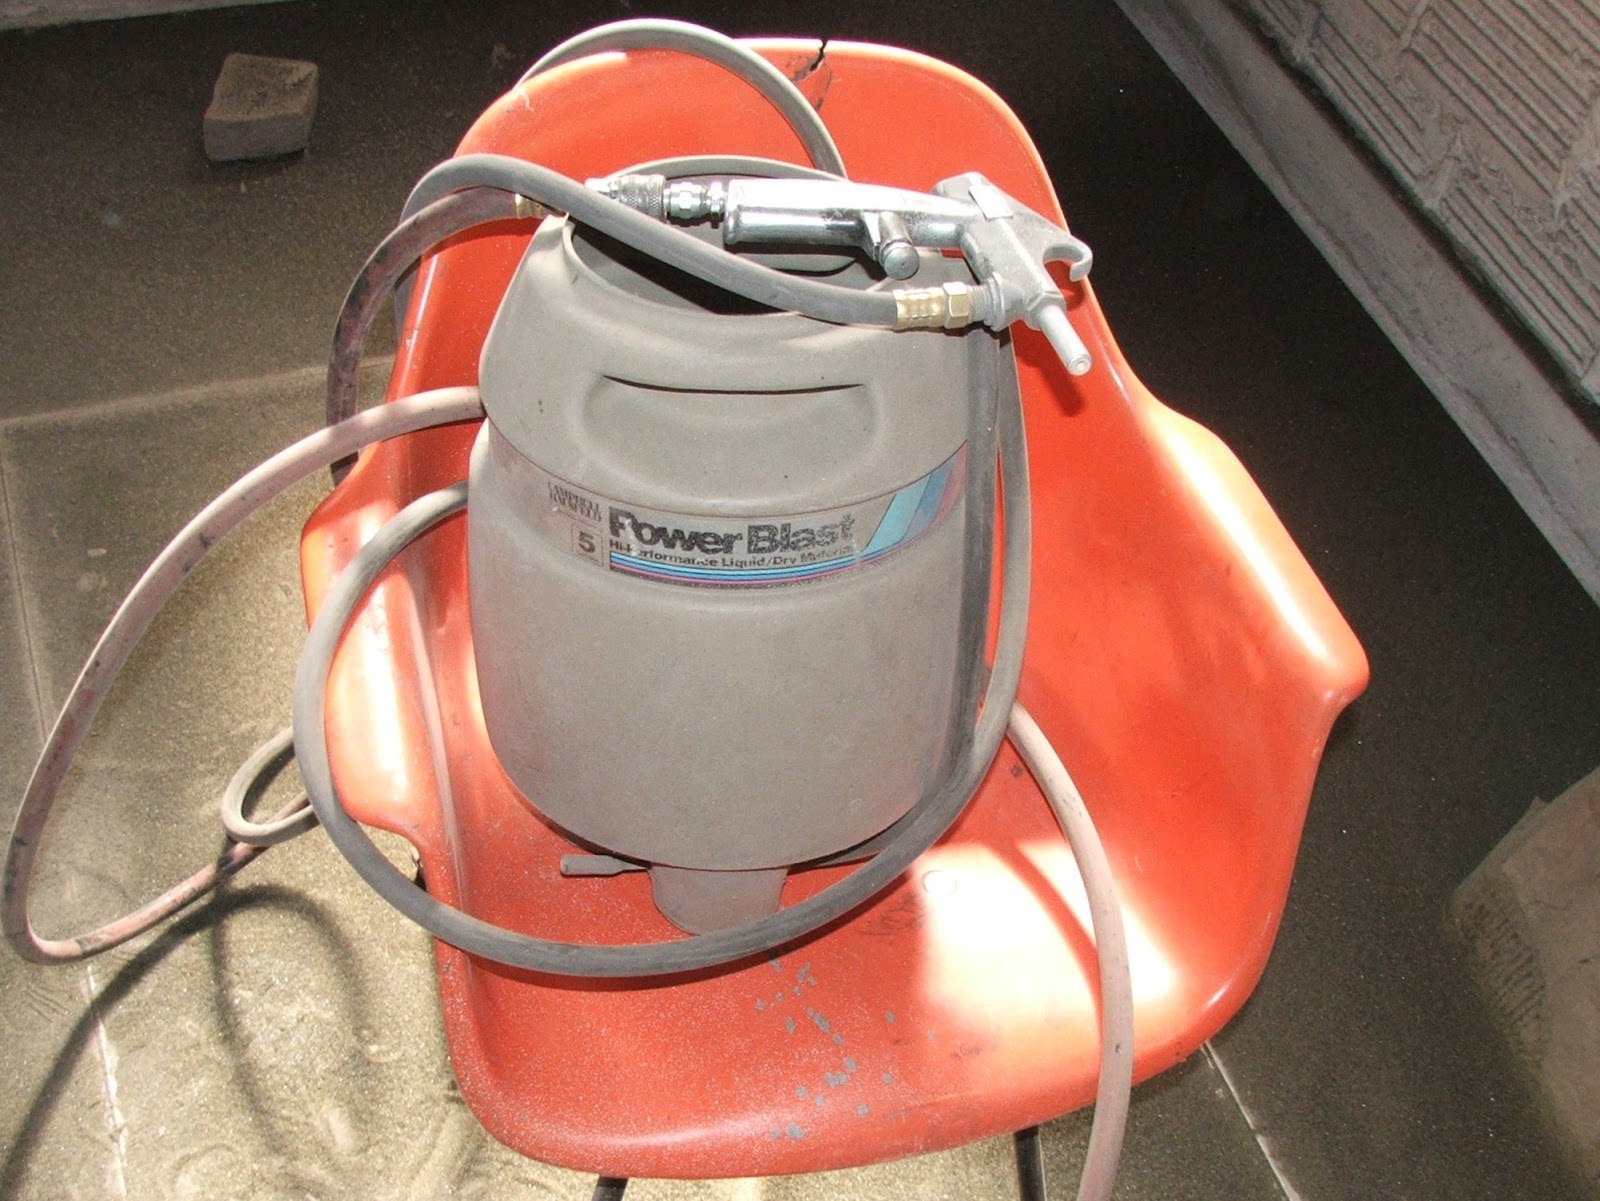 as well as our blast cabinet for the smaller stuff.  Once I was finished vacuuming and sifting the sand into 5 gallon buckets, I check my alternator captive nut to verify it would work as envisioned  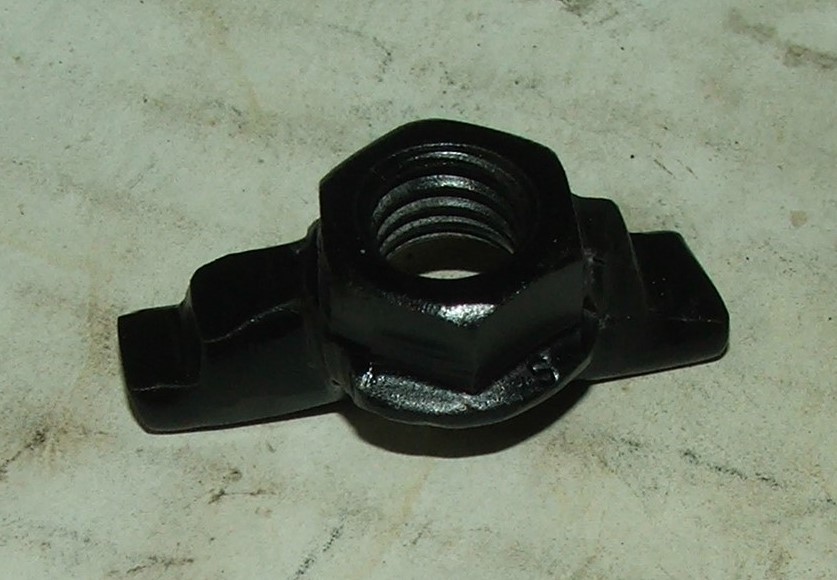 and got that all put together 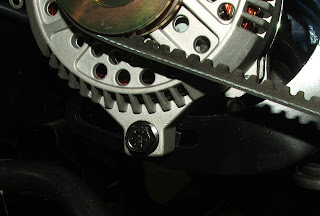  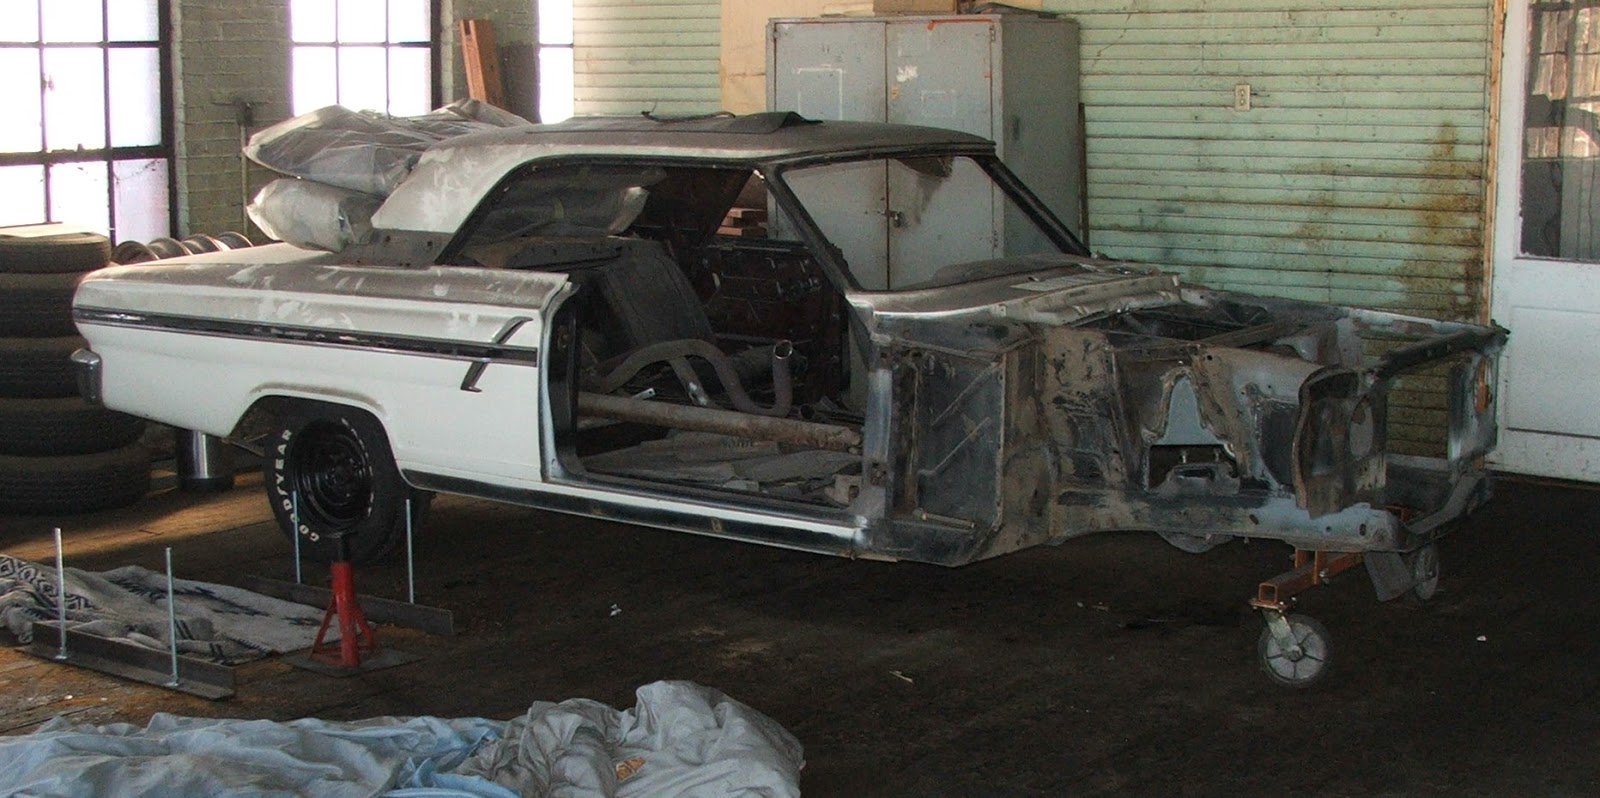 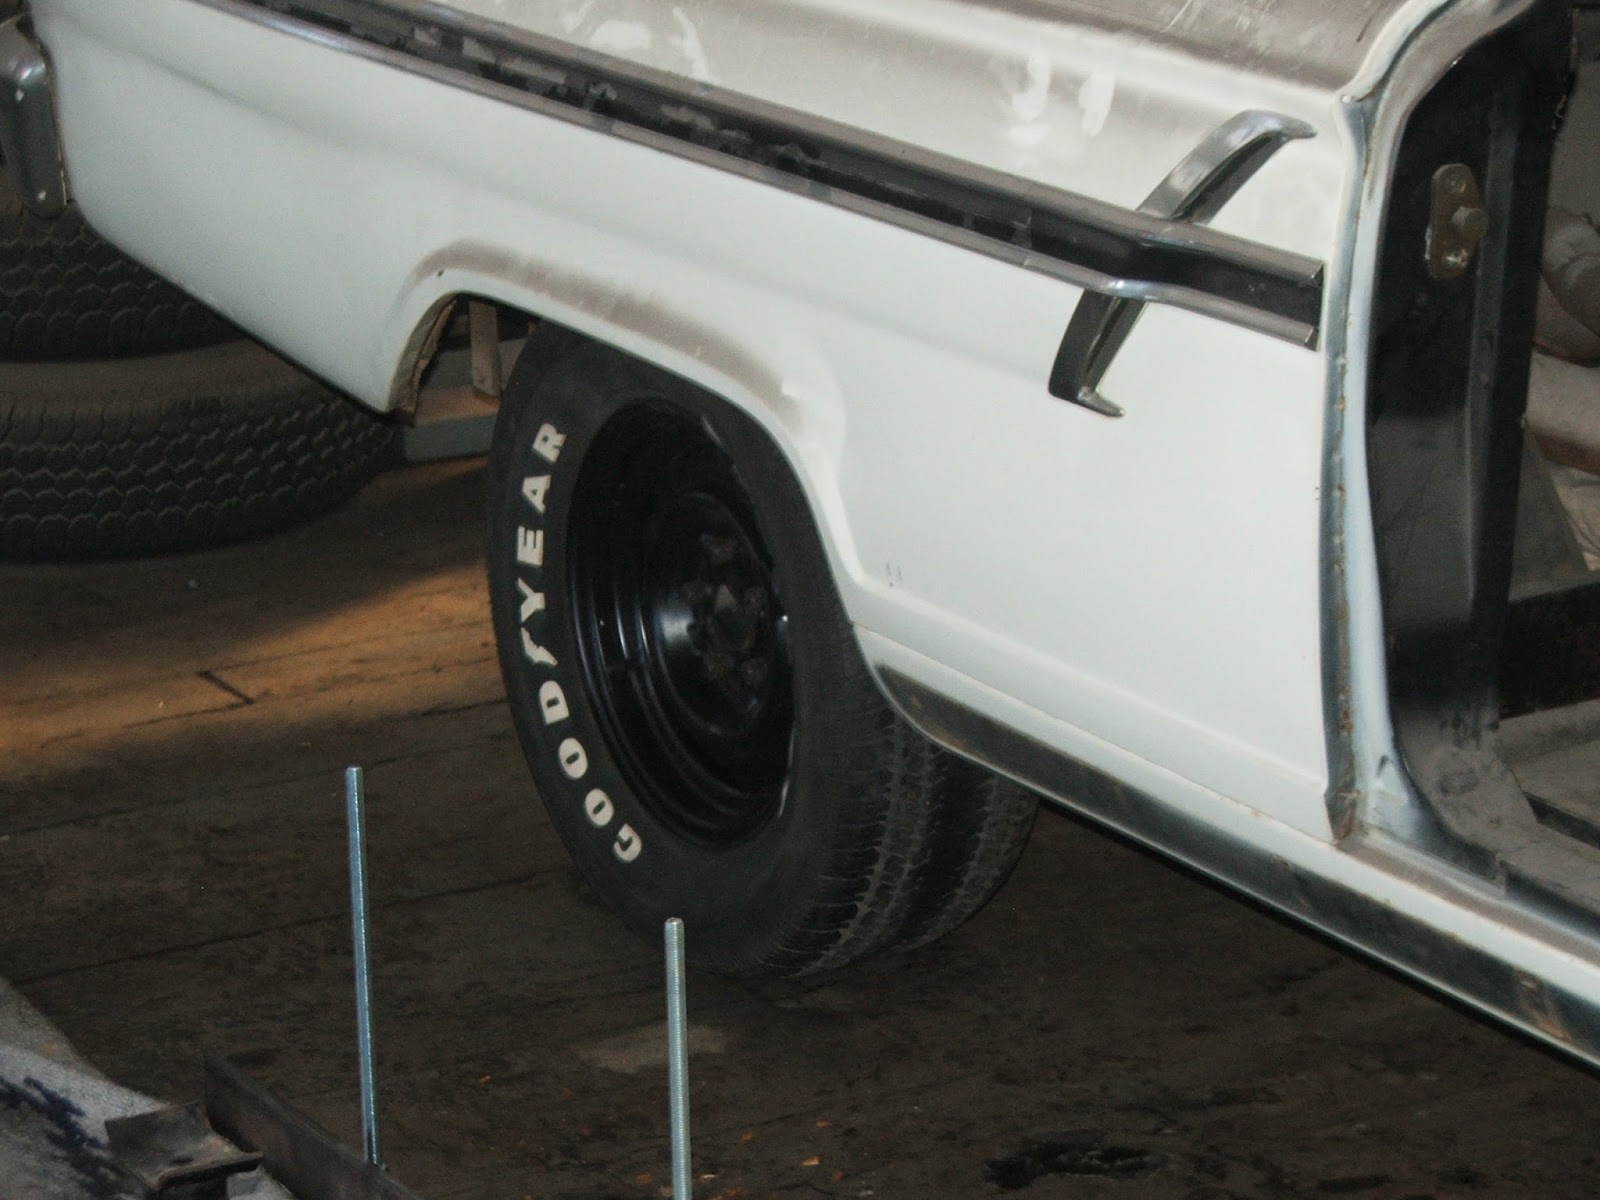 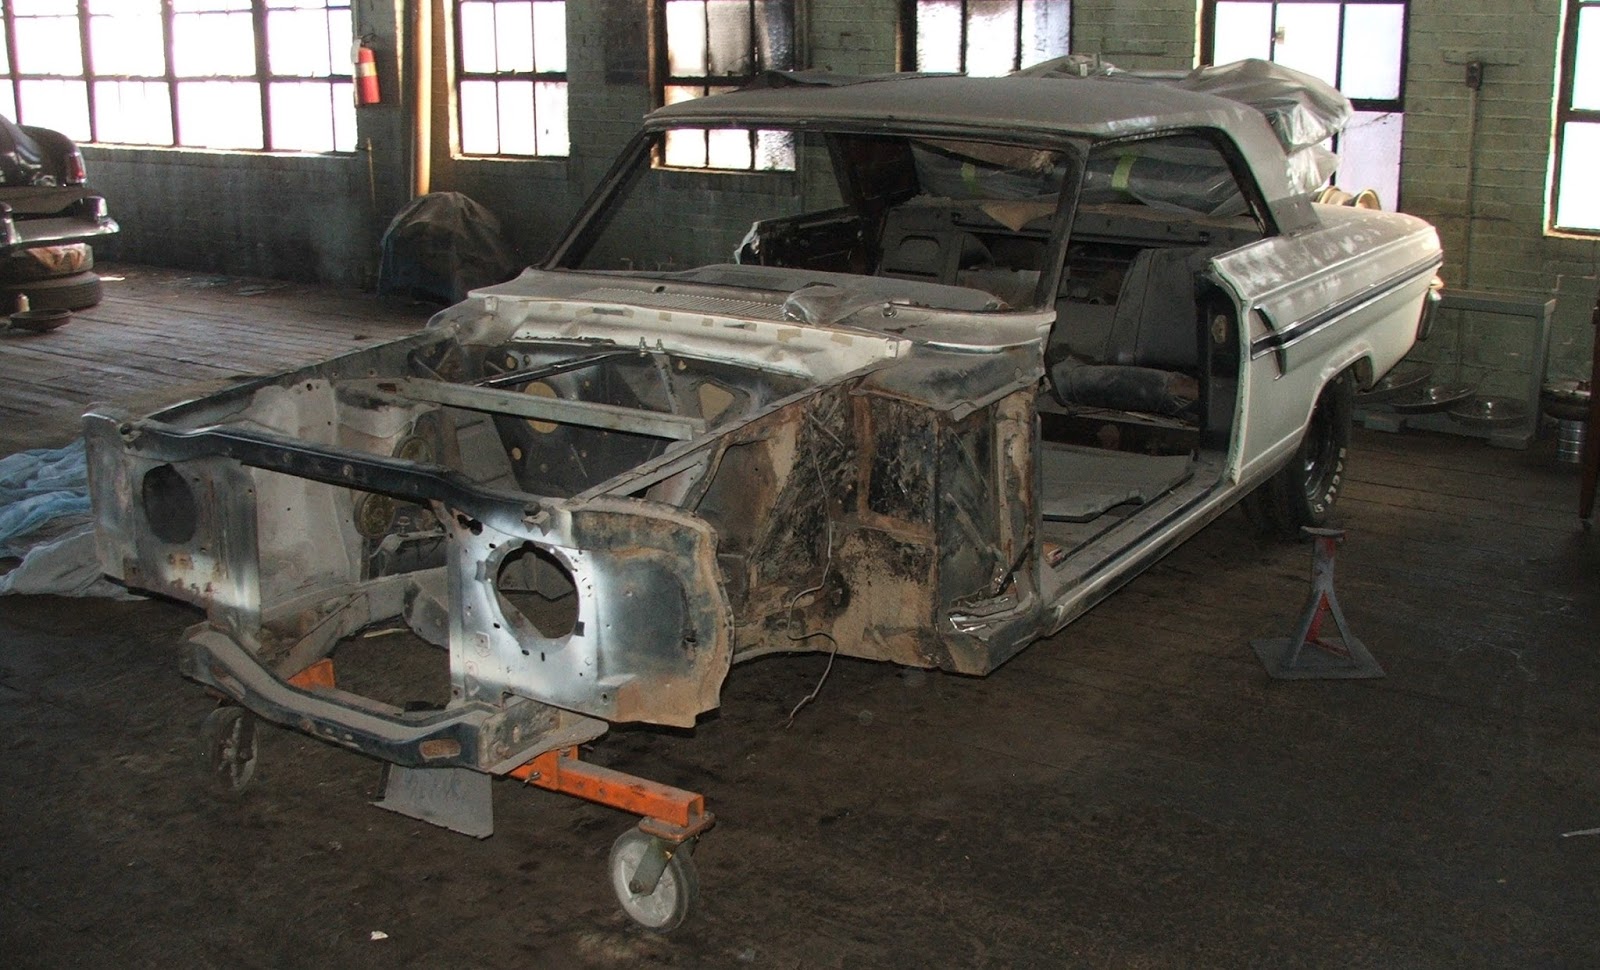 Next weekend hope to get the sheetmetal blasting all knocked out.
Edited by TV 2M8O - 01-October-2017 at 5:16AM |
|
|
TV 2M8O OUT JOE 1976 Gran Torino S&H season 2-4 Clone Project Blog: http://tv2m8o.blogspot.com/ |
|
|
|
|
californiajohnny
Moderator Group
Joined: 05-October-2013 Location: winlock, wa Status: Offline Points: 14609 |
Post Options
Thanks(0)
Quote Reply
Posted: 01-October-2017 at 6:31AM |
|
uh-huh several vehicles in various states of disrepair
 (lol i know the feeling ) (lol i know the feeling ) |
|
|
JOHN
74 GRAN TORINO S&H CLONE 74 VETTE CUSTOM 90 S10 BLAZER 4X4 LIFTED 77 CELICA CUSTOM 75 V8 MONZA SUPERCHARGED 79 COURIER VERT. SLAMMED 75 VEGA V6 5 SPD 70 CHEV C10 P/U 68 MUSTANG FB CONVERSION |
|
|
|
|
TV 2M8O
Senior Member
Joined: 20-September-2006 Location: Southern Ohio Status: Offline Points: 2053 |
Post Options
Thanks(0)
Quote Reply
Posted: 15-October-2017 at 9:34AM |
|
**CLICK ON PICS TO ENLARGE AND CLICK AGAIN TO SUPERSIZE** A wee bit of progress this weekend... CaliforniaJohnny sent me a proportioning valve like is on the Tomato. 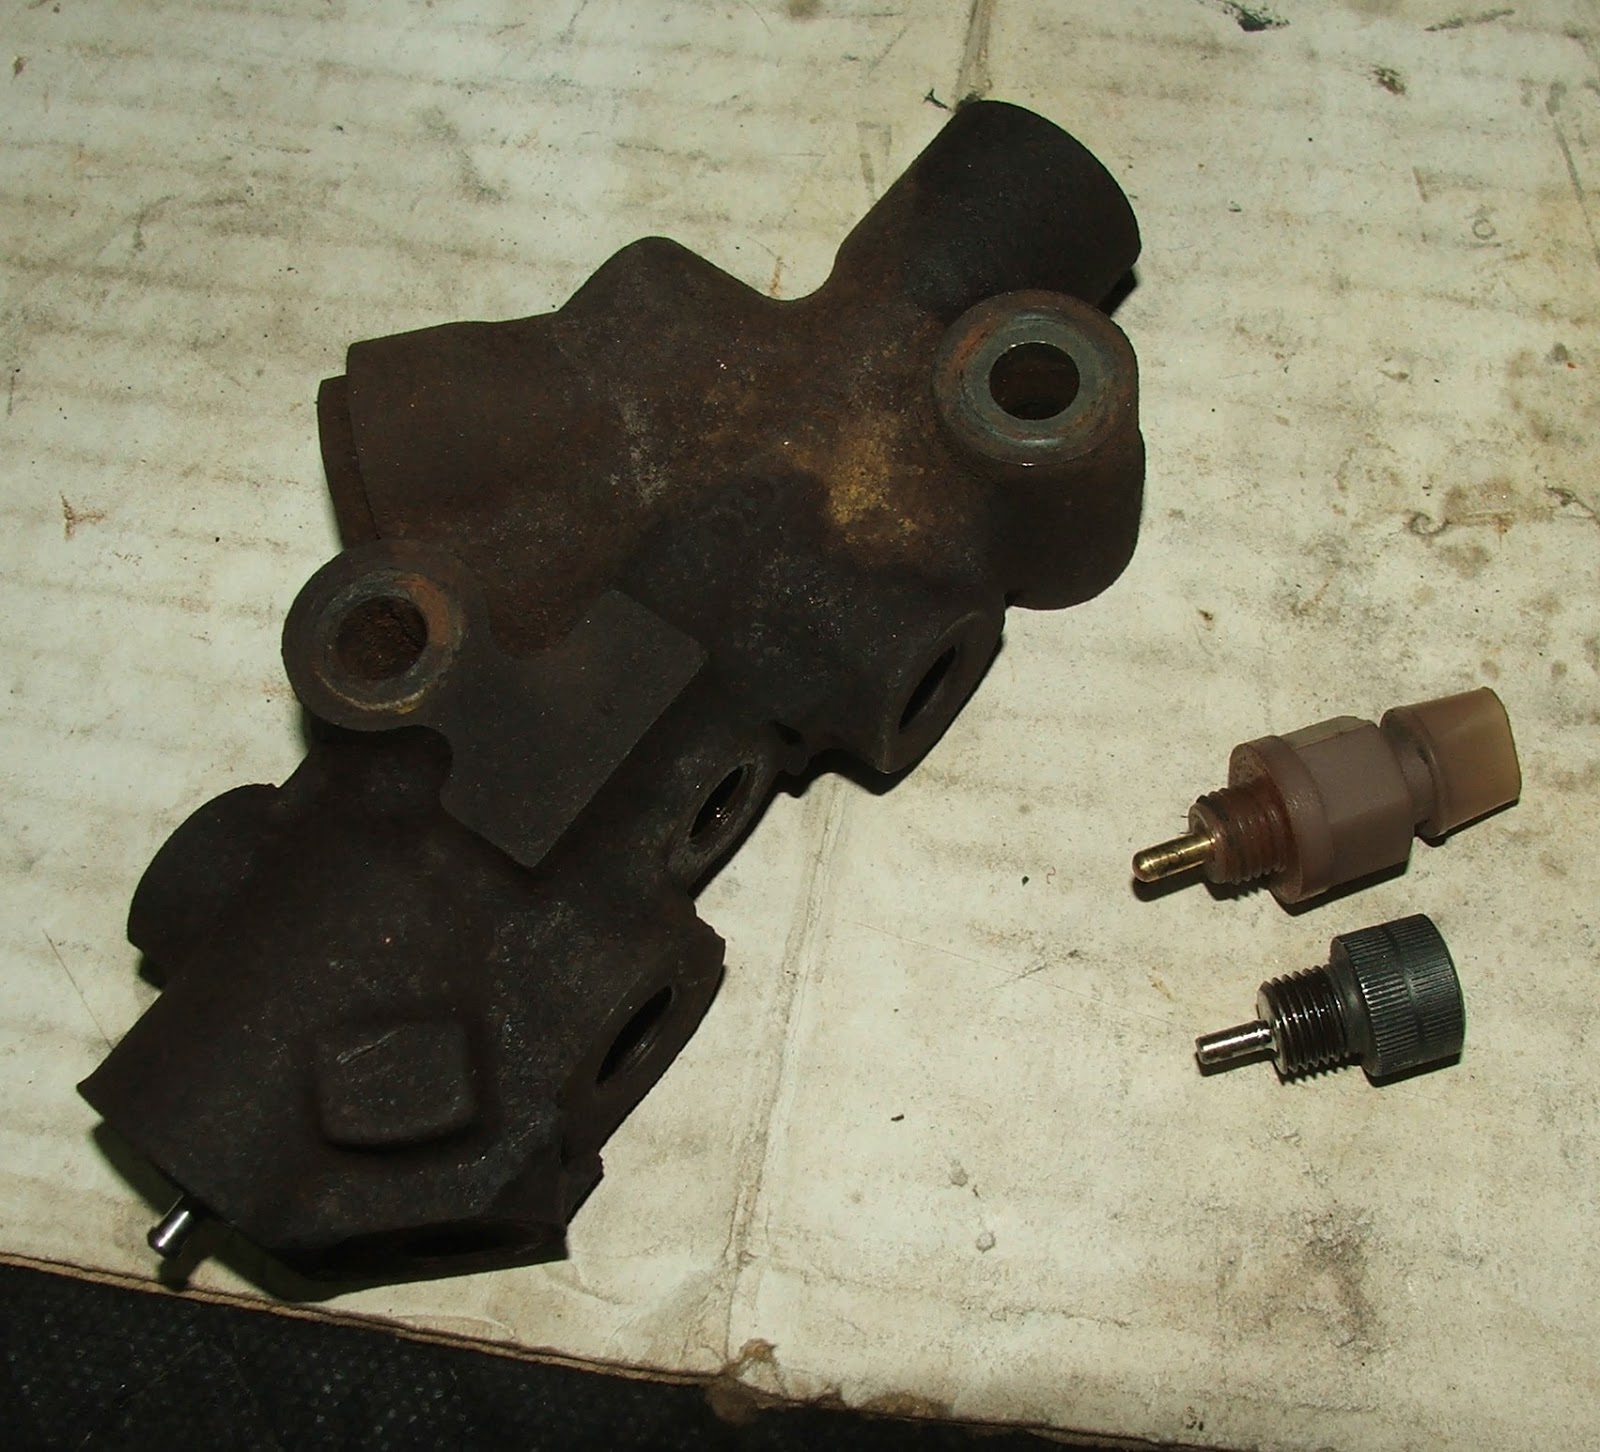 It allowed me to make a distribution piston stop (install in place of brake switch to keep the piston centered while bleeding) as well as determining how to recenter the piston in my proportioning valve.  Simple as taking a 3/32" dia round (the cross bar from a wire coat hanger in my case!) 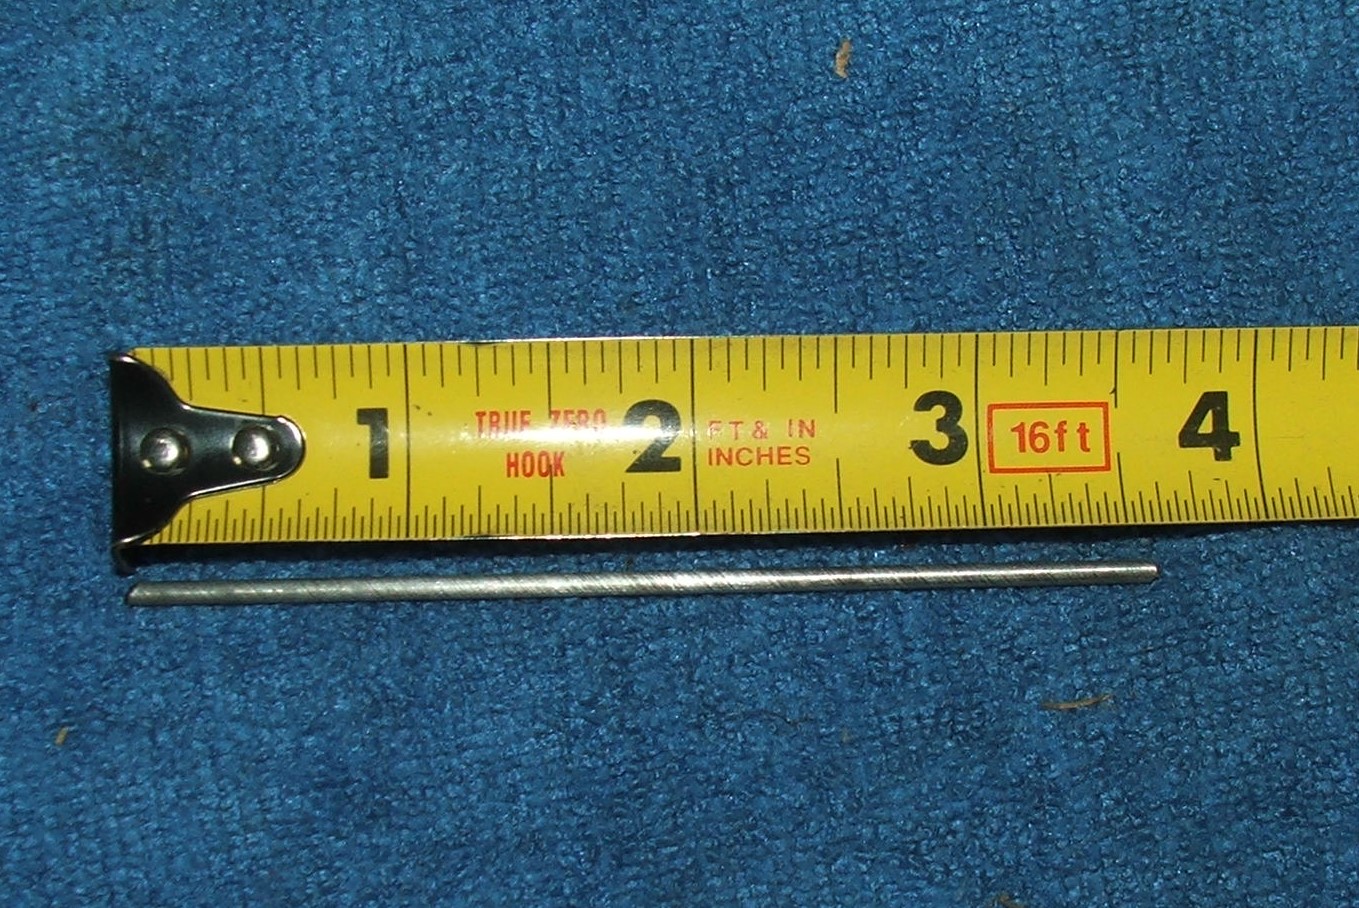 and gently tapping the piston forward in the distribution block until the center divot was visible in the switch opening. 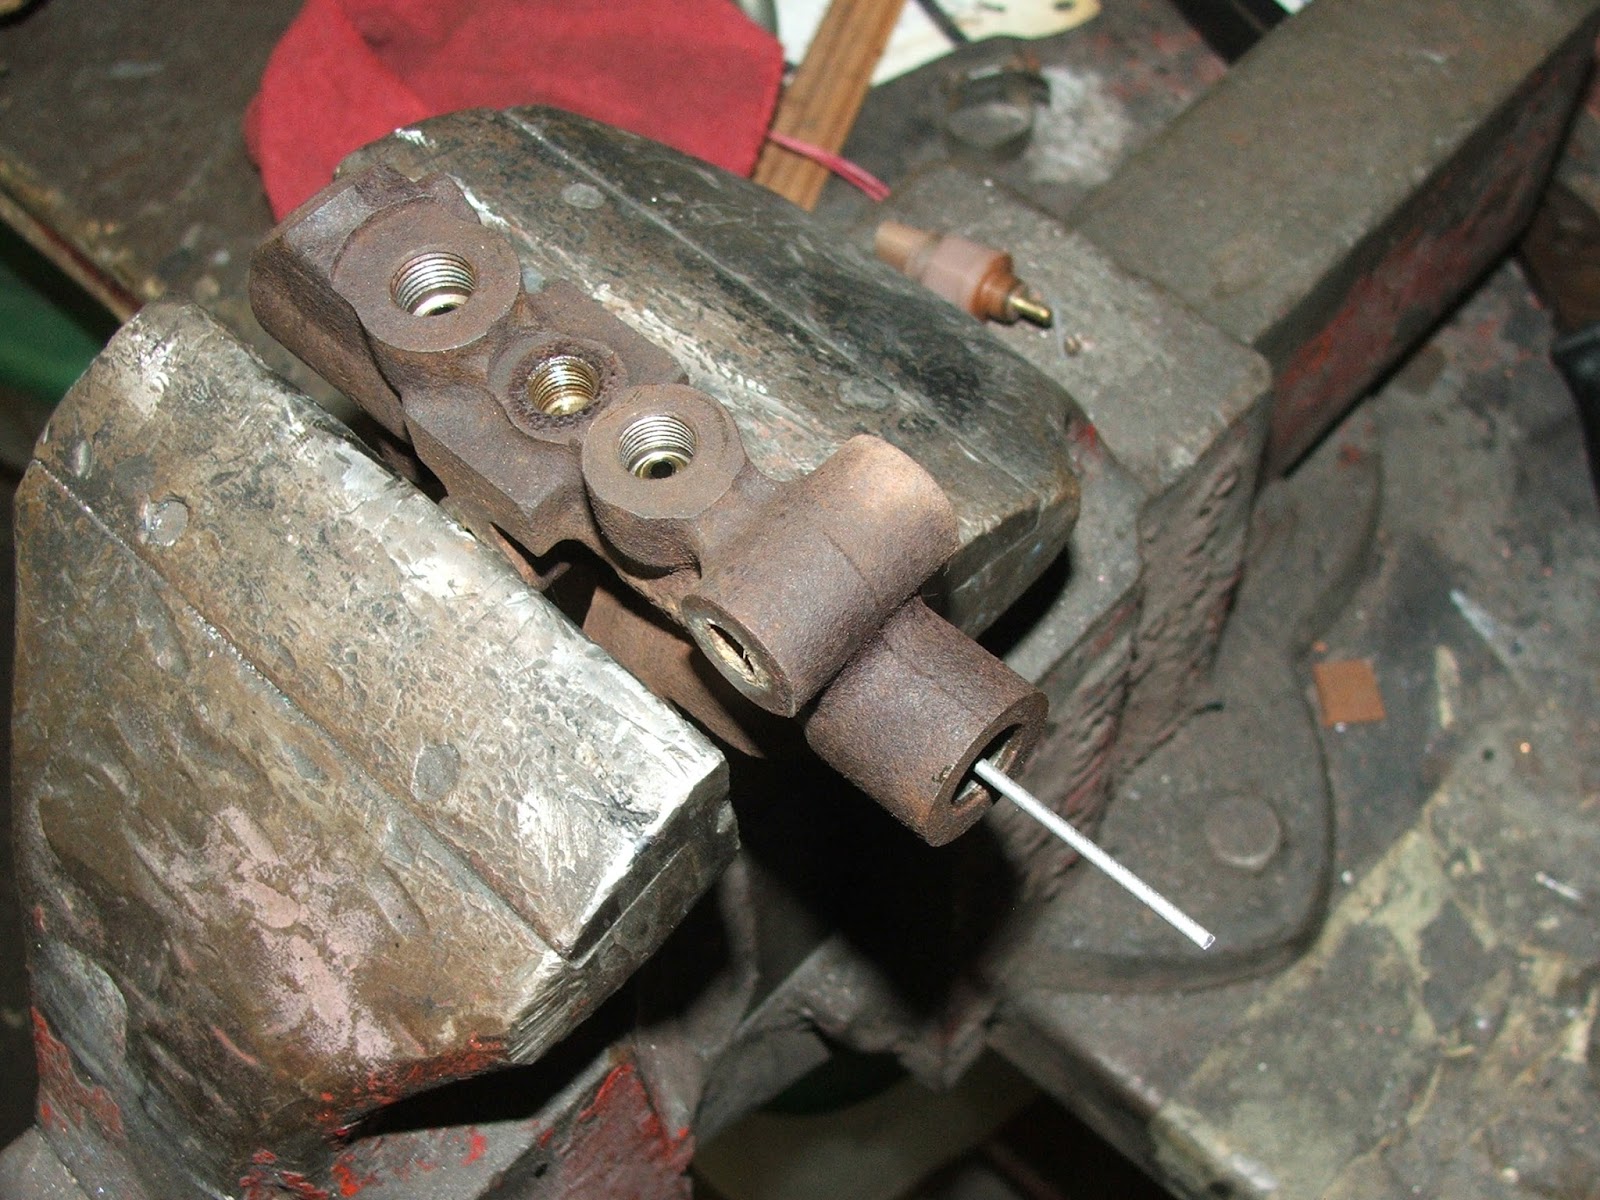 I'll install the stop to keep the piston in place until we get the back brakes bled. Once both systems are bled and I have a firm pedal, the stop will come out and the switch installed back into it's proper home. Once that was finished, I went into the blast booth and blasted a bit more on the deck lid. Just about finished on the outside...  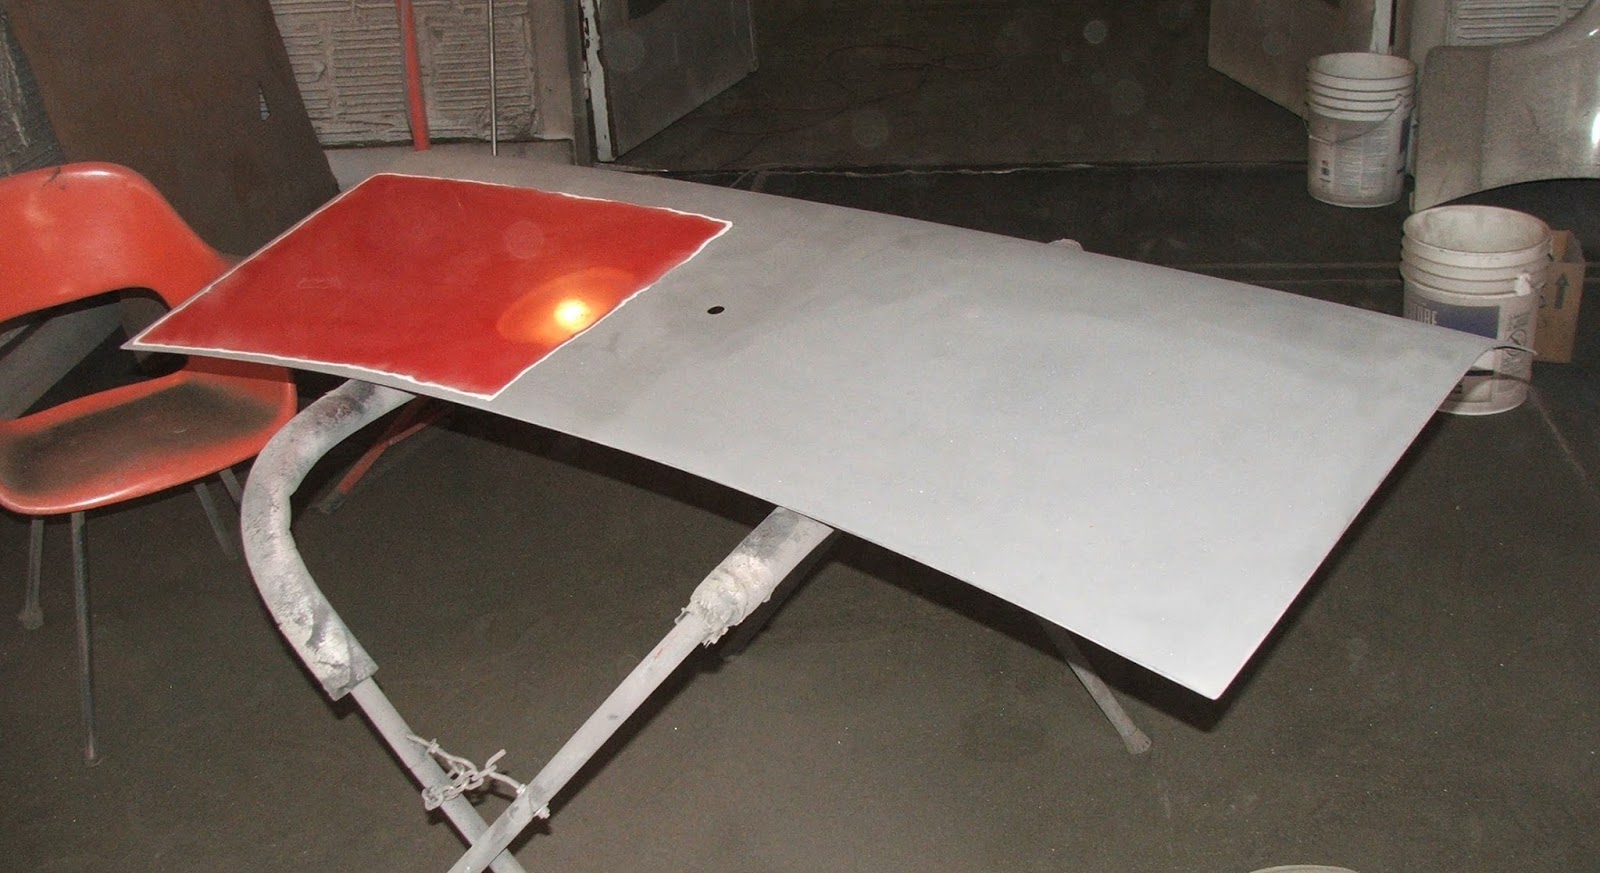 then I'll flip it over and do the inside. Oh what fun! The next two weekends will be unproductive... I have a doctors appointment next weekend at the Cleveland Clinic and the following weekend is our annual wedding anniversary Halloween party. Edited by TV 2M8O - 15-October-2017 at 9:38AM |
|
|
TV 2M8O OUT JOE 1976 Gran Torino S&H season 2-4 Clone Project Blog: http://tv2m8o.blogspot.com/ |
|
|
|
|
californiajohnny
Moderator Group
Joined: 05-October-2013 Location: winlock, wa Status: Offline Points: 14609 |
Post Options
Thanks(0)
Quote Reply
Posted: 15-October-2017 at 7:16PM |
|
looking good joe! i'm surprised that valve wasn't centered it came off a nice car with working brake system!!! must have moved during shipping? |
|
|
JOHN
74 GRAN TORINO S&H CLONE 74 VETTE CUSTOM 90 S10 BLAZER 4X4 LIFTED 77 CELICA CUSTOM 75 V8 MONZA SUPERCHARGED 79 COURIER VERT. SLAMMED 75 VEGA V6 5 SPD 70 CHEV C10 P/U 68 MUSTANG FB CONVERSION |
|
|
|
|
TV 2M8O
Senior Member
Joined: 20-September-2006 Location: Southern Ohio Status: Offline Points: 2053 |
Post Options
Thanks(0)
Quote Reply
Posted: 15-October-2017 at 10:13PM |
John, The valve you sent me WAS centered, I used it to determine if my idea to try and push mine back to center would work. Now I'll use yours as the rebuild model to see if they can truly be rebuilt easily with the parts kit I found on line.
|
|
|
TV 2M8O OUT JOE 1976 Gran Torino S&H season 2-4 Clone Project Blog: http://tv2m8o.blogspot.com/ |
|
|
|
|
californiajohnny
Moderator Group
Joined: 05-October-2013 Location: winlock, wa Status: Offline Points: 14609 |
Post Options
Thanks(0)
Quote Reply
Posted: 16-October-2017 at 3:19AM |
|
ah ok |
|
|
JOHN
74 GRAN TORINO S&H CLONE 74 VETTE CUSTOM 90 S10 BLAZER 4X4 LIFTED 77 CELICA CUSTOM 75 V8 MONZA SUPERCHARGED 79 COURIER VERT. SLAMMED 75 VEGA V6 5 SPD 70 CHEV C10 P/U 68 MUSTANG FB CONVERSION |
|
|
|
|
TV 2M8O
Senior Member
Joined: 20-September-2006 Location: Southern Ohio Status: Offline Points: 2053 |
Post Options
Thanks(0)
Quote Reply
Posted: 05-November-2017 at 7:06AM |
|
**CLICK ON PICS TO ENLARGE AND CLICK AGAIN TO SUPERSIZE**
Well after having a very unproductive October, I had a bit of progress this weekend... we got the rear brakes bled, the wheels back on and the Torino is ready to set down on the ground. I then moved into the blast booth and fought with the sandblaster. Seems I forgot to turn off my air line the last time I blasted and both water traps were full of water. I drained them both but evidently there was still moisture in the air lines because I could not get the media to get siphoned into the blasting pickup line, so I reverted to the old scotch-brite pad on the angle head as well as the DA to get the remaining paint off the top side of the deck lid. 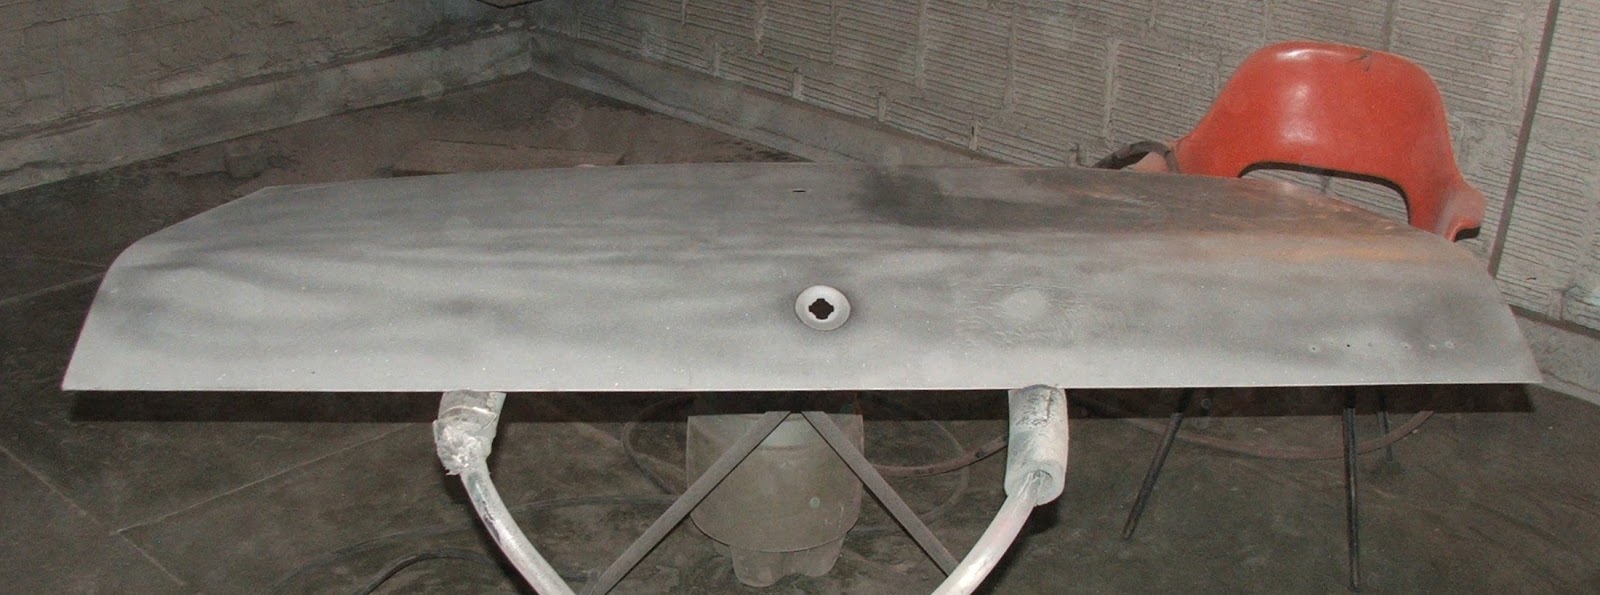  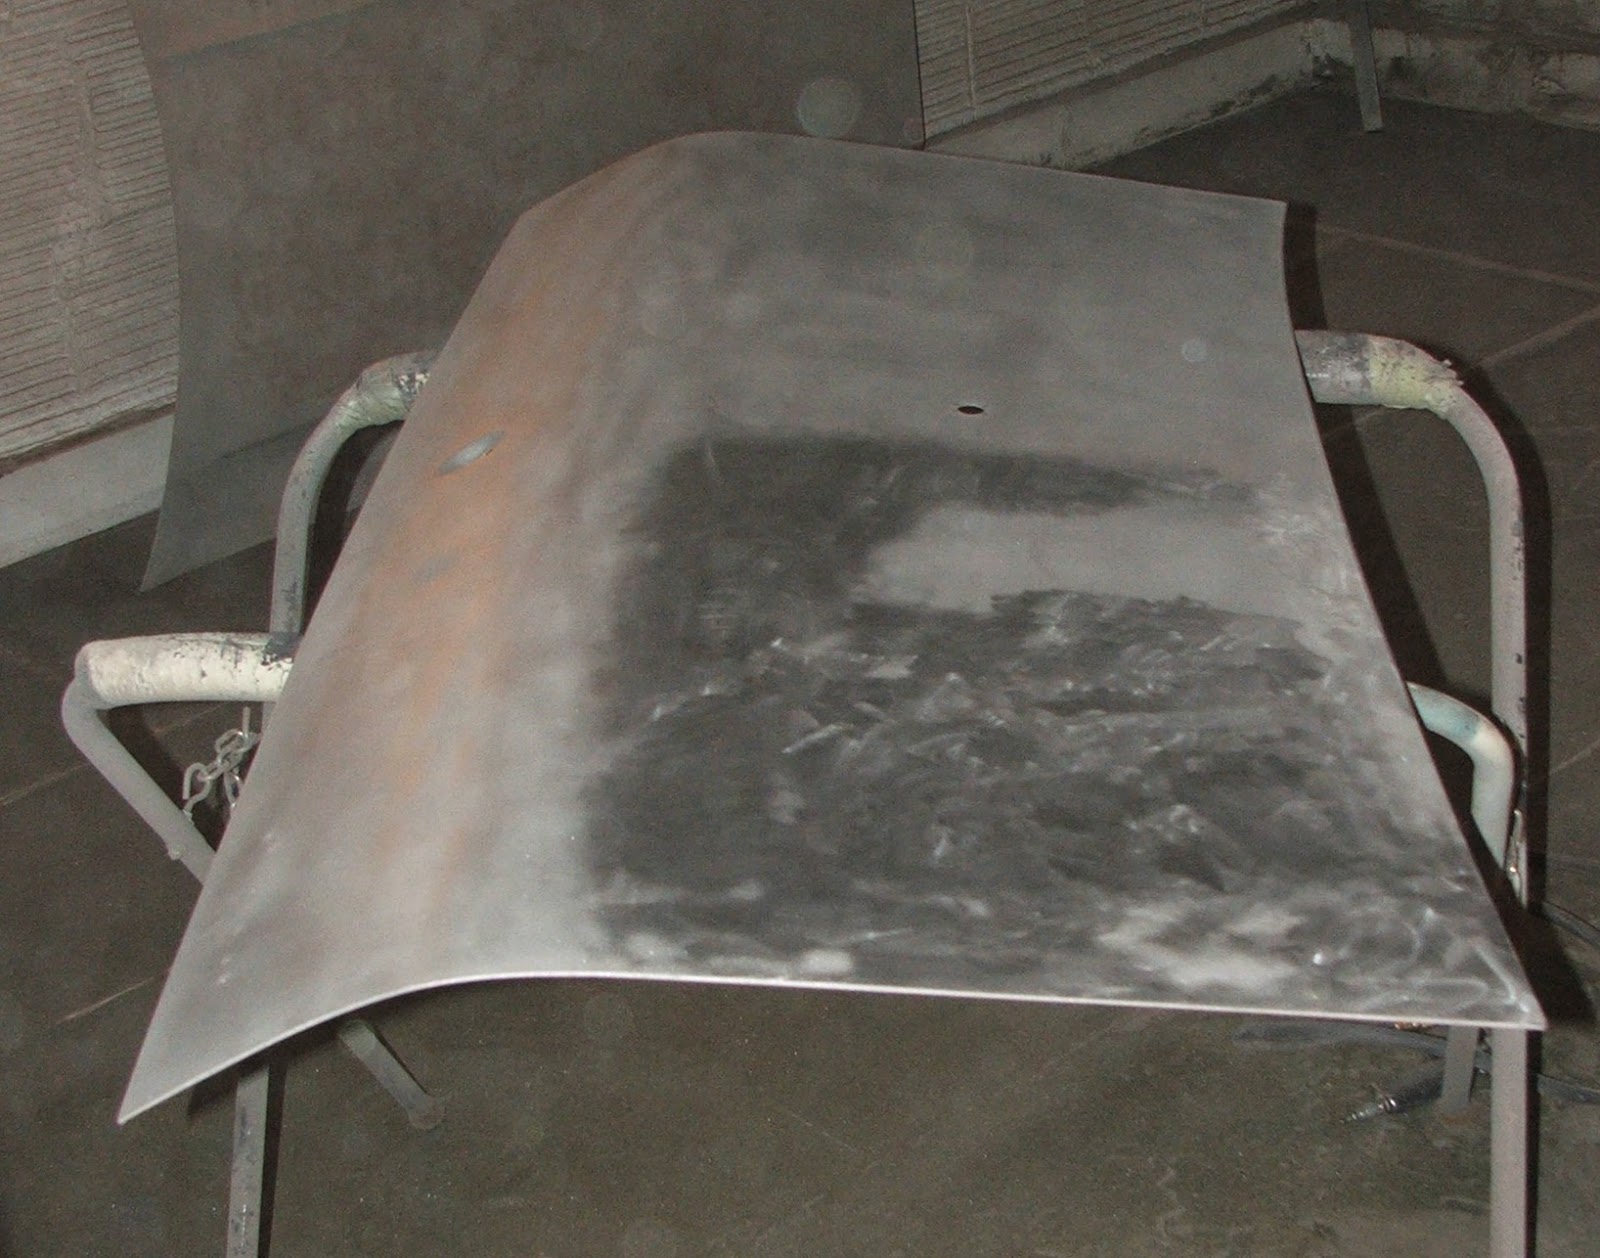  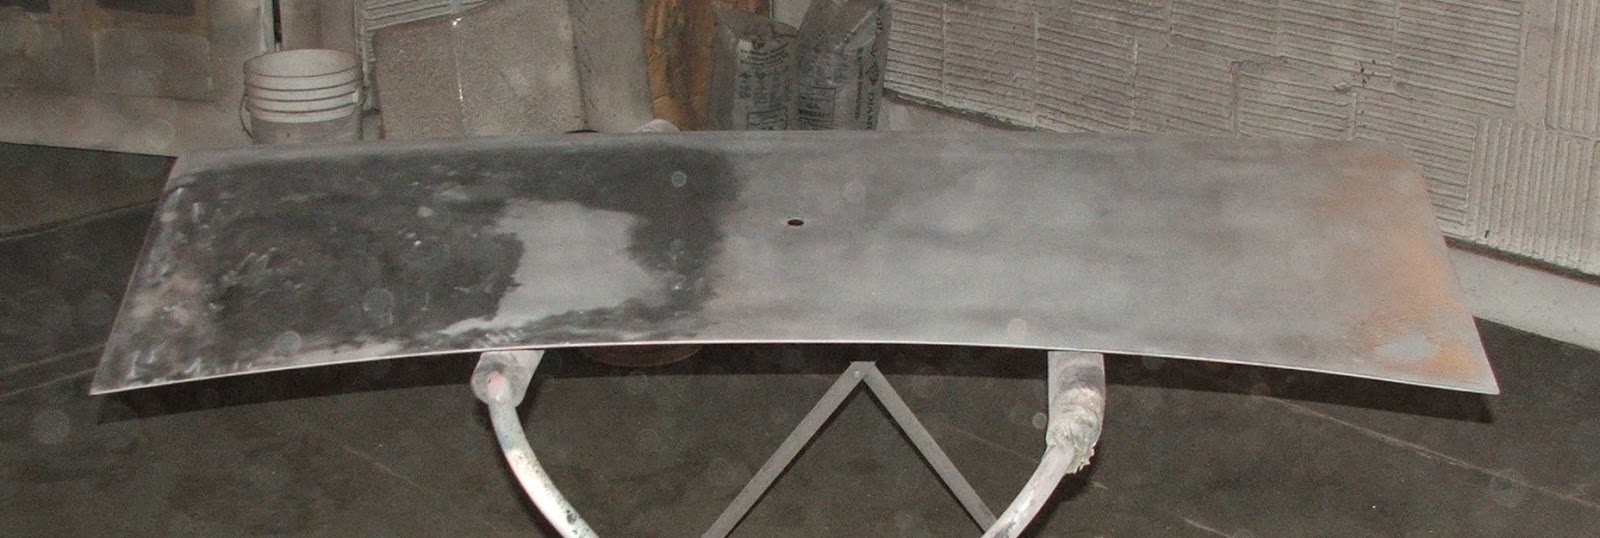 I did use the sandblaster to blow off the decklid once and the media started to be picked up, so I was able to do a bit of sandblasting on the remaining paint until I stopped to answer my phone. Once I finished and resumed trying to blast, evidently the moisture had built back up in the line so I had to revert back to manual stripping. Need to check on perhaps getting new filters/desiccant for the Sharpe water traps??? Next weekend, I'll flip over the deck lid and blast (hopefully!!) the underside and then start on the driver side front fender. Once the fender is clean, all body sheet metal will be stripped and I can protect and prep it all with a coating of Ospho until the Tomato is back into the body shop. I like the sound of that!!! Edited by TV 2M8O - 05-November-2017 at 7:12AM |
|
|
TV 2M8O OUT JOE 1976 Gran Torino S&H season 2-4 Clone Project Blog: http://tv2m8o.blogspot.com/ |
|
|
|
|
californiajohnny
Moderator Group
Joined: 05-October-2013 Location: winlock, wa Status: Offline Points: 14609 |
Post Options
Thanks(0)
Quote Reply
Posted: 05-November-2017 at 9:07AM |
|
it should siphon sand unless you have visible water coming out the gun??? i use the sediment bowl style water traps they work good! unless you forget to check them and they are full
|
|
|
JOHN
74 GRAN TORINO S&H CLONE 74 VETTE CUSTOM 90 S10 BLAZER 4X4 LIFTED 77 CELICA CUSTOM 75 V8 MONZA SUPERCHARGED 79 COURIER VERT. SLAMMED 75 VEGA V6 5 SPD 70 CHEV C10 P/U 68 MUSTANG FB CONVERSION |
|
|
|
|
TV 2M8O
Senior Member
Joined: 20-September-2006 Location: Southern Ohio Status: Offline Points: 2053 |
Post Options
Thanks(0)
Quote Reply
Posted: 12-November-2017 at 9:12AM |
|
**CLICK ON PICS TO ENLARGE AND CLICK AGAIN TO SUPERSIZE**
Well another unproductive weekend, but I think I've found the solution to my sandblasting problem. Another weekend trying to blast that was filled with frustration. I drained the air compressor as well as the air line filters into the blast booth, but could not get the sand to pick up. Then I remembered the disposable water trap I had installed on my paint gun, so I removed it from the paint gun and attached it to the blast gun air line and the media began to flow! Got about 1/3 of the seam sealer blasted from the underside of the decklid before the media stopped flowing..... 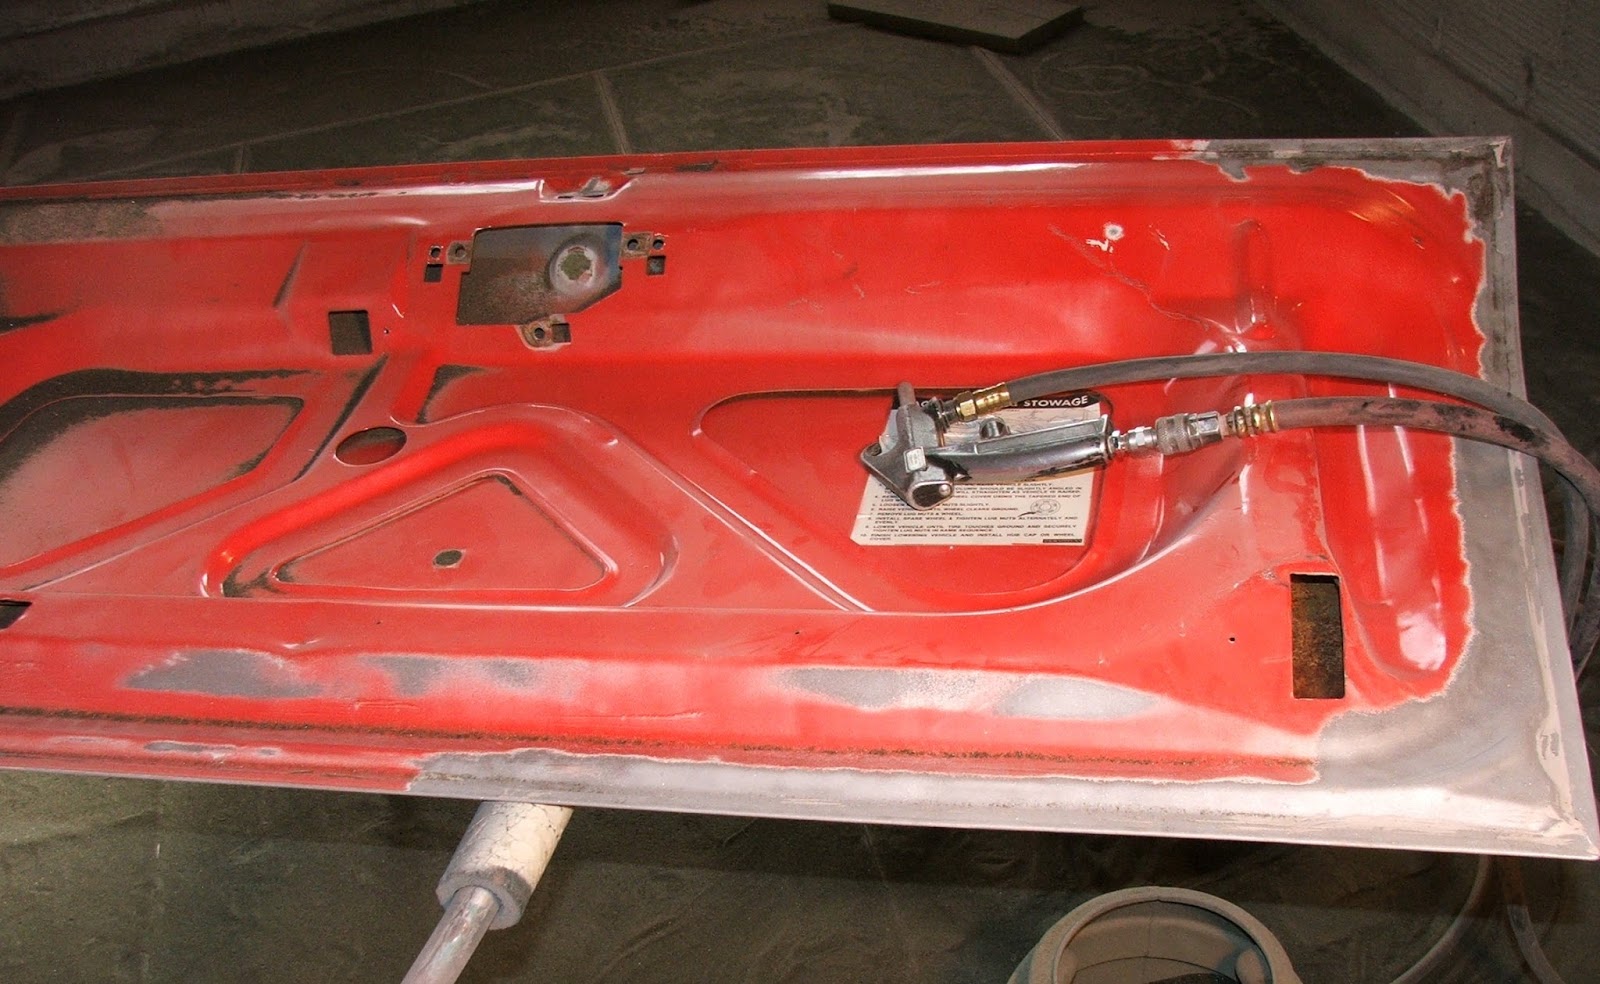 I called O'Reilly's and ordered two filter elements for the Sharpe oil/water traps installed on the hard lines and will make a run to Harbor Freight this week to buy a couple of their inline desiccant dryer/filters to see how well they perform at resolving my moisture issues. I also noticed some areas on the underside of the decklid that Ford missed as well as the 2B respray a few years ago... 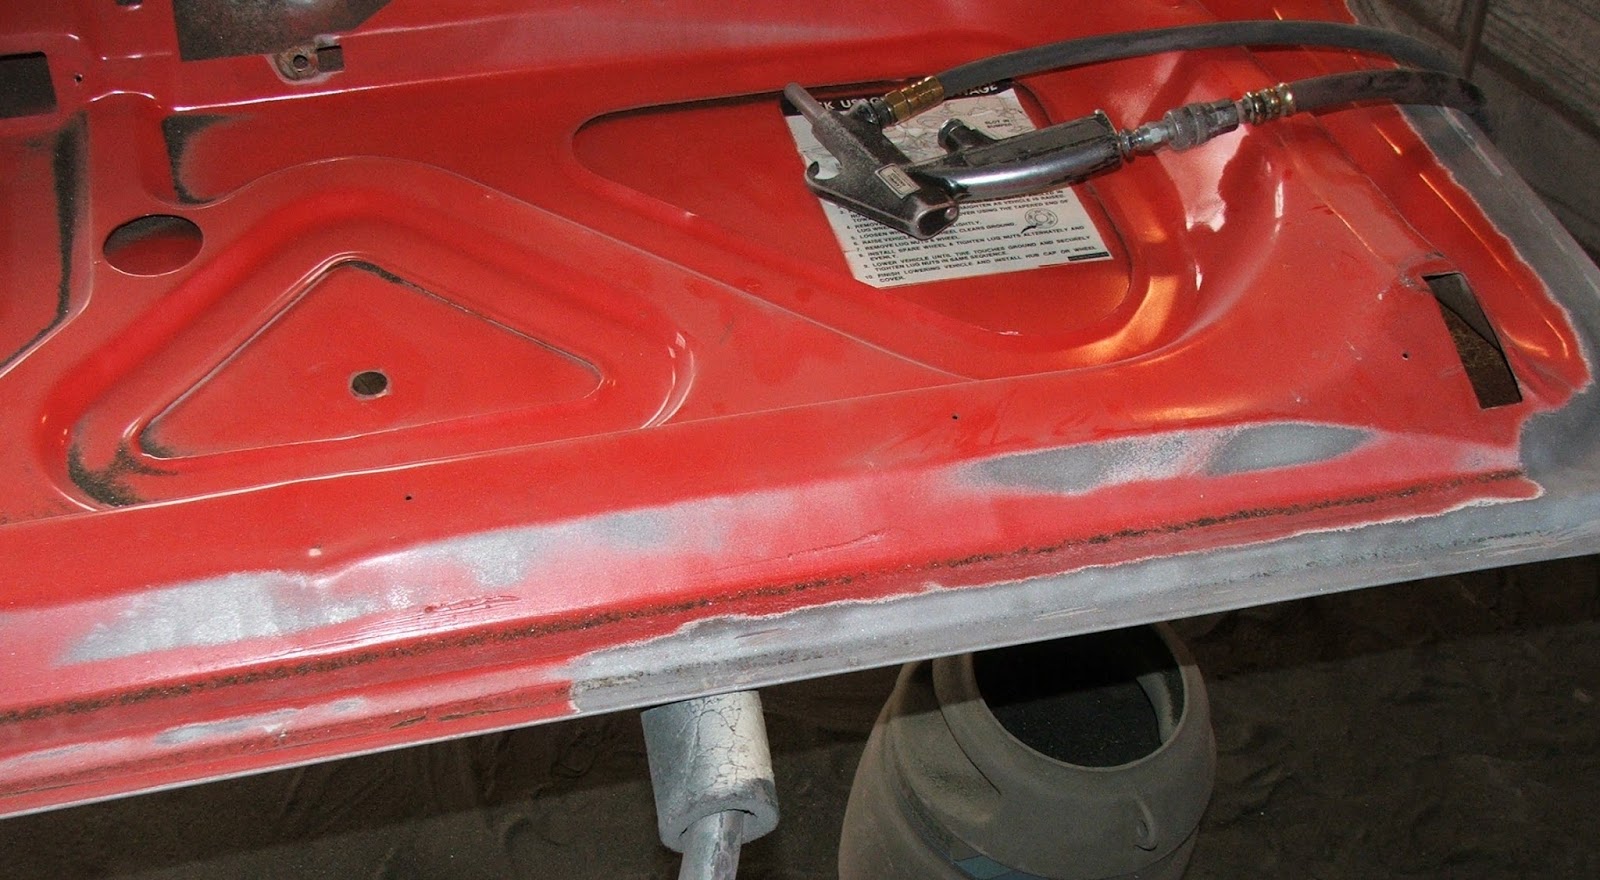 Seems with the decklid mounted on the car, it must be difficult to see to hit the backside of the rearward decklid bracing. I'll make sure mine gets painted as all the body panels will be painted off the car and rehung during final assembly. Well hopefully next weekend will be much more productive and I'll get the Tomato that much closer to going to the body shop for final fit and finish. Fingers crossed! Edited by TV 2M8O - 12-November-2017 at 9:16AM |
|
|
TV 2M8O OUT JOE 1976 Gran Torino S&H season 2-4 Clone Project Blog: http://tv2m8o.blogspot.com/ |
|
|
|
|
Power Surge
Senior Member
Joined: 06-March-2016 Location: Palm Coast, FL Status: Offline Points: 542 |
Post Options
Thanks(0)
Quote Reply
Posted: 12-November-2017 at 9:48AM |
|
Joe, I went through the same frustrations with my blast cabinet.
Here's what I suggest to help.... Get yourself a 25 or 50 foot air hose. Hook it up to your compressor, and then LEAVE IT COILED UP. Put a compressor water separator at the end of the coiled hose, mounted to a workbench leg or something similar. Then run your regular air hose off the separator. This should cure the majority of your moisture issues. Most people (like myself!) make the mistake of putting a water separator right off the compressor, but installed at that point, the speed of the air coming out of the compressor just blows the water vapor over the separator. The coiled hose will allow the water vapor to condense, where it can be better caught by the remote separator. Try it!
|
|
|
Sal Mennella
73 GTS 351 CJ 75 Cougar XR7 73 Ranchero - 5.0 Coyote swap - in progress Past Torinos - 72 Gran Torino, 75 Gran Torino, 75 Elite |
|
|
|
|
TV 2M8O
Senior Member
Joined: 20-September-2006 Location: Southern Ohio Status: Offline Points: 2053 |
Post Options
Thanks(0)
Quote Reply
Posted: 12-November-2017 at 12:26PM |
|
Thanks Sal for the tip!
|
|
|
TV 2M8O OUT JOE 1976 Gran Torino S&H season 2-4 Clone Project Blog: http://tv2m8o.blogspot.com/ |
|
|
|
|
californiajohnny
Moderator Group
Joined: 05-October-2013 Location: winlock, wa Status: Offline Points: 14609 |
Post Options
Thanks(0)
Quote Reply
Posted: 12-November-2017 at 3:44PM |
|
yes sal is right!! if the separator is right off the compressor the air is heated and any water is vaporized! as it travels down the line it cools and condenses forming water droplets!!! i use a separator similar to this way down line
 |
|
|
JOHN
74 GRAN TORINO S&H CLONE 74 VETTE CUSTOM 90 S10 BLAZER 4X4 LIFTED 77 CELICA CUSTOM 75 V8 MONZA SUPERCHARGED 79 COURIER VERT. SLAMMED 75 VEGA V6 5 SPD 70 CHEV C10 P/U 68 MUSTANG FB CONVERSION |
|
|
|
|
TV 2M8O
Senior Member
Joined: 20-September-2006 Location: Southern Ohio Status: Offline Points: 2053 |
Post Options
Thanks(0)
Quote Reply
Posted: 13-November-2017 at 10:47AM |
|
There's a Sharpe 606 & Sharpe 606B at the end of the hard line where the air hose is attached. Gonna change the filter elements in both and add the inline desiccant dryer/filter at the blast gun. That should resolve my issue (I HOPE!!).
Gotta get this baby back to the body shop ASAP!!!!!
|
|
|
TV 2M8O OUT JOE 1976 Gran Torino S&H season 2-4 Clone Project Blog: http://tv2m8o.blogspot.com/ |
|
|
|
|
californiajohnny
Moderator Group
Joined: 05-October-2013 Location: winlock, wa Status: Offline Points: 14609 |
Post Options
Thanks(1)
Quote Reply
Posted: 13-November-2017 at 5:44PM |
|
btw i'll send out your bumper bolts soon as i get a chance |
|
|
JOHN
74 GRAN TORINO S&H CLONE 74 VETTE CUSTOM 90 S10 BLAZER 4X4 LIFTED 77 CELICA CUSTOM 75 V8 MONZA SUPERCHARGED 79 COURIER VERT. SLAMMED 75 VEGA V6 5 SPD 70 CHEV C10 P/U 68 MUSTANG FB CONVERSION |
|
|
|
|
Post Reply
|
Page <1 2223242526 42> |
| Tweet |
| Forum Jump | Forum Permissions You cannot post new topics in this forum You cannot reply to topics in this forum You cannot delete your posts in this forum You cannot edit your posts in this forum You cannot create polls in this forum You cannot vote in polls in this forum |


 Topic Options
 TV 2M8O wrote: