
|
Sport scoop graft & 72 Sport hood reskin |
Post Reply 
|
Page 12> |
| Author | |
Guests 
Guest 
|
 Post Options Post Options
") Thanks(0) Thanks(0)
 Quote Reply Quote Reply
 Topic: Sport scoop graft & 72 Sport hood reskin Topic: Sport scoop graft & 72 Sport hood reskinPosted: 13-April-2012 at 3:17AM |
|
i'm going to be doing the famous 72 Sport hood scoop graft onto a 73-76 Gran Torino hood
and was going to do a progress thread on it and also take some video's too. I know some have seen photo's of the scoop graft from Eliteman76(Andy) and also Uante(Brent) but no one has done a step by step procedure for it an no one has taken video's of actual work being performed so since I will doing this project I though I might as well document it for others so they can see how it's done and those with welding experience can try it themselves *EDIT I also will be reskinning my original 72 Sport hood and replacing the complete bracing from a donor Sport hood that has good bracing but some rust on the outer skin at the rear corner edges. this thread will contain 2 hood projects now The 72 scoop graft onto a 73-76 Hood and also the 72 Sport hood reskin
Edited by 72 GTS 429 - 28-May-2012 at 2:06PM |
|
 |
|
|
Guests
Guest
|
Post Options
Thanks(0)
Quote Reply
Posted: 13-April-2012 at 9:12AM |
|
First step is more of restoration process as I will be stripping off all the old paint and get the hood surface down to bare metal as I want a fresh canvass. after i get the hood stripped and deal with any surface rust which I treat with Muriatic Acid which will eat into the metal and dissolve any minor rust.Then I neutralize the acid with water and dry it with compressed air and then apply
phosphoric acid to coat the metal against flash rust while I work on it till it's ready for primer. |
|
|
|
|
Guests
Guest
|
Post Options
Thanks(0)
Quote Reply
Posted: 13-April-2012 at 2:06PM |
|
ok I might as well just make this a start to finish project as you will learn other things besides just welding on the scoop.
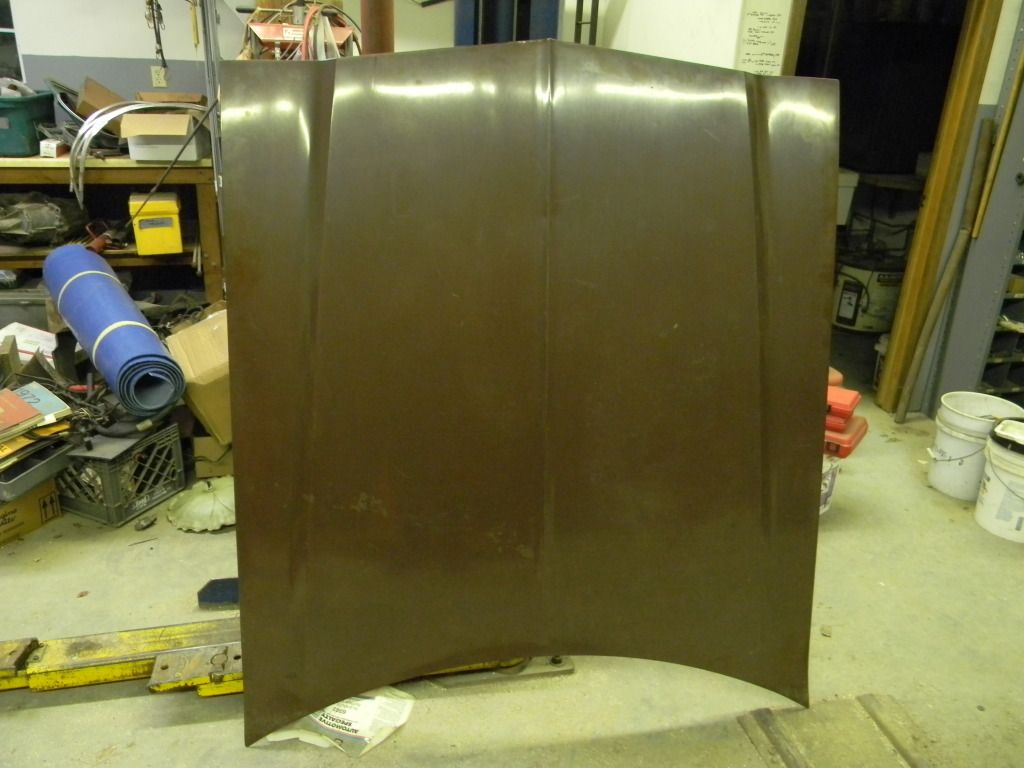
Here is the 73 GranTorino hood i'm using for this project  some surface rust where the paint was missing(don't worry this will clean up good)  surface rust where paint was thin on bodyline  |
|
|
|
|
Guests
Guest
|
Post Options
Thanks(0)
Quote Reply
Posted: 13-April-2012 at 3:01PM |
|
First step is to strip the paint off
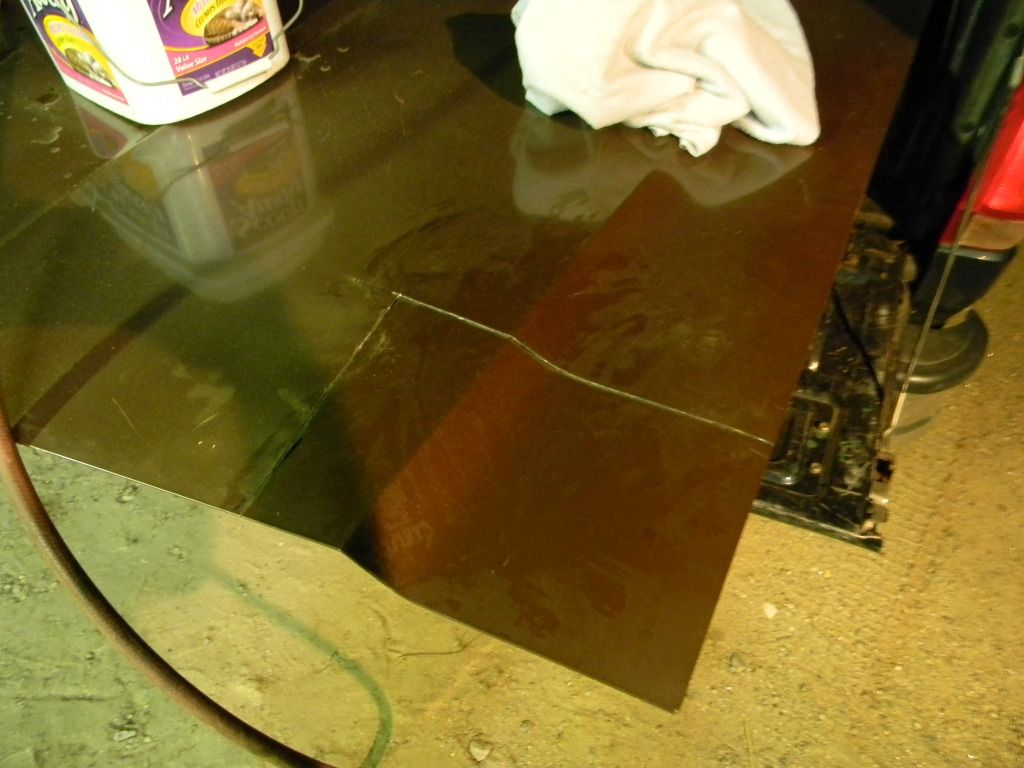
The car the hood came from had one repaint so it has a layer of most likely Enamel paint then the original lacquer paint underneath.You can use chemical stripper to remove the enamel but it doesn't work well for the old lacquer paint and makes a mess as it makes the lacquer turn to liquid so it gets messy.The enamel will wrinkle up from the chemical stripper and dry out so it's easy to just scrap off but I prefer to machine sand it to bare metal when working with old lacquer paint. For this I choose a good work horse,which is a 8in Orbital sander this is my trusty National Detriot Model 900 which I have had for 25 years. there are other brands but I have had this since early in my career and it works great for eating up the paint but it uses alof of cfm's so you need a big compressor.  I first start with 36 grit paper but I let the sandpaper do the work and not force it down on the hood. I only try to take the layers of paint off down to the factory primer and not keep sanding to get it to bare steel as you don't want the 36 grit scratches in the metal. here it is down to the factory primer with some bar spots which is fine just stop once you have the color removed.  close up of factory primer left  here is a close up of the surface rust after sanding,don't worry looks worse then it is  here there was some minor rust holes in the front edge on either side of the hood I will cut out the bad spots and weld patches in so it doesn't return   This is some minor surface rust that I can clean up one of 2 ways either I can lightly sand blast it with a spot blaster or I can use the muriatic acid to dissolve the rust and clean the metal.  Ok now I switch to 80 grit on my 8 in orbital sander to remove the factory primer and take it the rest of the way down to bare metal.Warning, do not sand in one spot too long as it will heat up the metal and can cause warping. Use fresh paper if it stops cutting as good as the metal dulls the sand on the paper.Move around especially on the middle where there are no braces underneath.Let it cool and sand another area and come back if you need to sand further to remove the primer.The orbital sander will leave traces of primer but get 90% of it off looking at the hood the left side has been sanded down with 80 grit and the right still has the primer left from sanding with the 36 grit   here we have some old bodywork which I will remove the body filler  Here I have removed most of the filler and the tip of the blow nozzle points to the dent at it's deepest point.This will be repaired with a stud gun puller later. back in the day they use to drill 1/8th in holes and use a screw puller to pull the dents out but whoever repaired this hood just filled it.Good thing as no holes to weld closed but now I can do a proper repair and pull the low spot out with a stud gun puller and have only a skim coat of filler to make it smooth.  here I lightly sandblasted with a spot blaster to see how deep the surface rust was and it cleaned up well so i stopped as I will be treating the hood with muriatic acid and it will remove the rest but notice the dark color rust has mostly been removed with a quick blast before after  Now we switch to 80 grit on a 6in DA sander to remove any traces of the primer that the orbital didn't remove     Edited by 72 GTS 429 - 13-April-2012 at 3:11PM |
|
|
|
|
Dan the ranchero man
Senior Member 

Joined: 24-July-2011 Location: Mchenry,IL Status: Offline Points: 1185 |
Post Options
Thanks(0)
Quote Reply
Posted: 14-April-2012 at 3:53PM |
|
Very informative. I like it.
|
|
|
|
|
72BlackGTS
Senior Member
Joined: 10-April-2007 Location: Millerton, NY Status: Offline Points: 871 |
Post Options
Thanks(0)
Quote Reply
Posted: 15-April-2012 at 1:51AM |
|
The process is very time intensive. Jeff, how long did it take you to do the whole process in those last pics? Just to give the guys who don't know a time frame. Good thorough explanation. Good job. Ron
|
|
|
Ron
1978 LTD II Sport-Green 2003 HD Road King Classic 100th Anniversary |
|
|
|
|
Guests
Guest
|
Post Options
Thanks(0)
Quote Reply
Posted: 15-April-2012 at 2:50AM |
|
well it took longer cause the compressor I have now is a 3hp 60gal tank wih 135psi max and it doesn't recover as fast.Like I mentioned the 8 in orbital uses alot of cfm's.When I had my 5hp 80 gal 175 max psi compressor I could just keep sanding and not stop and let the air build up.
I didn't time anything but the red paint came off really fast with the 36 grit and maybe took 15-20 mins. when machine sanding it will take time but your not in a race as you don't want to cause too much heat to the metal and warp it.Hood,trunklids and bigger panels flex when you sand them cause there are are's with no braces behind the sheet metal and that is where you have to be careful not to sand in one spot too long as the metal builds up heat and warps but if it's not to much heat it tightens back up when it cools but that is why I skip around from side to side so I don't cause excessive heat to the metal. believe me chemical stripping is no faster and is a mess.The only thing that is fast and is not cheap to do is plastic media blasting or soda blasting,but you have to take it someplace and pay to have it done.
|
|
|
|
|
75GranMan
Senior Member
Joined: 05-April-2011 Location: Colchester, CT Status: Offline Points: 1225 |
Post Options
Thanks(0)
Quote Reply
Posted: 15-April-2012 at 1:57PM |
|
Jeff,Awesome how to project,body work is the one aspect of auto repair that I never had the need to master.For 25 years at the ford dealership,my close friend Wayne preformed all my repairs.As he's the guy painting my current torino.can't wait to see the hood! most all the hoods around have the same rust on the front lip area.hows the bottom side for rust?
|
|
|
John 75Gran Torino 4spd
 |
|
|
|
|
Guests
Guest
|
Post Options
Thanks(0)
Quote Reply
Posted: 15-April-2012 at 3:37PM |
|
bottom side is good just minimal surface rust that will clean up nice.
i'll post some photo's tomorrow as i'm gonna start sanding the underneath. This hood that i'm building here is going on John's(75GranMan) car which he is doing the S&H stripe on the darkred instead of 2B as his car is originally the darker red and wants to be different. This hood will make a great addition to your car John
|
|
|
|
|
srwith
Senior Member

Joined: 04-September-2010 Location: North E. FL Status: Offline Points: 468 |
Post Options
Thanks(0)
Quote Reply
Posted: 16-April-2012 at 10:24AM |
|
Just sanding is all you had to do for this surface rust?
|
|
 two loves, torino's and bike riding. drive and ride safe. two loves, torino's and bike riding. drive and ride safe.
|
|
|
|
|
Guests
Guest
|
Post Options
Thanks(0)
Quote Reply
Posted: 16-April-2012 at 12:24PM |
|
it's still there but looks better when it's stripped down to bare metal.
the Muriatic Acid will remove what traces of the surface rust is there. When I stripped my 72 GTS before I primed it I coated each panel with muriatic acid to remove the surface rust and the slight pitting and it cleans it out good. You have to neutralize the acid so it don't keep eating at the metal so I rinse it with water real good then dry it with the blow nozzle from the compressor. It will started turning brown after that so you then have to coat the bare metal with phosphoric acid which you can buy at Home Depot and that will eliminate the flash rusting and you just let that dry so it coats the metal and protects it. Before priming I sand the residue from the phosphoric acid off with 80 grit on a 6in DA Sander then I wipe it down and prime it. If you want to use 2K urethane primer surfacer you first have to prime the bare metal with self etching primer and I will show that later in the progress. Edited by 72 GTS 429 - 16-April-2012 at 12:36PM |
|
|
|
|
Guests
Guest
|
Post Options
Thanks(0)
Quote Reply
Posted: 16-April-2012 at 12:31PM |
|
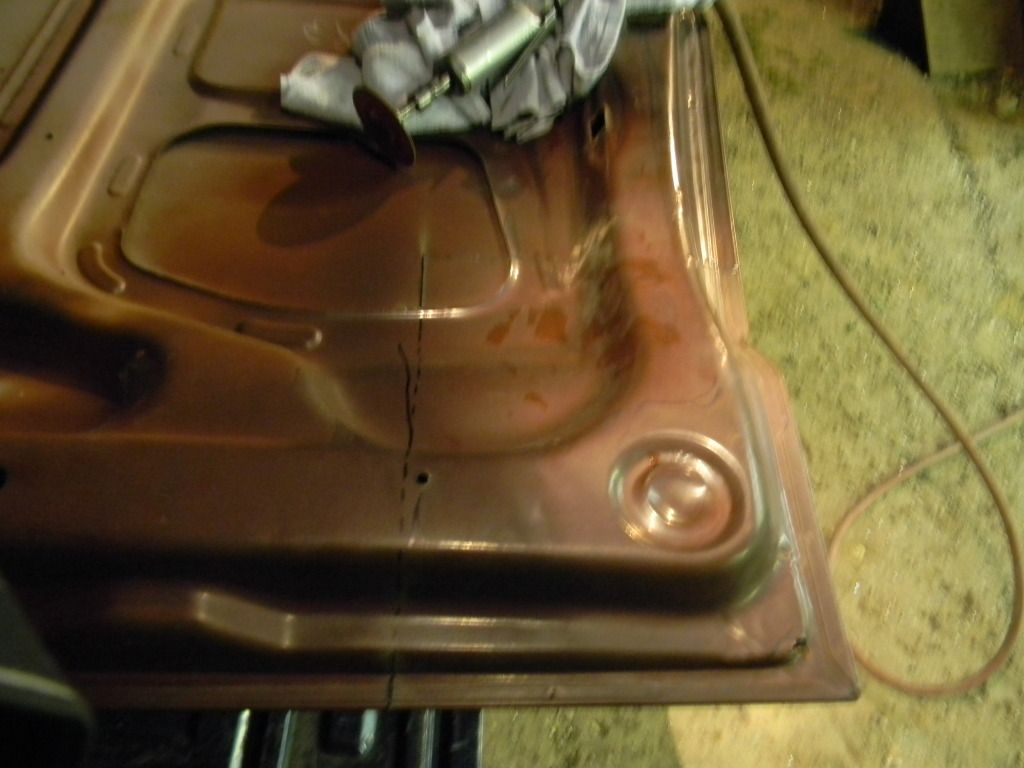
Here is the underside of the hood John, I started cleaning it up with a wire wheel and alot of the old paint was coming off as it was all original underneath.I did take a spot down with roloc scotchbrite surfacing disc and the metal is great under the paint and primer.
         |
|
|
|
|
75GranMan
Senior Member
Joined: 05-April-2011 Location: Colchester, CT Status: Offline Points: 1225 |
Post Options
Thanks(0)
Quote Reply
Posted: 16-April-2012 at 1:49PM |
|
Jeff,I have a spare hood that I have in storage,I know it has some rust on the bottom side brace area, not sure what side the rot is on,If you need to patch in pieces.I can check and sent pix if you want.
|
|
|
John 75Gran Torino 4spd
|
|
|
|
|
Guests
Guest
|
Post Options
Thanks(0)
Quote Reply
Posted: 16-April-2012 at 1:56PM |
|
the only rust is right here on the front round indention that is stripped bare
it would be the driver side when on the car. The rest is perfect just need to strip off all the old paint and primer so I can start fresh Edited by 72 GTS 429 - 16-April-2012 at 2:12PM |
|
|
|
|
picon3
Senior Member
Joined: 20-February-2007 Location: North Carolina Status: Offline Points: 2106 |
Post Options
Thanks(0)
Quote Reply
Posted: 16-April-2012 at 2:34PM |
|
Jeff,
Fantastic thread. Keep the details and pictures coming!
Paul~ |
|
|
1972 GTS 351CJ-4V black/black
|
|
|
|
|
Guests
Guest
|
Post Options
Thanks(0)
Quote Reply
Posted: 16-April-2012 at 2:50PM |
|
yah this is the boring part cleaning it all up to start fresh.The fun begins when I start cutting the hoods for the scoop graft.I figure I might as well show it all as people can learn from it
|
|
|
|
|
papadeath
Senior Member

Joined: 08-December-2011 Location: Eagle Rock, CA Status: Offline Points: 498 |
Post Options
Thanks(0)
Quote Reply
Posted: 17-April-2012 at 7:44AM |
|
I have to add something: Water alone will not stop the acid completely, it just dilutes it. Of course, continued rinsing will eventually disperse it I reckon. However, to truly neutralize it, you need a 'base', such as sodium hydroxide, or lye, probably most drain cleaners will work if they don't have too many other additives. Easy Off used to be lye based, but they changed the formula and now it's crap, hehe. Thanks for the wonderful how-to.!!
|
|
|
75 Ranchero in progress
04 Harley Deuce stage one kit 89 Toyota pickup modded 09 Scion XB (bought for the ol' lady) buy American! (sorry) skateboard 4 bicycles 1 scooter 2 dogs 2 stupid cats |
|
|
|
|
papadeath
Senior Member
Joined: 08-December-2011 Location: Eagle Rock, CA Status: Offline Points: 498 |
Post Options
Thanks(0)
Quote Reply
Posted: 17-April-2012 at 7:48AM |
|
Oh, by the way, be careful welding on that thin metal! I welded a little scoop on my Toyota and it warped my hood, gak. No biggie, just my work truck. Still looks cool, though. I have one question; You know the space between the reinforcement bars/skeleton on the underside of the hood and the actual hood? When the factory spacers, glue, whatever they used to keep the hood from rattling, what do people use to replace it?
|
|
|
75 Ranchero in progress
04 Harley Deuce stage one kit 89 Toyota pickup modded 09 Scion XB (bought for the ol' lady) buy American! (sorry) skateboard 4 bicycles 1 scooter 2 dogs 2 stupid cats |
|
|
|
|
Guests
Guest
|
Post Options
Thanks(0)
Quote Reply
Posted: 17-April-2012 at 9:59AM |
|
3M makes a special 2 part product for that but it takes the special application gun to use it and they are not cheap.The stuff that is on the hood i'm working on actually looks like auto body seam sealer and what I use to use before they came out with the Dampening Material
3M™ NVH Dampening Material 04274
Product DescriptionNVH Damping Material 04274 is a flexible adhesive-type material used to reduce noise and vibration between panels where a long work time is required. NVH Dampening Material can be applied between roof skins and roof bows, door skins and door intrusion beams or other areas using non-structural type foam materials, providing up to 1” thick layer of flexible material on vertical and overhead applications. 04274 can be applied to a thickness of 1 inch on vertical and overhead surfaces. It can also be applied over existing damping material as long as the original material is still integrally bonded. |
|
|
|
|
Guests
Guest
|
Post Options
Thanks(0)
Quote Reply
Posted: 17-April-2012 at 10:58AM |
|
btw thanks for the tip on neutralizing the acid,I just flushed it good with water then I apply the Phosphoric acid.
welding sheet metal the process is the same on a hood or a quarter you have to weld a little at a time and skip around and let the metal cool every so often,it's a long process but this way you don't warp the panel too bad>You might get some slight warping but if you do it correctly the body filler should smooth it out or sometimes take a hammer and dolly to straighten it if needed but I try to weld like small tack welds here and there and skip around then let it cool then start again and repeat the process till the seam is total filled in with weld.then you have to carefully grind the welds smooth as the heat from grinding can warp it so sometimes you have to grind a little at a time and let the metal cool in between grinding these grinding wheels on a die grinder help with grinding welds faster and keep down the heat but still have to let cool on big panels 3M™ Green Corps™ Reinforced Weld Grinding Wheel 01991
|
|
|
|
|
srwith
Senior Member
Joined: 04-September-2010 Location: North E. FL Status: Offline Points: 468 |
Post Options
Thanks(0)
Quote Reply
Posted: 17-April-2012 at 11:18AM |
|
Jeff, I have a 72 hood with a scoop on it on hold when I get home. The guy live's about 3mi from my house. Have not seen it yet other than a picture of the top. It was on craig's list. I will be watching this post real close if I decide to do this on my own. The one your doing is the one I missed having you do for me.
|
|
|
two loves, torino's and bike riding. drive and ride safe.
|
|
|
|
|
Guests
Guest
|
Post Options
Thanks(0)
Quote Reply
Posted: 17-April-2012 at 11:28AM |
|
is that the hood that I sent you the Craigslist ad for?
yah if I stayed in Florida this hood would probably have been built for your car but unfortunately I had to move out of state. there are a few guys that have done it or had it done.I have copies of the one that Andy did but that doesn't give you a step by step like i'm doing here and plan to include some video's once I get to the scoop part so this will be good for others who are interested in doing it.
|
|
|
|
|
75GranMan
Senior Member
Joined: 05-April-2011 Location: Colchester, CT Status: Offline Points: 1225 |
Post Options
Thanks(0)
Quote Reply
Posted: 17-April-2012 at 3:34PM |
|
Jeff,here's some pix of my spare hood being sectioned for the project.
   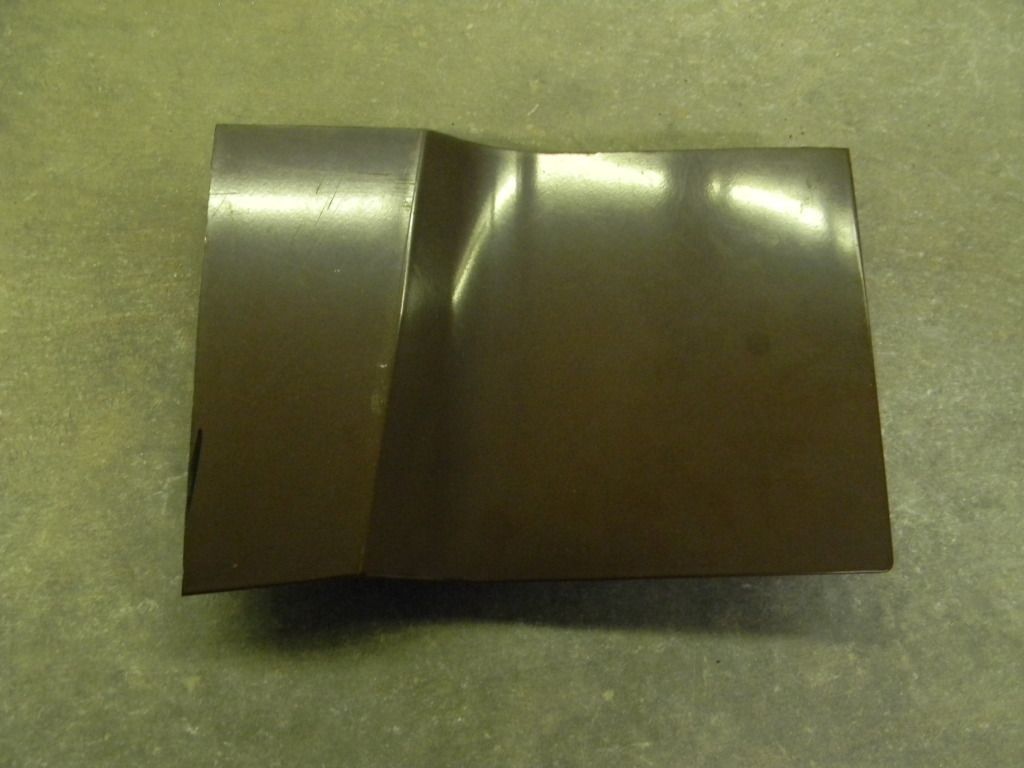 I made sure to cool the panel with a damp towel to prevent warping.will send you section piece tommorow, if I can buggout for a few minutes. I made sure to cool the panel with a damp towel to prevent warping.will send you section piece tommorow, if I can buggout for a few minutes.
|
|
|
John 75Gran Torino 4spd
|
|
|
|
|
Guests
Guest
|
Post Options
Thanks(0)
Quote Reply
Posted: 17-April-2012 at 3:48PM |
|
hey wait that's the wrong side
just kidding
|
|
|
|
|
75GranMan
Senior Member
Joined: 05-April-2011 Location: Colchester, CT Status: Offline Points: 1225 |
Post Options
Thanks(0)
Quote Reply
Posted: 18-April-2012 at 3:04PM |
|
No problem,I'll just send the big piece then!
|
|
|
John 75Gran Torino 4spd
|
|
|
|
|
Guests
Guest
|
Post Options
Thanks(0)
Quote Reply
Posted: 18-April-2012 at 3:38PM |
|
yah shouldn't take too long to get to NJ
no progress today as it was rainy off and on,I miss having a garage to work in
Edited by 72 GTS 429 - 18-April-2012 at 3:38PM |
|
|
|
|
srwith
Senior Member
Joined: 04-September-2010 Location: North E. FL Status: Offline Points: 468 |
Post Options
Thanks(0)
Quote Reply
Posted: 20-April-2012 at 1:41PM |
|
Jeff that is the one you told me about. Will see it when I get home if he does not sale it.
|
|
|
two loves, torino's and bike riding. drive and ride safe.
|
|
|
|
|
papadeath
Senior Member
Joined: 08-December-2011 Location: Eagle Rock, CA Status: Offline Points: 498 |
Post Options
Thanks(0)
Quote Reply
Posted: 23-April-2012 at 8:32AM |
|
So 72 GTS 429 I have to buy an applicator with this product? I can't finagle it artistically? Thank you I will go looking for it. Do you know where to get it?
|
|
|
75 Ranchero in progress
04 Harley Deuce stage one kit 89 Toyota pickup modded 09 Scion XB (bought for the ol' lady) buy American! (sorry) skateboard 4 bicycles 1 scooter 2 dogs 2 stupid cats |
|
|
|
|
papadeath
Senior Member
Joined: 08-December-2011 Location: Eagle Rock, CA Status: Offline Points: 498 |
Post Options
Thanks(0)
Quote Reply
Posted: 23-April-2012 at 8:37AM |
|
I'm so freaking stupid. Looking at this made me realize I can fix the buckle in my hood just by grinding on the scoop, duh.
Sometimes it takes me longer to figure things out, but when I do I feel like a genius, hehe. |
|
|
75 Ranchero in progress
04 Harley Deuce stage one kit 89 Toyota pickup modded 09 Scion XB (bought for the ol' lady) buy American! (sorry) skateboard 4 bicycles 1 scooter 2 dogs 2 stupid cats |
|
|
|
|
Guests
Guest
|
Post Options
Thanks(0)
Quote Reply
Posted: 23-April-2012 at 11:52AM |
|
no cause the mix has to be right and push the 2 sides of the tube even so it takes a applicator gun to dispense it.I get it from the auto paint supplier as most carry 3M products but there are some online auto body supply companies just have to check to see if they carry it.
|
|
|
|
|
Post Reply
|
Page 12> |
| Tweet |
| Forum Jump | Forum Permissions You cannot post new topics in this forum You cannot reply to topics in this forum You cannot delete your posts in this forum You cannot edit your posts in this forum You cannot create polls in this forum You cannot vote in polls in this forum |


 Topic Options